Thursday, April 26, 2012

Polly's First Naan

I love all kinds of different breads from different cultures.     When I go to Indian restaurant, I consume more breads - chapati, naan than the meat dishes.     This naan recipe is from one of the blogger's site that I tested.     Since I like mine puffier, I rolled it out to 1/4 inch thickness.   
So, the recipe I used is from this site:  http://tete-a-tete4food.blogspot.com/2012/03/naan-bread.html  by Miss C.       Now I remember why I didn't have the information in the beginning... because my printer ran out of inks, and I hand copied the recipe on a piece of scratch paper.    Luckily the printer managed to print the URL before it ran out of the ink and I found that page.    So, please visit the site for the recipe details.        Yummm.... Love it!
 Knead the dough well until gluten is formed.


 Should have rolled it out into much smoother dough, but alas!  at the last minute, I remembered that I forgot to add the oil ingredient into the dough.      When I added it in while rolling the dough out and folding and rolling again, .... well, this is as smooth as I can produce because I was not about to re-proof the dough, again.    (too impatient)


 Enjoy with Curried Lentils with Tofu

Polly's Harissa

Gathering the ingredients were bit challenging as far as the different types of chili peppers needed.      I wished I had found Fresno Chili Pepper and Guajillo Chili Pepper.     But normally, they are not found at the local markets.  I end up improvising and substituting.      It is quite aromatic and taste delicious in meat dishes.
Some of the ingredients I used are: fresh Jalapeno Chili Pepper, fresh Red Bell Pepper, Cayenne Pepper (home grown & dried), fresh Anaheim Chili Pepper.... perhaps, I should have used dried chili peppers instead of the fresh ones as they are more flavorful.      


 Love the food processing power of the NINJA four blade core.


Top it off in the jar with some Olive Oil and store in the refrigerator.

Saturday, April 21, 2012

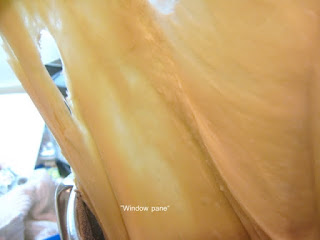
"Window Pane" - a well formed bread dough gluten

Some times ago, I posted about the kneading power of my Kitchen Aid Artisan mixer not living up to it's power and kind of non-functional "C" hook that it came with.    Since then, I have been kneading the dough manually.      Last year, while perusing one of the cookbook Culinaria France one of the picture caught my eyes.      It's a French bread baker holding up a large piece of dough right out of Kitchen Aid Profession mixer - kneaded and formed into a perfect "window pane".     That got me persistent to get the same result with my Artisan.     And here are the photo journal of it.     I hope you will get encouragement and have a great bread baking result.
Tip:  Use paddle attachment for 15 minutes to mix the flour mixture with water.    Water:Flour ratio per your recipe but the moisture content of every bag of flour varies with season the flour is manufactured and type of wheat, etc, so use some "common knowledge / grand-mother's tip / family secret" sense of "ear lobe" touch test.      Then, switch to "C" hook and knead until the dough forms into a ball and separate itself from the side of the mixing bowl.   Stop and pull out to test.     Depending on the dough's flour and water ratio, it will take anywhere from 30 min to 45 min for the window pane to form.    **Flour used:  All Purpose Flour


 Depending on the type of bread formula, the crumb textures will vary.      The general tip is that the well kneaded dough will have finer crumb textures.     Less kneaded, for example, Ciabbata, wet and less kneaded, will result in larger open pores.