Thursday, December 24, 2015

Coconut Chiffon Cake Yule Log and Chiffon Cake

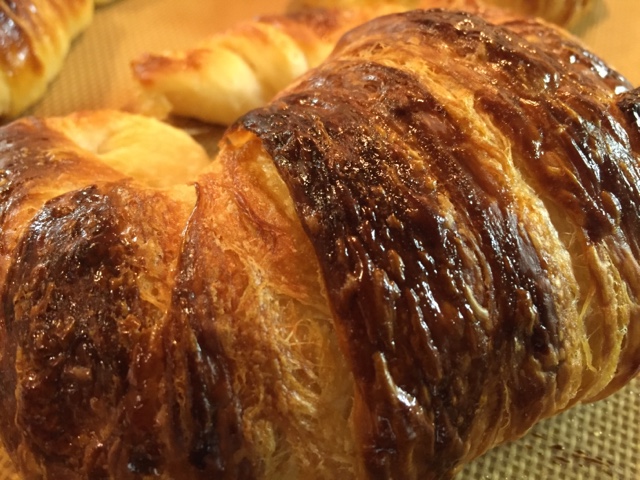
Here is the picture of a simple Yule Log decorated just enough with Chocolate Ganache.  Couldn't find any candied fruits, so used chili pepper flavored popcorn to give some holly effect. 
(This Yule log is not decorated, yet. But it will be tomorrow.)
Since I am getting a good hang making this chiffon cake, I thought why not make Yule Log with it instead of the usual sponge cake.  So, here it is.  Instead of driving down to be with my family on the Christmas eve, I baked.
Here is the result:
Ingredients:
10 eggs - separated

Egg Yolk mixtures:
10 Organic Large Egg Yolks
60 g Organic Cane Sugar
1/4 tsp Kosher Salt
125 ml Extra Virgin Olive Oil
90 ml Organic Whole Milk
95 ml Coconut Milk
260 g Shifted Pastry Flour

Egg White Meringue:
10 Egg Whites + 130 g Organic Cane Sugar.
 Equipment.
Two separate bowls, two separate large hand whisks, and a large spatula.
Angel Food Cake mold.   Large flour sack cloth or clean cloth as large as the jelly roll pan.
Jelly roll pan.
Unless you are confident that your mixer is capable of beating up all egg whites at the bottom of the bowl completely.  Use your mixer to make meringue.
 Mix egg yolk mixtures together and add Shifted Pastry Flour.   Mix well. Set aside.
In a large bowl, hand whisk 10 egg whites.  Add 1st Tablespoon of sugar when the foam start to appear.
Add constant slow flow of sugar as you continue to whisk egg white.   Beat until stiff peak forms.
Using a whisk mix 2 C of meringue into yolk mixtures to lighten it up.
Add another 2 C of meringue into yolk mixtures.  Use whisk to mix.
Preheat oven to 325'F.  Rack set at one below the center position.
Unless your yolk mixtures is in large mixing bowl to begin with, transfer the rest of the meringue into yolk mixtures.  Use whisk to mix. Scrape side of the bowl with the whisk and bottom and turn it over to the top. Repeat until all meringue is mixed in.
Fill the cake mold.
Tap gently over the counter to release trapped bubbles.
Bake for 45 - 50 min - depending on your oven's power.
Inserted tester should come out clean.
Remove from oven and invert it over a baking sheet.
Let it cool completely before removing from the mold.
With this batch of Chiffon, I made a Jelly Roll and a Chiffon Cake.
The idea is to make a Yule log for tomorrow night's Christmas dinner.
Jelly Roll pan is lined with parchment paper.
Set the rack at 4th from the top or 2nd from the bottom of large gas oven. My gas oven has 5 rack notches. 
Then, fill it with 1" of batter.  

Bake at 325'F for  12 - 14 min, but check at 8 min for doneness.
Inserted tester should come out clean.
Remove.   Start working the next step right away.
Start separating the sides of cake from parchment paper, gently to avoid tearing.  Insert knife to help with separation, if needed.
Place a large flour sack cloth on the counter.  Transfer the entire cake with the parchment still attached to the bottom of the cake over to the sack cloth.
Start rolling the longest side of the cake with the parchment paper like doing the Sushi roll to make the first center curl.  Open back up gently and remove the parchment paper at the beginning and start rolling the cake.  At the end, roll the parchment paper over and around and wrap the sack cloth.  Basically just roll the rolled cake with parchment paper again, but this time with sack cloth.
Set it aside to cool completely.
Prepare fillings.
Unroll the cake gently without flattening it.
Fill.  Roll back.  Decorate.  You got a Chiffon Cake Yule Log.
Boxed up and ready for tomorrow.
And here is the other chiffon cake in its regular Angel food cake mold.  
Finishing touch for the Yule Log at the party site was filling the center with creme chantilly.  For ganache - A few ounces of chocolate pistolles melted with heated heavy whip cream and some heavy corn syrup.  Taste?  It was wonderful.  It tasted so much better than the sponge cake.  We all love chiffon cake.

Saturday, December 19, 2015

Polly's Sourdough Bread II Adventure

It all started with cravings for sandwich made with home baked bread.  A bowl of Leaven I tried to make many times during summer proved to me that 'that is not it'. The baked bread's crumb feel wet and heavy.  This time around, I followed as close to the formulas as possible by saving only small amount of starter, then adding 50/50 of flour and water, a good pinch of yeast, then mixed thoroughly. Placing the lid and kept in dark spot of kitchen. It went on for a few days.  Checking it each day, but all I saw was large bubbles forming.  The leaven was failing the float test.  Then this week, I thought about my container with lid on vs Tartine's instruction of covering with towel. 

Even though there got to be Air during the process I have been keeping the lid on.  Why?  Because it didn't work out before in summer. My dough turned out taffy like texture and bread turned out tough. The starter did not have any power. . . But let me try again I thought.  After a few days,  Interesting. I started to notice the 'mini' bubbles forming on the top.   I continued to discard most of it, then saved 1/4 C of it and added 50/50 flour and water.   I also started another bowl of leaven mixing with flour and some rye and a pinch of yeast.   Discarding and feeding the leaven every day.  Keeping the lids of both containers loose.  Checking it each day.  Then I noticed the 'lightness' of the leaven in the jar and bowl.
It passed the floating test. It was very exciting as I have never seen this happened.  I decided to feed the the new mix for a few days also.  Eventually I added enough feed to make the required weighed amount of Poolish.  
Ingredients for Poolish:
200 g Flour
200 g water - at least 75'F
Added them to about 1 C of leaven pre-made, instead of adding dry yeast.  
Weigh and measure total of 400 g Poolish mixture after mixing the ingredients. 
Cover loosely and Set aside - overnight in 'cold' kitchen
Do the float test.  Ready?  Good.   No? Then let it stand longer.  
Prepare Leaven:  Mix 1 Tbsp of Mature Starter/Leaven that you pre-made with 220 g Flour, 220 g Water (80'F).  Cover and let stand.  Do the float test.  
Measure 400 g of leaven into a large bowl.   Keep the remaining 40 g for future starter.  Pour 500 g warm water (74'F to 76'F) into leaven and add Poolish.  Stir to disperse the ingredients.  

Add 650 g A-P Flour and 350 g Bread Flour.  Mix with hands or large wooden spoon. 

The dough is heavy and rough looking.  Transfer to heavy/thick clear plastic container and begin the bulk  fermentation.  

Cover loosely with lid and towels to keep warm.  Rest for 40 min (in cold kitchen).  Measure 25 g kosher salt and 20 g warm water.  
Start the first turn of Four turns - at first turn - Open the lid and add salt, wet your hand (from 20 g water) pull dough from bottom and over to the top, repeat each corner.   Salt will be roughly mixed in.  

Repeat the turn one or more times if your hands are small like mine.  You will still feel the salt granules here and there, but eventually the salt will get mixed in at each subsequent turn.  
Cover and rest 40 min. 
At each turn of the dough, the dough will increase in volume and feel pliable and lighter.  
Turn the container over on work surface without flour.  Let the dough slowly separate itself from the sides of container.  
(This dough looks much more structured than the Sourdough I in previous post.  The formula is different also .)

Portioning:
After the fourth turns (or 'your' estimated visual turns),  transfer the dough to a work surface without flour.  Divide the dough into portions measuring the approximate length size of the Baguette doughs your oven could hold.   I divided dough to be prepared to be shaped into three baguettes, two French Breads, and one Rondo.   Form the doughs into rectangular shape with rounded corners. If you notice the dough starts to spread then give each dough a several tucking turns.  Resting the dough in between each turn and tuck.  Once the dough can hold its shape form them into rectangular shape.
Cover and rest for 30 min. 
Shape each dough (not described here) into French Bread, Baguettes, Rondo.  Cover and let rise for 2-1/2 hrs to 3 hrs...4 hrs in cold kitchen. 

Cover to let rise till double in size.   
Preheat oven to 500'F.  For 15 min steam required for best result for crispy crust, set a roasting pan filled with water at the base of oven with towel in it to build steam.  Make sure the pan you use is deep enough to hold hot water to last at least 15 minutes.  I use my oven's roaster/grill pan that came with it.  
I used French Bread and Baguette molds for my final rise and shaping.
Score each dough.  
Have a spray bottle ready to give extra steaming action in the oven.  Place oven rack third rack from the top.  
A soon as the oven reaches 500'F, place the bread mold on third rack from the top - quickly.   Spray as you quickly close the oven door. 
Immediately lower the temp to 475'F.  Bake for 18 min and check the color of the dough. Every 5 min, Crack open oven door and quickly Spray aiming at the walls of interior oven, if your steam pan doesn't seem to be building enough steam power.  At the end of 18 minutes, check and make sure the dough is fully browned before taking them out.  Bake a few minutes longer to make sure the crust is browned thoroughly, if needed.  
Remove steamer pan after 15 min and or remove the towel in the pan that is set in it before it starts to scorch to cause unpleasant odor to the bread. 
Rondo's dough is rising in flour-coated flour cloth with seam side up.
I should have dusted off the rice flour for this one before baking. 
I am very happy with the results, however.  
Both Baguettes and Rondo turned out with great holes.  
See the differences of bread baked in well steamed oven vs lacking of it?  Baking in the well steamed oven produced shiny crusts.  While the Rondo was covered with flour/rice flour before the baking, it contributed to dull looking crust.  As for the taste of these sourdough breads, they are excellent.  I love it better than the store bought. Crumbs are soft and light with crispy crust.   

Wednesday, December 16, 2015

Croissant Adventure in Winter

This is another photo journal of my croissant adventure. I never get tired of taking pictures of croissants.  It is very satisfying even if I had to wake up at 2:30 am in the morning to complete the baking.
Ingredients/formula is in previously posted blog.
Hmmm... I see my slight mistake.   I seemed to have ignored my own rule - do not egg wash sliced edges of each roll.  It sealed the layers and have kept them from rising during the baking period.  
The taste of 'Euro-Style' Unsalted Butter is more flavorful than the normal Kirkland unsalted butter I always use. 
This one below shows the layer separation and rise where egg wash is carefully applied only to the top of the rolled layer avoiding the sliced edges.  
Baked at 475'F on baking sheet on Silpat.  3rd rack from the top in GE Large gas oven.  Maximum 12 minutes baking time. Keep a close watch.