Here is the Photo Journal of Canneles Preparation Process - batch 15 - 20th:
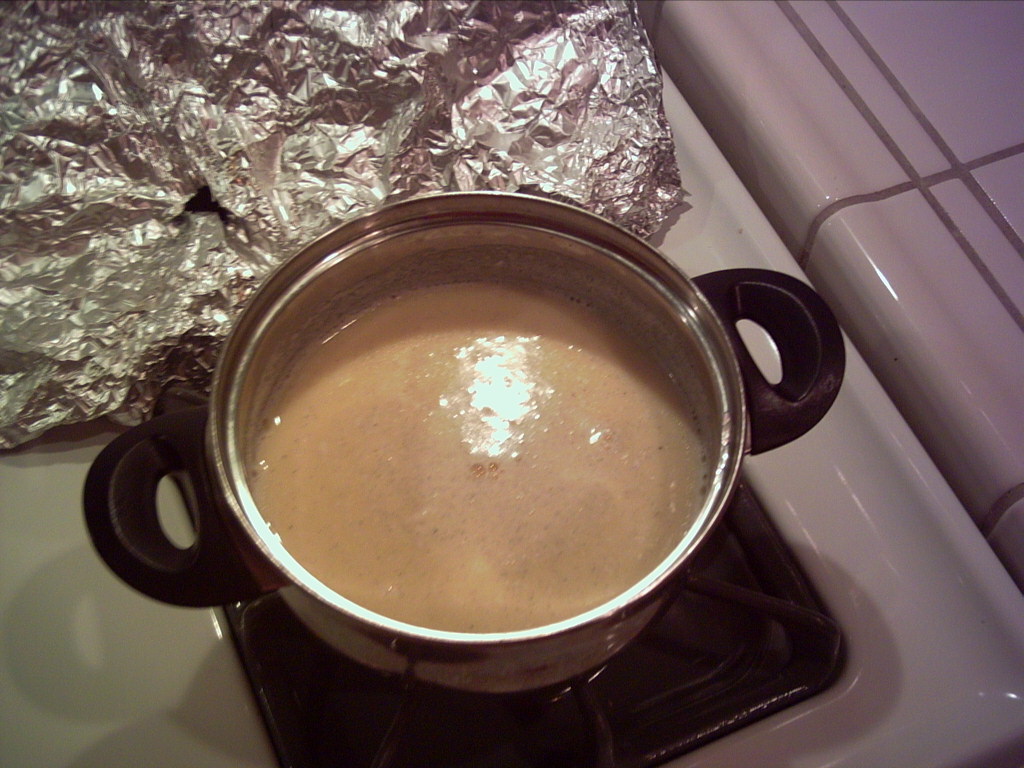
Scald 3 Cups of whole milk and 1 TBSP of Vanilla Paste (or 1 Vanilla Bean). Stir frequently to keep the milk from burning at the bottom and keep "the skin" from forming at the top. When it reaches 180F. Turn off the heat and Add 3 TBSP of unsalted Butter. Let it cool to lukewarm. Make sure the milk mixture is cool to the touch.
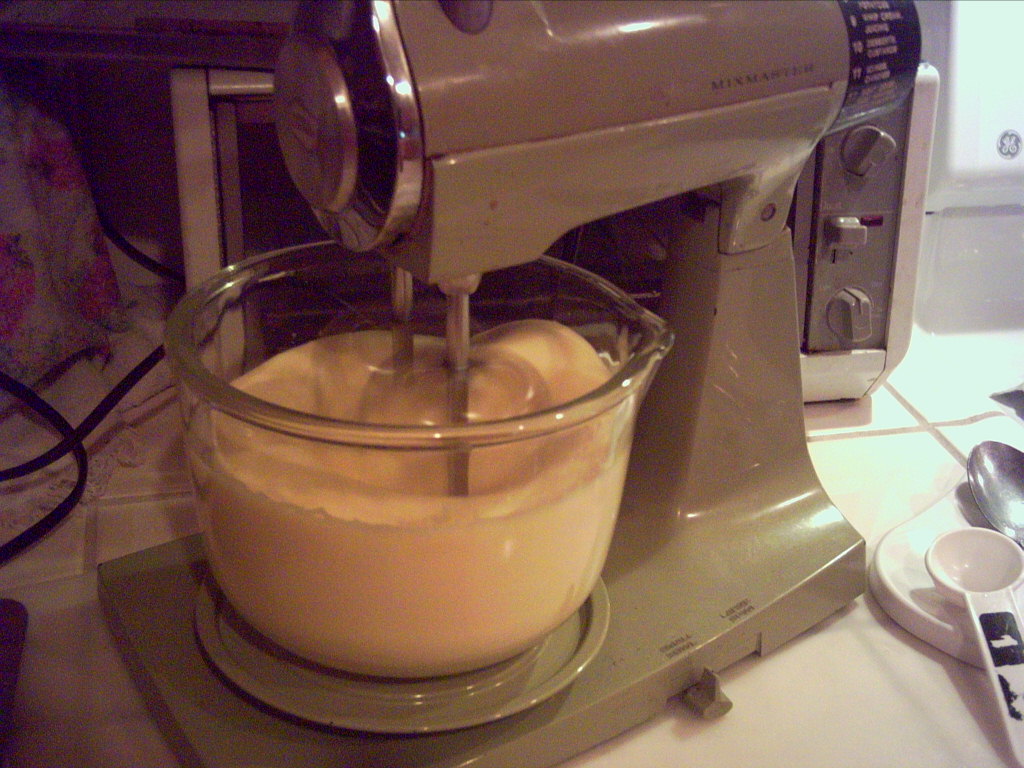 Beat 2 whole eggs and 1 egg yolks with 1-3/4 Cups of "Baker's Sugar." It should become Lemony color. All recipes called for "whisking" the egg, then add 3 TBSP of Dark RUM, but after 14th batch of testing, I find beating the eggs and Baker's Sugar brought a better result - the result is browning of outer shell -- "caramelizing". Still need one more testing of just "whisk" together ingredients the same way the recipe called for.
Get 2/3 Cup of Cake Flour ready.

Add egg mixture to the flour. Gently fold eggs into the flour. It will look lumpy.

Make sure the milk mixture is cool to the touch.
Next, Add milk mixture to the flour mixture. Whisk to mix gently.
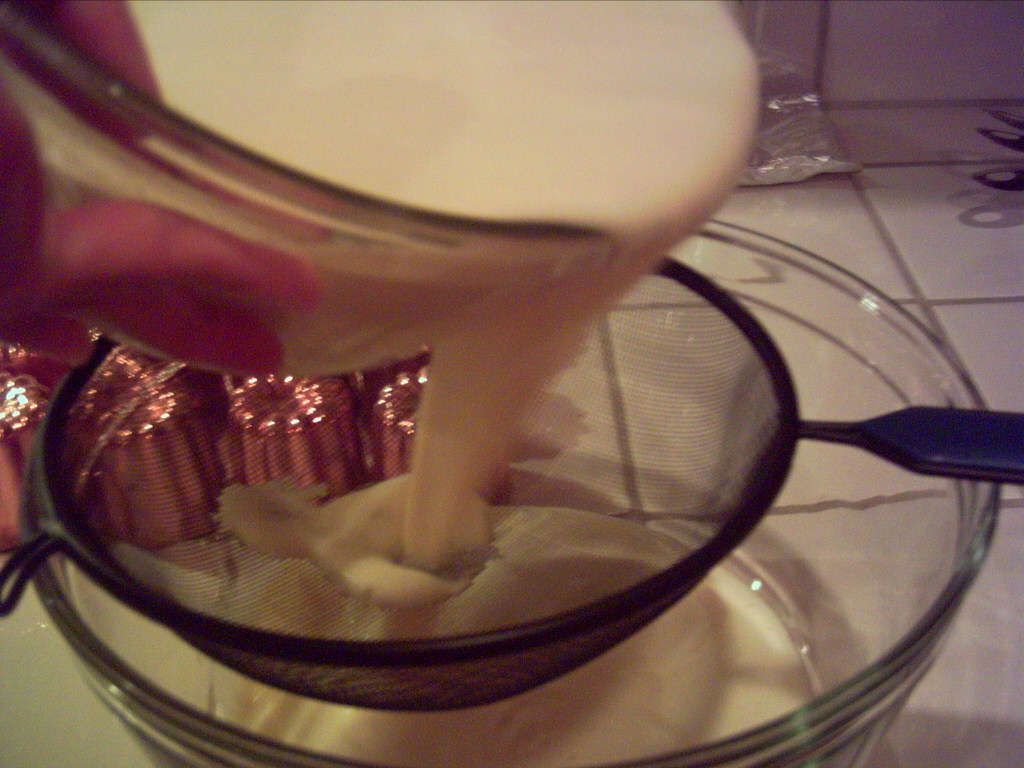
Strain the mixture.
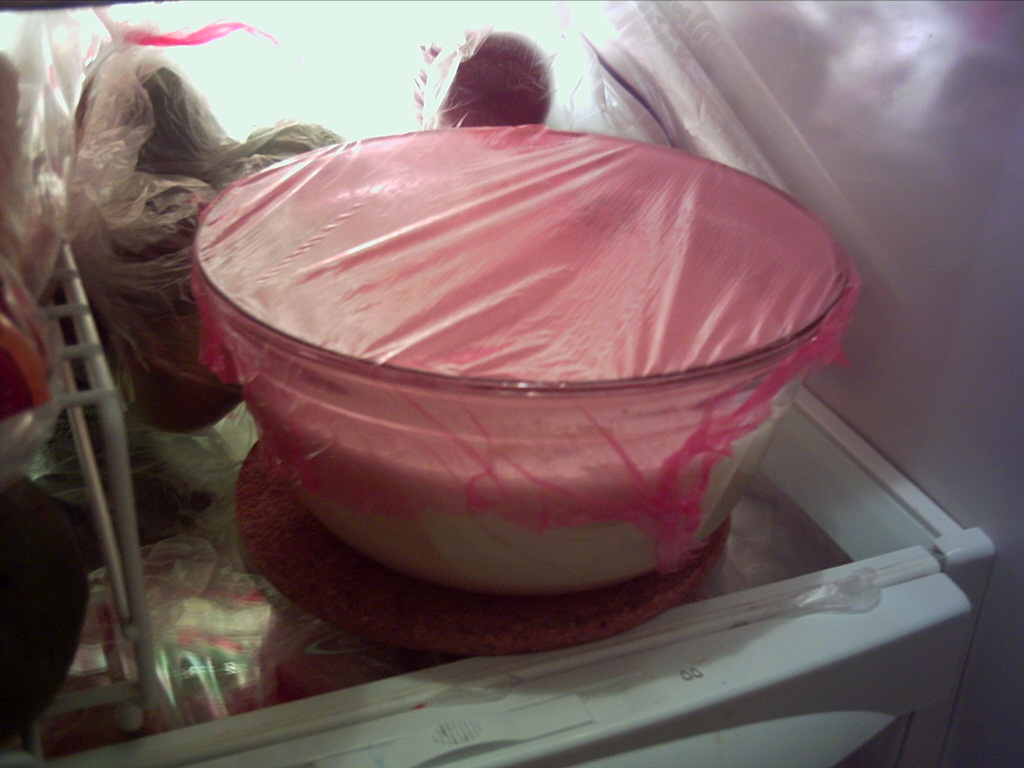 Refrigerate for minimum of 12 hours. I've tested with 6 hours with my new recipe combination and it turned out satisfactory. However, I noticed the difference in batter's aroma, it lacks the sweet mature aroma of rum and sugar when it is refrigerated less than 12 hours.
When ready to bake, bring it out to room temperature for minimum of 1 hour.
 Coat each Canneles molds with unsalted melted butter or "beeswax and butter".
Tip**Leave the molds in the refrigerator for a few minute. Although this image shows copper tin-coated canneles molds, I have acquired Non-Stick Aluminum canneles molds as well, and have successfully baked the Canneles in them.


Preheat oven to 180C or 365F -- Electric Convection Oven brought the best results in testing last 5 batches. Nice even brown and within a reasonable time. Baking Canneles in Conventional GE Gas Oven/Stove worked out well, but the results have been a bit unpredictable. But I am sure it is more than the temperature that played a role producing perfect Canneles, such as thickness of the baking pan that molds were sitting on, how many molds were on it, which height level the baking pan were set in... all these seemed to have tampered the result of the Canneles.
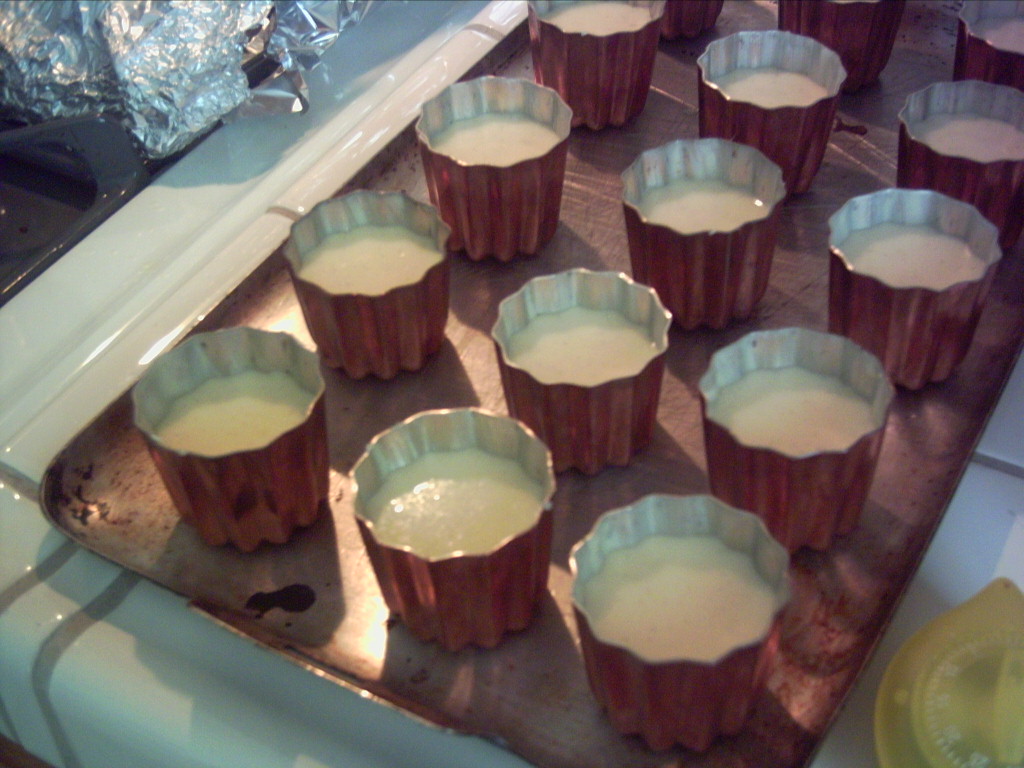 Use 1/3 Measuring Cup to scoop batter mixture into molds.
**Do not fill up the mold.
Line up the molds on a baking pan with rim to catch butter spill during baking.
*I've used melted 100% pure beeswax and butter as the traditional recipe calls for. I find the unsalted butter working just as well and giving the shell the "shine". However, without beeswax mixed with butter coating Canneles Molds, Canneles tend to get stuck during demolding.
Tip: You can order 100% Pure Beeswax with no chemical additives at Sacramento Beekeeping Supplies, http://midtowngrid.com/sacbeekeeping/sacbeekeeping.shtml.
* Never use Candle Wax from your ordinary candle.
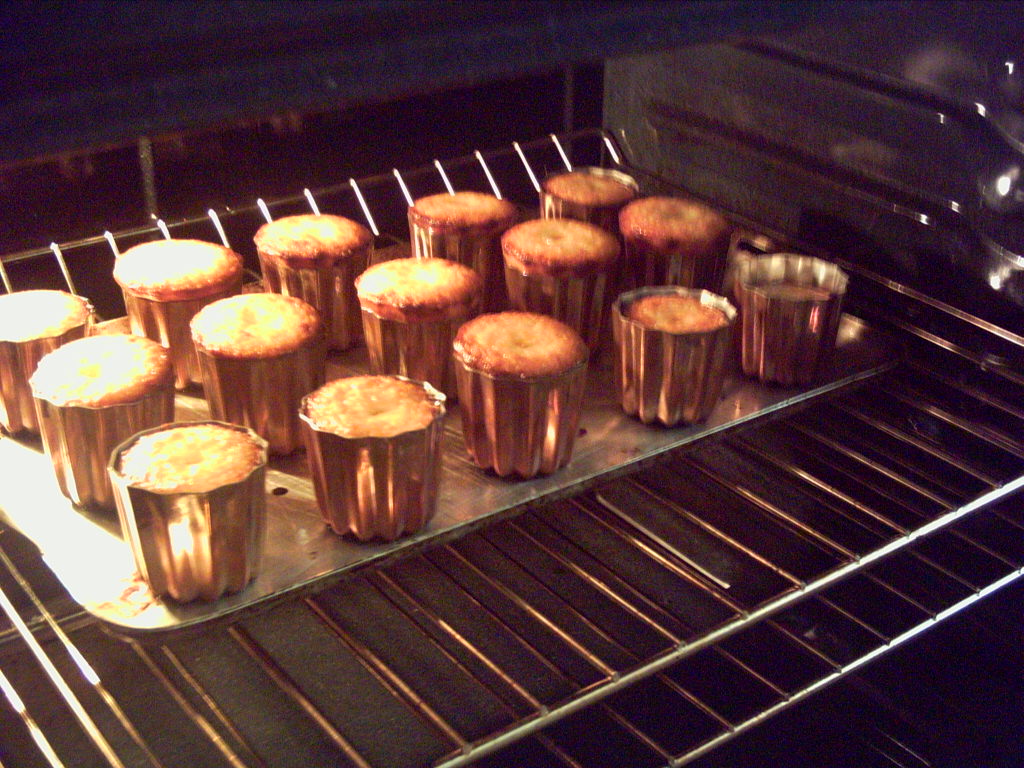
This batch is baked in the conventional gas oven. Make sure not to crowd the molds on the pan. As you can see, the batter starts to puff up above the rim.

Baking period seems to be the most critical part of the Canneles baking.
Baking for 1 hr 30 min in gas oven still did not brown the Canneles -- the recipe from Foodnetwork's "Canneles de Bordeaux." Additional 15 to 20 min were required for pan of 15 canneles molds to become beautiful brown.

Towards the end of baking period, I took one out of mold to check the status of shell caramelization. Reverse the mold and tap it gently and Cannele should slide down. If it is still pale, I baked it longer; however, I noticed that the longer you bake, the tougher the center. Which is true with any custard or working with eggs. So, again, here the counter-top electric convection oven I bought brought the best timing in baking and in texture and taste.

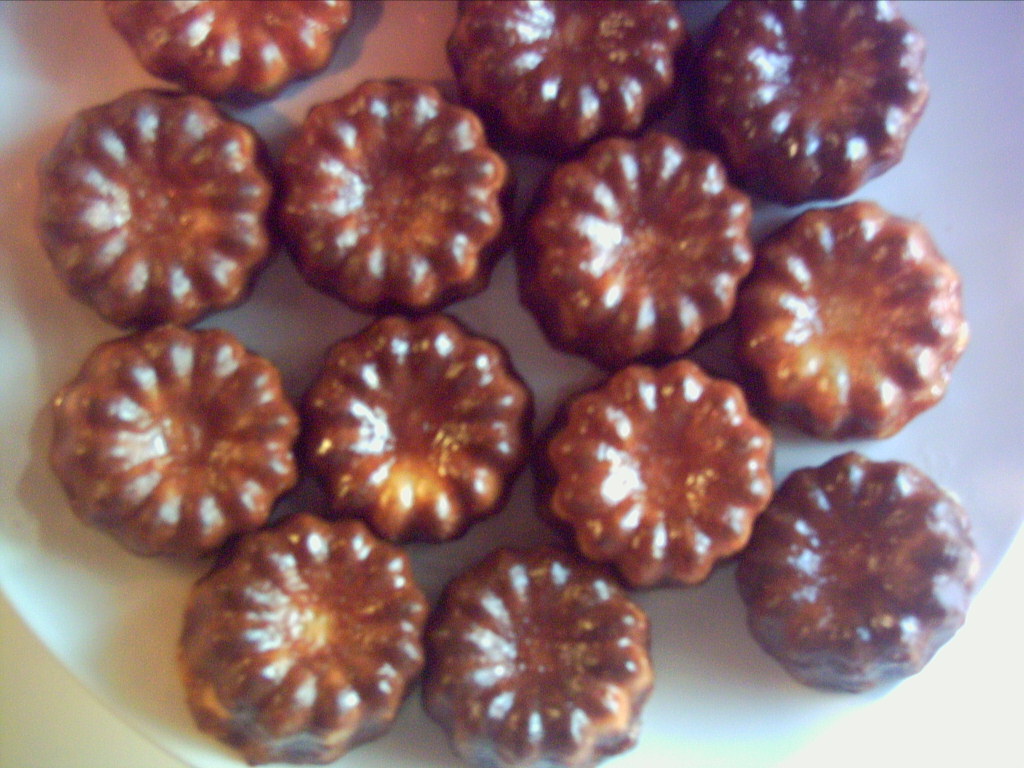 These are the ones done in gas oven---after close to two hours of baking.
Tips: Do not buy and use non-stick Cannele molds. The fume from the teflon burning at 450'F is a killer.

The result of Pumpkin Buttermilk Canneles de Polly is surprisingly delicious. The recipe measurements were done after deduction of study of recipe of Canneles from www.MeilleurChef.com and Foodnetwork's "Canneles de Bordeaux" recipe and Gale Gand's recipe and of course, after 14th batch baking tests.

This is the recipe of Foodnetwork's Canneles de Bordeaux that I baked in Batch 18, except I modified the way I mix and amount of sugar. As I mentioned above, I beat the eggs and sugar together till lemony rather than just "whisk" eggs and add rum. & increased the sugar from 1 Cup to 1-3/4 Cup. I think 1-2/3 Cup will do just well -- I will test that on the next batch.

I hope this will add some flavor and encouragement to your adventure in Canneles baking. They are just YUMMMY!!
Hi, its been a long time since you posted this article, but I have a couple of questions I was hoping you'd answer.
ReplyDeleteDo you have any opinion or comparison between the bare aluminium molds and the copper ones? Any photos?
How hard is it to get the canele out of the copper mold if you do not use beeswax, only butter?
Thanks!
Hello. Thank you for checking the blog.
DeleteWhat you need to understand is the "Burn" Temperature of the "fat" you use. The true Canneles is with "Crunchy caramelled external shell with soft filling/center". This is achieved at baking at high temperature. Butter's flash point is low. Caramelization of occur at high temp. If you want to complete the baking within a reasonable time 35 - 45 min, at 425'F above temp, non-parafin added or no chemical added Bees Wax would help you achieve that. Bees Wax also adheres to the surface of the mold quickly and thickly while butter would take a few brushing. My recipe for the mold calls for Bees Wax plus butter.
As for how easy to take it out of the mold? If you brush both types of molds well with Bees Wax mixture and Caramelization has achieved - out of my 15 molds, I might have 1 with tiny mess.
So the tip is the temperature that you are baking + good well coated molds with Bees Wax + butter mixture and turn the molds over immediately while they are still in bubbling state when removed from the oven. Your rack should sit over a sheet pan covered with papertowels or counter work surface covered with 'something' disposable.
I hope this helps. Otherwise, please ask me again.