Once in a while I get this cravings for Japanese food. I think and think about it, and I could have just bought the frozen packages of GYOZA or YAKISOBA or MISO soup.... then, I think and think, again... I don't want all those preservatives and MSG, and etc, etc. At the end, I try to gather all the ingredients... checking for any veges in the garden.... nope, nothing is growing. But I found small portions of ground pork in the freezer - good! now I can make GYOZA (---the Chinese Fried Potstickers in Japanese name).

While I was preparing them, I thought of my Japanese nursemother preparing dinner. I remember her mixing in the MISO into the soup, and at the end of the meal, she puts all the rice with oats into it and feed them to the two large dogs. Dogs would lap clean the large NABE that they eat out from.
For MISO SOUP
Ingredients: serves 4
4 inches of small DAIKON - peeled and julienned thinly
1/2 cake of extra firm TOFU - cut into 1-1/2 cm cubes
4 to 5 Cups of water - boiling
1 Tsp of HONDASHI - bonita granules
1 Tbsp MISO - low sodium type

 Bring water to boil in a small pot, add HONDASHI or dried bonita. (Strain/Remove dried bonita after 15 min.) Medium Low heat - Add DAIKON and Tofu. Cook for 5 min. Turn to simmer.
 Scoop 1 Tablespoonful of MISO into a large ladle. Over the pot, add some liquid into the ladle with the MISO still in it. With chopsticks, stir the MISO in the ladle to liquefy, pouring out the mixed liquid into the soup, then, at the same time scoop in more liquid into the ladle that is still with MISO..... Well, that's how it is usually done. You can do it anyway you want to liquefy the MISO paste, but be sure that the paste is well mixed with the liquid before adding into the soup base. Stir gently to mix. Turn to low to keep warm while you make all other food or it is ready to serve at this point. Garnish with some chopped green onions, if you would like.


For YAKISOBA (Stir fried Japanese noodles)
This usually the fast food served close to and around the train stations or at shopping malls. Funny things about Asian culture is that you see shoppers buying fresh vegetables and fresh seafood at the markets...and yet still they set a small snack time aside to sit down to eat RAMEN, YAKISOBA, and other quick snack meal before heading home. This is the same in Japan or in Viet-Name or in Taiwan where I have been, as well as right here in San Jose, San Francisco, etc, etc.... Food! is such a easy comfort to the human tummy.
Ingredients: Serves 4
4 leaves of NAPA cabbage - washed thoroughly & cut into 4x1/4 inch strips
( or 1/4 section of a small Cabbage is actually preferred for the YAKISOBA for the texture reason - cut into strips as well.)
1/4 Cup Ground Pork or any meat you like
1 bag of Bean sprouts - rinsed with salt and rinsed again. Then, soaked in water for at least 5 minutes to get rid of the acidic odor
2 Tbsp Extra Virgin Olive Oil or vegetable oil
3 Green Onions chopped.
1-1/2 packages of YAKISOBA (with mix package << yes it has MSG....) - Rinse it off under warm water to soften and to get rid of the extra oil they packaged in. Otherwise, buy dried noodle, boil enough noodles to serve 4 people, and strain, then, set aside.
I don't know what it is with the bean sprouts in the US, but I don't ever remember such odor in the bean sprouts we purchased in Japan. We buy these bean sprouts from the Korean women (when we lived in Japan). She sprouts these strong tasty bean sprouts. Everyone goes there to buy from her. So, be sure to rinse your bean sprouts thoroughly and let it soak in fresh water for a while.
In a heated skillet or Wok, add cooking oil. Medium High Heat - Add chopped onion and stir fry for a minute. Add meat and stir fry - 45 sec. Add Napa Cabbage. Stir fry till it wilts. Add softened noodle, stir fry to mix all well. Add Bean Sprouts. Add 1-1/2 packages of YAKISOBA flavor mixture. The alternative is to add ready made Japanese YAKISOBA sauce (yes, it has MSG also.. unless they make one without.) or my alternative is to add TONKATSU sauce. Stir fry and till everything is well mixed. If you want to add a bit of "crispiness" to the noodle, stop stirring and let it fry at medium low heat for a minute. But FYI - it will not 'brown or become crisp' like the pan fried noodle.


 The first time I made this YAKISOBA, I placed the noodle out of the package right under the vegetables. The heat softened the noodle eventually, but I discover that the noodle from the package is covered with cooking oil, thus, the final product was very oily. So, the 2nd time I prepared it, I chose to soften the noodle out of the package in a bowl of warm water. Changing it a couple of time to wash out the oil. This softened the noodle and got rid of the extra oil.


For GYOZA (Japanese Fried Potstickers)
To make it yourself or just buy the frozen version??? that is the question. I like LING LING's dumpling to some extent, but not satisfactorily. Because my mother spoiled us rotten when we were young. She made everything from scratch and rolled all 100's dumpling skin herself. She makes them the we like. or I could fly to TOKYO and eat at this famous restaurant for GYOZA or to TAIWAN to eat at strips of eatery famous for dumpling... well, the last I heard from my friends who fly back and forth to Japan or Taiwan, those places are 'gone'. I have a package of Wonton skin in the refrigerator that I can use, but... naaa, just not the same. So, next! onward. No complaining!
Ingredients: Serves 4
Mixed all of the ingredients in a bowl - set aside while rolling out the skins
2/3 C ground pork
2 chopped green onions
4 leaves of NAPA Cabbage - washed and chopped and squeezed between your palms to remove liquid.
1 tsp minced ginger,
1 tsp salt
1/2 tsp ground Black pepper
1/4 tsp sesame oil
2 Tbsp cooking oil for frying
1 Cup of hot water for frying

Prepare GYOZA dough skin:
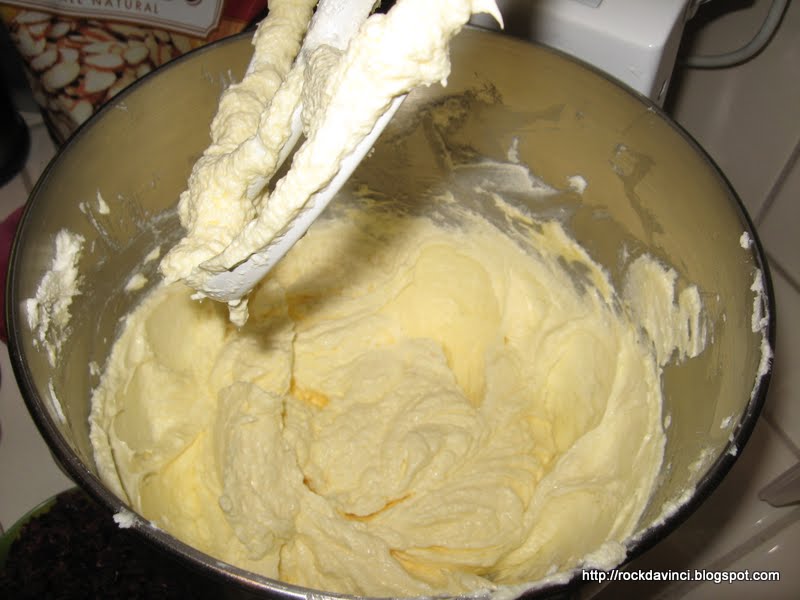
Mix 1-1/2 Cup of Flour and 1/2 tsp of salt. Add 1/2 C of 'hot' boiled water.
Mix quickly to form a dough. The dough should be as soft as your ear lobe.
Add flour or more water to achieve the softness.
Cover and let it sit for 5 min.
Roll into a long rope - 1-1/2 in diameter.
Cut into 1 to 1-1/2 inch pieces.
Smash with the palm of your hand the 'cut' side down to form the dough into a disc.
Set aside in flour bed until all pieces are cut and formed into disc.
With the straight rolling pin, roll out the skin.
You can check out several techniques posted on the YOUTUBE.
Mine is here at: http://www.youtube.com/watch?v=sOknUXH2BRU
or in the previous posting at http://rockdavinci.blogspot.com/2010/05/pan-fried-potstickers-home-made.html
Then fill the dough.
Heat the skillet, add cooking oil, then, place the dumpling around in the pan.
Listen to the frying noise.
Add enough hot water to almost cover the dumplings. Cover with Lid.
Cook in High until water evaporates.


Make sure to use a lid that fits the fry pan. In this picture, this lid is not it. I changed it afterwards, but I didn't want to lose the temperature while I go get the right lid.
 Listen carefully to the music of frying - "pitter chat patter" -- as the water evaporate. Rotate the position of the skillet to make sure the well browning of each potsticker. Lift one up and check. Remove from heat when they are golden brown.
 Finally, my dinner is served!! It was a great GYOZA, YAKISOBA, and MISO soup!


While I was preparing them, I thought of my Japanese nursemother preparing dinner. I remember her mixing in the MISO into the soup, and at the end of the meal, she puts all the rice with oats into it and feed them to the two large dogs. Dogs would lap clean the large NABE that they eat out from.
For MISO SOUP
Ingredients: serves 4
4 inches of small DAIKON - peeled and julienned thinly
1/2 cake of extra firm TOFU - cut into 1-1/2 cm cubes
4 to 5 Cups of water - boiling
1 Tsp of HONDASHI - bonita granules
1 Tbsp MISO - low sodium type


 Scoop 1 Tablespoonful of MISO into a large ladle. Over the pot, add some liquid into the ladle with the MISO still in it. With chopsticks, stir the MISO in the ladle to liquefy, pouring out the mixed liquid into the soup, then, at the same time scoop in more liquid into the ladle that is still with MISO..... Well, that's how it is usually done. You can do it anyway you want to liquefy the MISO paste, but be sure that the paste is well mixed with the liquid before adding into the soup base. Stir gently to mix. Turn to low to keep warm while you make all other food or it is ready to serve at this point. Garnish with some chopped green onions, if you would like.


For YAKISOBA (Stir fried Japanese noodles)
This usually the fast food served close to and around the train stations or at shopping malls. Funny things about Asian culture is that you see shoppers buying fresh vegetables and fresh seafood at the markets...and yet still they set a small snack time aside to sit down to eat RAMEN, YAKISOBA, and other quick snack meal before heading home. This is the same in Japan or in Viet-Name or in Taiwan where I have been, as well as right here in San Jose, San Francisco, etc, etc.... Food! is such a easy comfort to the human tummy.
Ingredients: Serves 4
4 leaves of NAPA cabbage - washed thoroughly & cut into 4x1/4 inch strips
( or 1/4 section of a small Cabbage is actually preferred for the YAKISOBA for the texture reason - cut into strips as well.)
1/4 Cup Ground Pork or any meat you like
1 bag of Bean sprouts - rinsed with salt and rinsed again. Then, soaked in water for at least 5 minutes to get rid of the acidic odor
2 Tbsp Extra Virgin Olive Oil or vegetable oil
3 Green Onions chopped.
1-1/2 packages of YAKISOBA (with mix package << yes it has MSG....) - Rinse it off under warm water to soften and to get rid of the extra oil they packaged in. Otherwise, buy dried noodle, boil enough noodles to serve 4 people, and strain, then, set aside.
I don't know what it is with the bean sprouts in the US, but I don't ever remember such odor in the bean sprouts we purchased in Japan. We buy these bean sprouts from the Korean women (when we lived in Japan). She sprouts these strong tasty bean sprouts. Everyone goes there to buy from her. So, be sure to rinse your bean sprouts thoroughly and let it soak in fresh water for a while.
In a heated skillet or Wok, add cooking oil. Medium High Heat - Add chopped onion and stir fry for a minute. Add meat and stir fry - 45 sec. Add Napa Cabbage. Stir fry till it wilts. Add softened noodle, stir fry to mix all well. Add Bean Sprouts. Add 1-1/2 packages of YAKISOBA flavor mixture. The alternative is to add ready made Japanese YAKISOBA sauce (yes, it has MSG also.. unless they make one without.) or my alternative is to add TONKATSU sauce. Stir fry and till everything is well mixed. If you want to add a bit of "crispiness" to the noodle, stop stirring and let it fry at medium low heat for a minute. But FYI - it will not 'brown or become crisp' like the pan fried noodle.


For GYOZA (Japanese Fried Potstickers)
To make it yourself or just buy the frozen version??? that is the question. I like LING LING's dumpling to some extent, but not satisfactorily. Because my mother spoiled us rotten when we were young. She made everything from scratch and rolled all 100's dumpling skin herself. She makes them the we like. or I could fly to TOKYO and eat at this famous restaurant for GYOZA or to TAIWAN to eat at strips of eatery famous for dumpling... well, the last I heard from my friends who fly back and forth to Japan or Taiwan, those places are 'gone'. I have a package of Wonton skin in the refrigerator that I can use, but... naaa, just not the same. So, next! onward. No complaining!
Ingredients: Serves 4
Mixed all of the ingredients in a bowl - set aside while rolling out the skins
2/3 C ground pork
2 chopped green onions
4 leaves of NAPA Cabbage - washed and chopped and squeezed between your palms to remove liquid.
1 tsp minced ginger,
1 tsp salt
1/2 tsp ground Black pepper
1/4 tsp sesame oil
2 Tbsp cooking oil for frying
1 Cup of hot water for frying

Prepare GYOZA dough skin:
Mix 1-1/2 Cup of Flour and 1/2 tsp of salt. Add 1/2 C of 'hot' boiled water.
Mix quickly to form a dough. The dough should be as soft as your ear lobe.
Add flour or more water to achieve the softness.
Cover and let it sit for 5 min.
Roll into a long rope - 1-1/2 in diameter.
Cut into 1 to 1-1/2 inch pieces.
Smash with the palm of your hand the 'cut' side down to form the dough into a disc.
Set aside in flour bed until all pieces are cut and formed into disc.
With the straight rolling pin, roll out the skin.
You can check out several techniques posted on the YOUTUBE.
Mine is here at: http://www.youtube.com/watch?v=sOknUXH2BRU
or in the previous posting at http://rockdavinci.blogspot.com/2010/05/pan-fried-potstickers-home-made.html
Then fill the dough.
Listen to the frying noise.
Add enough hot water to almost cover the dumplings. Cover with Lid.
Cook in High until water evaporates.


Make sure to use a lid that fits the fry pan. In this picture, this lid is not it. I changed it afterwards, but I didn't want to lose the temperature while I go get the right lid.