I came across quite a few web forum asking where to buy the Canneles baking molds. The molds are sold at limited number of places in US, I think. However, depending on how you spell the word "Canneles", the result group in web search engine differs. By the way, there are Copper tin-lined mold, aluminum, non-stick aluminum, Copper and inox steel lined, gastroflex mold, and elastomold. When you do an entry phrase in any of the web SEARCH ENGINE, you need to type: Canneles de Bordeaux molds or Caneles molds or Canneles copper tin mold. The mold is sold individually and priced anywhere from $6 to $25, depending on who you are buying from.
Some of the sites are: **Some sites may have changed. Some might have discontinued.
Tip: Go to their Main Home Page and Do Search.
Interested in testing with Aluminum Cannele Molds? Great affordable price at $4.99 ea. How good is the mold? I am not sure, yet. I am waiting for my shipment (Purchased 12/29/2009 just now) from http://www.fantes.com/stacks.html
MYCHEFSFAVORITES thus far has the affordable copper tin-lined Canneles molds.
http://www.mychefsfavorites.com/baking/cannele-and-charlotte/cannele--copper--tin-lined.html
http://culinary-direct.com/store/index.cfm?displayMode=catalog&action=search&viewmode=search&searchType=items&searchTerm=CANNELE
Other favorite sites are:
http://www.fantes.com/stacks.html
or
http://www.meilleurduchef.com/cgi/mdc/l/fr/boutique/produits/moule_cannele/index.html
The reason being that they do have promotional sales.
I am waiting for next group of Canneles molds to arrive to test my batch 9 and 10. Someone asked me whether I can use Low Fat Milk, etc. Only a test will tell. However, I think in French cooking, the real butter and "whole" of something is the key to their wonderful rich taste.
So far, I have seen Canneles mold (moule in French) being sold individually. I was very lucky to have acquired a set of 15 from France over e-Bay. It was a lucky buy.
I am interested in buying Copper Cannele Molds lined with inox steel, but I have not found anyone selling it.
Thursday, October 12, 2006
Photo Journal of Canneles de Polly
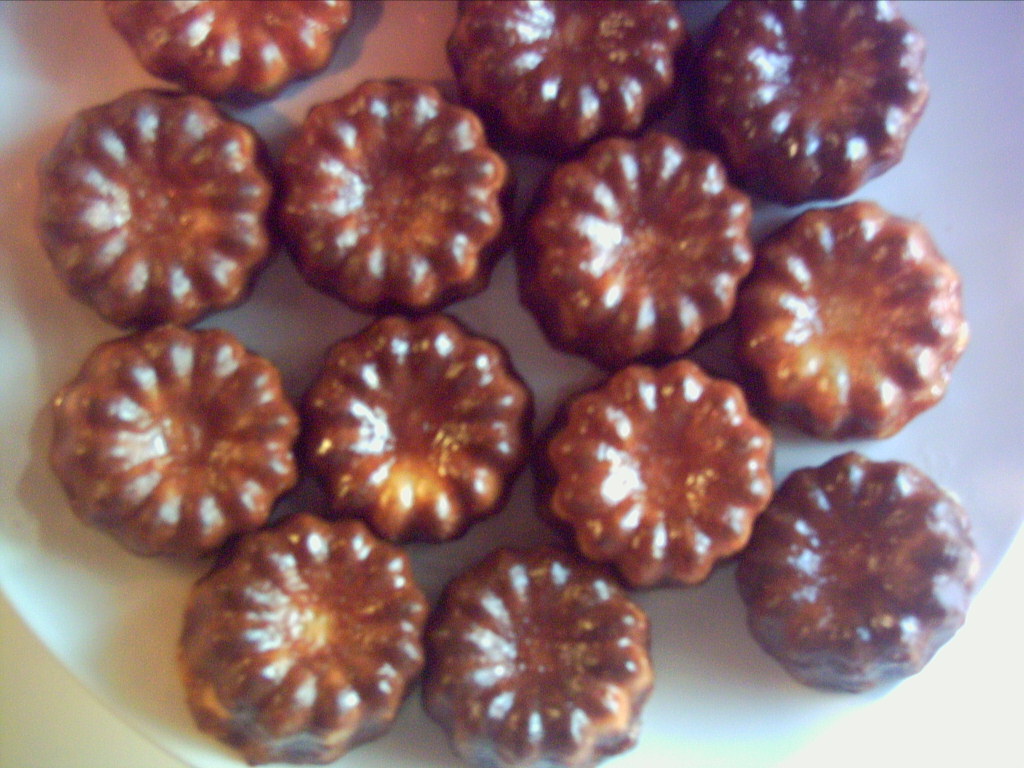
Canneles de Bordeaux adventure continues - After 14th batch baking test of Canneles recipes and baking time, I finally found the right combination of sugar and temperature that produced wonderfully crunchy outer shell and custardy center. There is a recipe that produces bread like texture of center of the Canneles, but after 14th batch of test baking two different recipes, I like the custardy center the best.
Here is the Photo Journal of Canneles Preparation Process - batch 15 - 20th:

Scald 3 Cups of whole milk and 1 TBSP of Vanilla Paste (or 1 Vanilla Bean). Stir frequently to keep the milk from burning at the bottom and keep "the skin" from forming at the top. When it reaches 180F. Turn off the heat and Add 3 TBSP of unsalted Butter. Let it cool to lukewarm. Make sure the milk mixture is cool to the touch.
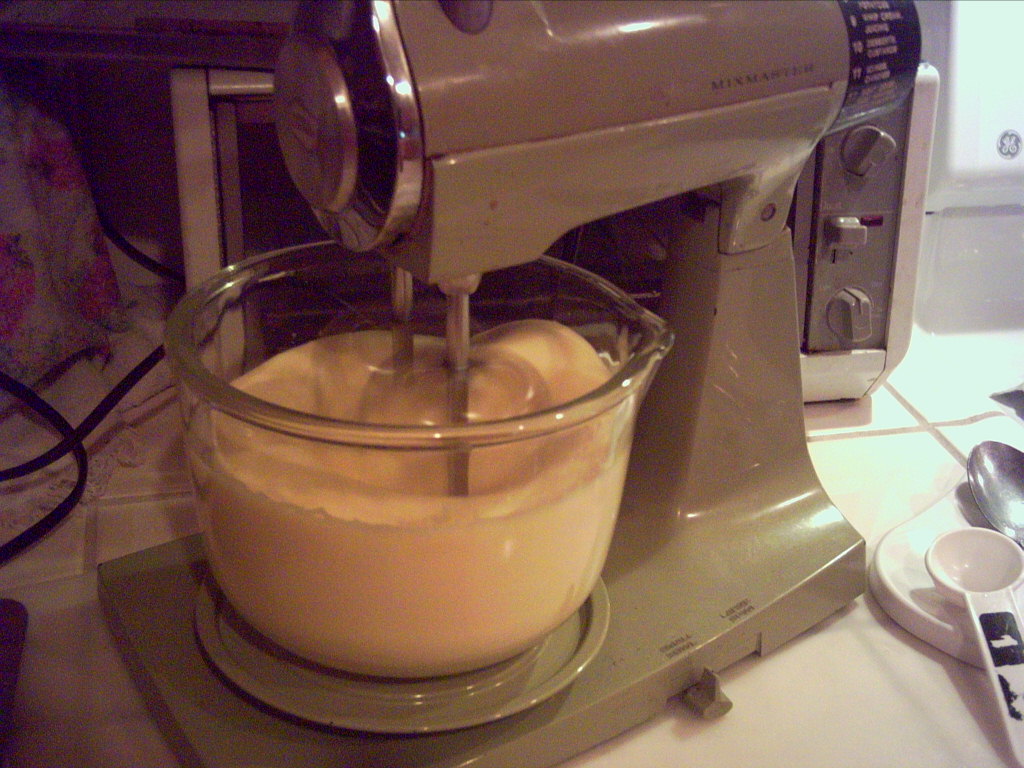
 Beat 2 whole eggs and 1 egg yolks with 1-3/4 Cups of "Baker's Sugar." It should become Lemony color. All recipes called for "whisking" the egg, then add 3 TBSP of Dark RUM, but after 14th batch of testing, I find beating the eggs and Baker's Sugar brought a better result - the result is browning of outer shell -- "caramelizing". Still need one more testing of just "whisk" together ingredients the same way the recipe called for.
Get 2/3 Cup of Cake Flour ready.

Add egg mixture to the flour. Gently fold eggs into the flour. It will look lumpy.

Make sure the milk mixture is cool to the touch.
Next, Add milk mixture to the flour mixture. Whisk to mix gently.
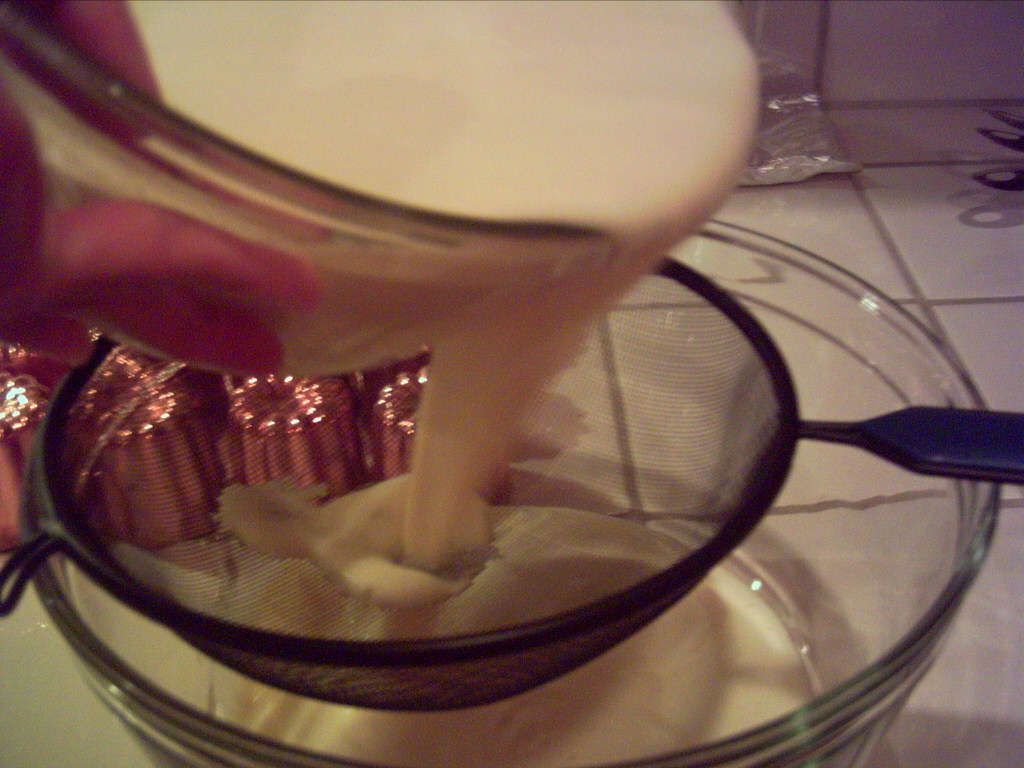
Strain the mixture.
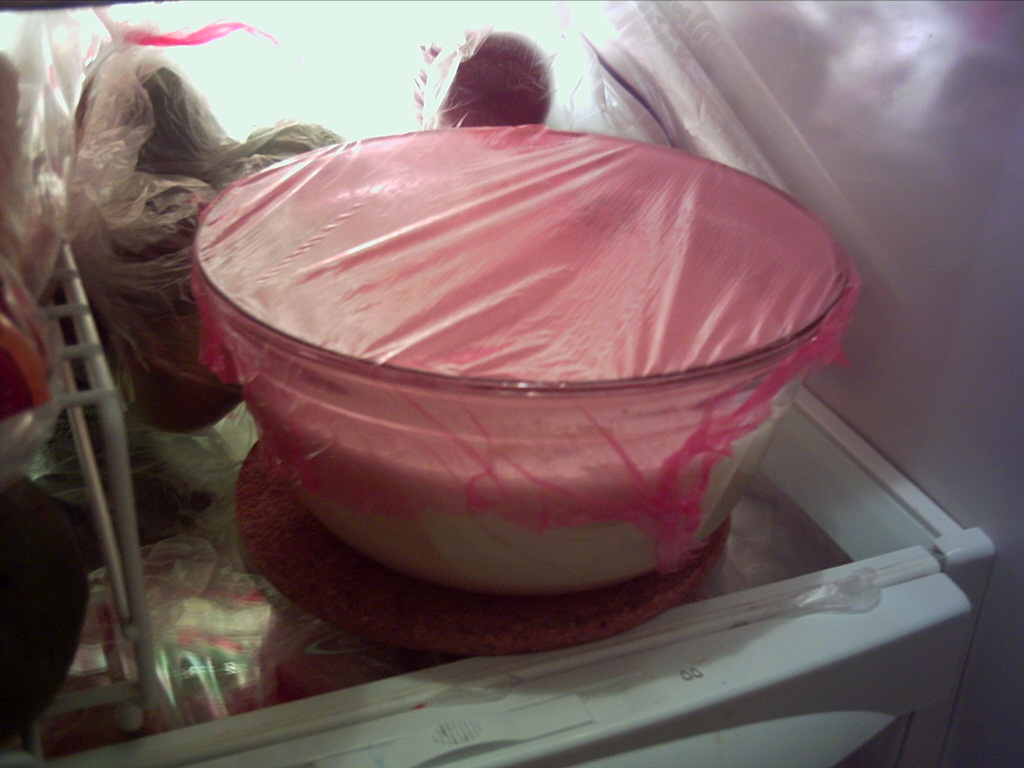
 Refrigerate for minimum of 12 hours. I've tested with 6 hours with my new recipe combination and it turned out satisfactory. However, I noticed the difference in batter's aroma, it lacks the sweet mature aroma of rum and sugar when it is refrigerated less than 12 hours.
When ready to bake, bring it out to room temperature for minimum of 1 hour.
 Coat each Canneles molds with unsalted melted butter or "beeswax and butter".
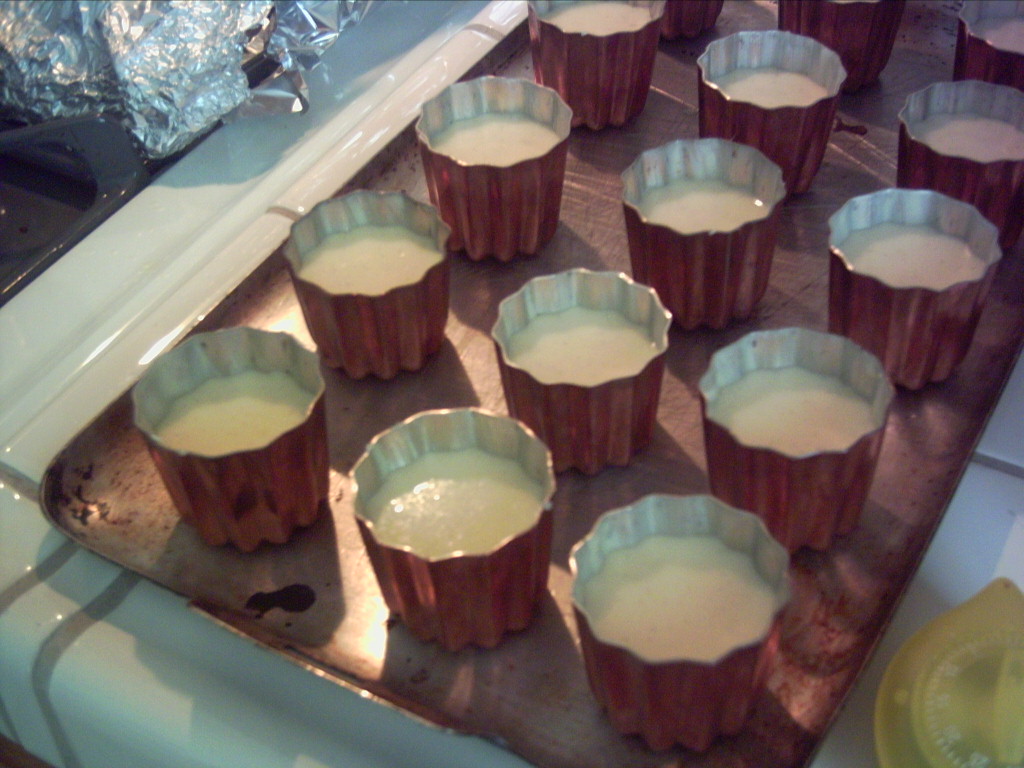
Tip**Leave the molds in the refrigerator for a few minute. Although this image shows copper tin-coated canneles molds, I have acquired Non-Stick Aluminum canneles molds as well, and have successfully baked the Canneles in them.


Preheat oven to 180C or 365F -- Electric Convection Oven brought the best results in testing last 5 batches. Nice even brown and within a reasonable time. Baking Canneles in Conventional GE Gas Oven/Stove worked out well, but the results have been a bit unpredictable. But I am sure it is more than the temperature that played a role producing perfect Canneles, such as thickness of the baking pan that molds were sitting on, how many molds were on it, which height level the baking pan were set in... all these seemed to have tampered the result of the Canneles.
 Use 1/3 Measuring Cup to scoop batter mixture into molds.
**Do not fill up the mold.
Stir batter mixture often to make sure that flour mixtures are evenly distributed before scooping into molds.
Line up the molds on a baking pan with rim to catch butter spill during baking.
*I've used melted 100% pure beeswax and butter as the traditional recipe calls for. I find the unsalted butter working just as well and giving the shell the "shine". However, without beeswax mixed with butter coating Canneles Molds, Canneles tend to get stuck during demolding.
Tip: You can order 100% Pure Beeswax with no chemical additives at Sacramento Beekeeping Supplies, http://midtowngrid.com/sacbeekeeping/sacbeekeeping.shtml.
* Never use Candle Wax from your ordinary candle.

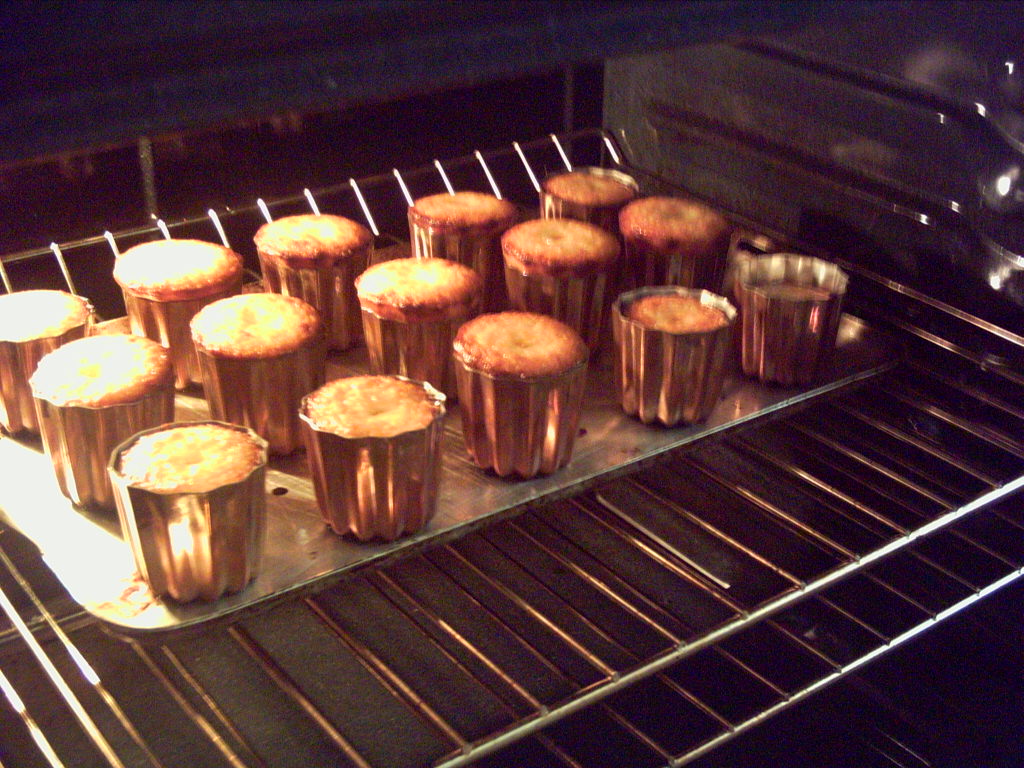
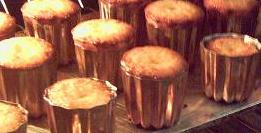
This batch is baked in the conventional gas oven. Make sure not to crowd the molds on the pan. As you can see, the batter starts to puff up above the rim.

Baking period seems to be the most critical part of the Canneles baking.
Baking for 1 hr 30 min in gas oven still did not brown the Canneles -- the recipe from Foodnetwork's "Canneles de Bordeaux." Additional 15 to 20 min were required for pan of 15 canneles molds to become beautiful brown.

Towards the end of baking period, I took one out of mold to check the status of shell caramelization. Reverse the mold and tap it gently and Cannele should slide down. If it is still pale, I baked it longer; however, I noticed that the longer you bake, the tougher the center. Which is true with any custard or working with eggs. So, again, here the counter-top electric convection oven I bought brought the best timing in baking and in texture and taste.

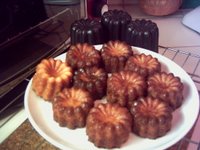
 These are the ones done in gas oven---after close to two hours of baking.
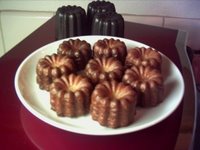
 This batch is baked in my new counter-top electric convection oven. Molds are non-stick aluminum coated with melted butter or" beeswax and butter" mixture. After batch 14, I dared myself to come up with my own recipe mix. This is Pumpkin Buttermilk Canneles de Polly. I decided to honor my new convection oven with this recipe.
Tips: Do not buy and use non-stick Cannele molds. The fume from the teflon burning at 450'F is a killer.

The result of Pumpkin Buttermilk Canneles de Polly is surprisingly delicious. The recipe measurements were done after deduction of study of recipe of Canneles from www.MeilleurChef.com and Foodnetwork's "Canneles de Bordeaux" recipe and Gale Gand's recipe and of course, after 14th batch baking tests.
This is the recipe of Foodnetwork's Canneles de Bordeaux that I baked in Batch 18, except I modified the way I mix and amount of sugar. As I mentioned above, I beat the eggs and sugar together till lemony rather than just "whisk" eggs and add rum. & increased the sugar from 1 Cup to 1-3/4 Cup. I think 1-2/3 Cup will do just well -- I will test that on the next batch.
I hope this will add some flavor and encouragement to your adventure in Canneles baking. They are just YUMMMY!!
Here is the Photo Journal of Canneles Preparation Process - batch 15 - 20th:
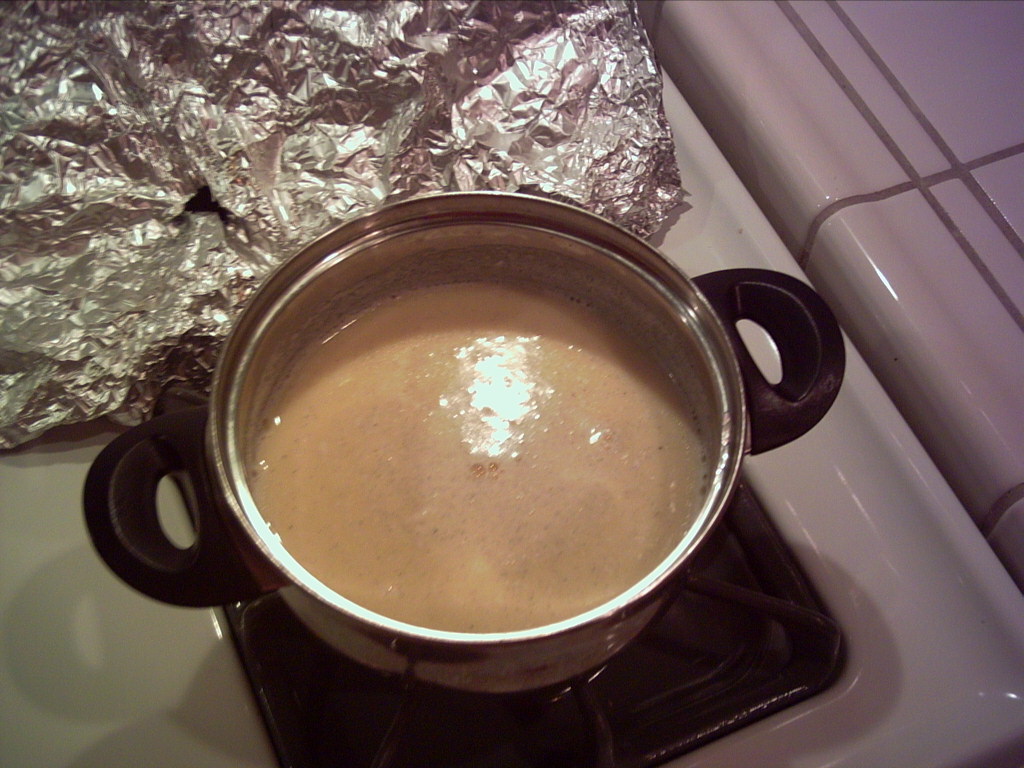
Scald 3 Cups of whole milk and 1 TBSP of Vanilla Paste (or 1 Vanilla Bean). Stir frequently to keep the milk from burning at the bottom and keep "the skin" from forming at the top. When it reaches 180F. Turn off the heat and Add 3 TBSP of unsalted Butter. Let it cool to lukewarm. Make sure the milk mixture is cool to the touch.
 Beat 2 whole eggs and 1 egg yolks with 1-3/4 Cups of "Baker's Sugar." It should become Lemony color. All recipes called for "whisking" the egg, then add 3 TBSP of Dark RUM, but after 14th batch of testing, I find beating the eggs and Baker's Sugar brought a better result - the result is browning of outer shell -- "caramelizing". Still need one more testing of just "whisk" together ingredients the same way the recipe called for.
Get 2/3 Cup of Cake Flour ready.

Add egg mixture to the flour. Gently fold eggs into the flour. It will look lumpy.

Make sure the milk mixture is cool to the touch.
Next, Add milk mixture to the flour mixture. Whisk to mix gently.
Strain the mixture.
 Refrigerate for minimum of 12 hours. I've tested with 6 hours with my new recipe combination and it turned out satisfactory. However, I noticed the difference in batter's aroma, it lacks the sweet mature aroma of rum and sugar when it is refrigerated less than 12 hours.
When ready to bake, bring it out to room temperature for minimum of 1 hour.
 Coat each Canneles molds with unsalted melted butter or "beeswax and butter".
Tip**Leave the molds in the refrigerator for a few minute. Although this image shows copper tin-coated canneles molds, I have acquired Non-Stick Aluminum canneles molds as well, and have successfully baked the Canneles in them.


Preheat oven to 180C or 365F -- Electric Convection Oven brought the best results in testing last 5 batches. Nice even brown and within a reasonable time. Baking Canneles in Conventional GE Gas Oven/Stove worked out well, but the results have been a bit unpredictable. But I am sure it is more than the temperature that played a role producing perfect Canneles, such as thickness of the baking pan that molds were sitting on, how many molds were on it, which height level the baking pan were set in... all these seemed to have tampered the result of the Canneles.
 Use 1/3 Measuring Cup to scoop batter mixture into molds.
**Do not fill up the mold.
Line up the molds on a baking pan with rim to catch butter spill during baking.
*I've used melted 100% pure beeswax and butter as the traditional recipe calls for. I find the unsalted butter working just as well and giving the shell the "shine". However, without beeswax mixed with butter coating Canneles Molds, Canneles tend to get stuck during demolding.
Tip: You can order 100% Pure Beeswax with no chemical additives at Sacramento Beekeeping Supplies, http://midtowngrid.com/sacbeekeeping/sacbeekeeping.shtml.
* Never use Candle Wax from your ordinary candle.
This batch is baked in the conventional gas oven. Make sure not to crowd the molds on the pan. As you can see, the batter starts to puff up above the rim.

Baking period seems to be the most critical part of the Canneles baking.
Baking for 1 hr 30 min in gas oven still did not brown the Canneles -- the recipe from Foodnetwork's "Canneles de Bordeaux." Additional 15 to 20 min were required for pan of 15 canneles molds to become beautiful brown.

Towards the end of baking period, I took one out of mold to check the status of shell caramelization. Reverse the mold and tap it gently and Cannele should slide down. If it is still pale, I baked it longer; however, I noticed that the longer you bake, the tougher the center. Which is true with any custard or working with eggs. So, again, here the counter-top electric convection oven I bought brought the best timing in baking and in texture and taste.

 These are the ones done in gas oven---after close to two hours of baking.
Tips: Do not buy and use non-stick Cannele molds. The fume from the teflon burning at 450'F is a killer.

The result of Pumpkin Buttermilk Canneles de Polly is surprisingly delicious. The recipe measurements were done after deduction of study of recipe of Canneles from www.MeilleurChef.com and Foodnetwork's "Canneles de Bordeaux" recipe and Gale Gand's recipe and of course, after 14th batch baking tests.

This is the recipe of Foodnetwork's Canneles de Bordeaux that I baked in Batch 18, except I modified the way I mix and amount of sugar. As I mentioned above, I beat the eggs and sugar together till lemony rather than just "whisk" eggs and add rum. & increased the sugar from 1 Cup to 1-3/4 Cup. I think 1-2/3 Cup will do just well -- I will test that on the next batch.

I hope this will add some flavor and encouragement to your adventure in Canneles baking. They are just YUMMMY!!
Wednesday, October 11, 2006
Canneles de Polly? Canneles Adventure

Canneles de Bordeaux --- I have never gotten so interested in baking pastry until my friend showed me the Canneles copper mold she acquired. It was at one of her end of summer BBQ dinner she invited me to. As she is an experienced French Pastry Chef, I listened attentively to what she was telling me about this tiny crunchy chewy caramelized cake as I ate her wonderful tasting flat plum pie she made from scratch. As I listened to her, my interest got heightened by each bite of delicious plum pie. Canneles (CAN-A-LAYS)? How in the world I missed it during m y trip to France? Hmmm… I went right to work as I returned home that night. I did a web search on all the information there is about Canneles. That was the start of my adventures of Canneles baking. Thus far, I have baked 26 batches of Canneles. Twenty Success, Two Flops, and Four Questionables.
 y trip to France? Hmmm… I went right to work as I returned home that night. I did a web search on all the information there is about Canneles. That was the start of my adventures of Canneles baking. Thus far, I have baked 26 batches of Canneles. Twenty Success, Two Flops, and Four Questionables.
I hope my Canneles journal will give you encouragement and start your adventure in Canneles baking. If you have any question that I can answer, please e-mail me.
The Canneles images on this blog are from my batch 7 and 8. Copper/Tin molds were special purchase from France, and they are circa 1950, and they still work.
Monday, May 01, 2006
Lemon Pepper Flavored Bread with Garlic
Make One 4 Lb Loaf Bread, using Home Baking Machine - WelBilt or any other brand.
Ingredients -- Pour the ingredients into Bread Machine Baking Basket in the Order Listed:
**Make sure the Bread Machine is located in a room above 69 degrees.
**Preheat 1 & 1/4 Cup MILK Plus 1/4 Cup UNFILTERED Tap Water to 120 degrees in Microwave. Let it Sit and ADD it as Ingredient Item 5.
1. 2 Teaspoon of Rapid Rise Dry YEAST
2. 2 Tablespoon Granulated SUGAR
3. 3&3/4 to 4 Cups of Angor Flour for Baking (COSTCO's 25lb bag)
4. 2 Teaspoon SALT
5. ADD 1& 1/2 Cup of Preheated MILK and Water.
6. 2 Tablespoon of Canola Cooking Oil
(6a. DO NOT PUT in YET: 2 Tablespoon of Lemon Pepper w/Garlic flavor Spice.)
Start Bread Machine:
7. Insert the Bread Baking Basket securely.
8. Start the setting - 4 Lb loaf, Light Color, Run now.
9. At the sound of "ADD" ingredients BEEP timer, ADD 2 Tablespoon of Lemon Pepper w/Garlic spice.
Approximate Time of Prep & Bread Completion: 3 hrs 30 min.
The bread tastes with a hint of tanginess from lemon and flavorful pepper and garlic. Great for anytime with butter... butter tastes better, but use it moderately.
Eat Well, Be Well.
MODIFIED Flavor:
Add a 1/2 Cup of Raisins during the "ADD" CYCLE.
Add some Cinnamon spice to the dry ingredients after adding Flour.
Check the height of the dough about 20 to 30 minutes after the "ADD CYCLE". If the dough has not doubled, your room temperature could be the culprit.
Monday, February 13, 2006
Rum Fruits Preserves
The dehydrated fruits and canned pineapple soaked in spirit of Barcardi Rum, Brandy, and Grand Manier provides interesting taste to your regular sponge cake, holiday fruits cake, or just to sample some after dinner.
*This is very sugary and highly spirited. Recipe calls for real liquor.
PREPARE Rum Pot Starter:
1 clean 1/2 gallon or 4lb 6oz glass jar with lid
(use Maraschino Cherry jar)
2 Cups Maraschino Cherry juice
1/4 Cup Grand Manier
1/2 Cup Barcardi Rum
1/8 Cup Brandy
1 Cup granulated sugar
WOODEN SPOON
Total of 3 Cups of various dried fruits cut into 1/2-inch size:
Dried Cherries
Dried Apricot - cut into 1/2 inch
Dried Mango - cut into 1/2-inch pieces
Raisins
Maraschino Cherry
1 Can -- 20 oz Pineapple Chunks drained well
Discard juice or use it for other recipe (for sweet and sour pork sauce for your dinner.)
You can buy large jar of marching cherry at your local COSTCO.
With1/4 jar of maraschino cherry left over, drop prepared 3 Cups of dried fruits and well drained pineapple into the glass jar. Cover the fruits with all liquid ingredients - Rum, Brandy, and Grand Manier. Top it off with 1 Cup of sugar. Place the lid on the jar, but not closed or tightened.
Place the jar in somewhat warm spot in the kitchen, and away from direct light. Sugar will slowly dissolve into the liquid in a week. If you see any sugar left on top on the 7th day, stir it once with the Wooden Spoon.
WEEKLY ADD ONS:
Prepare - 1 Cup of dried fruits or 1-20 oz drained pineapple on Alternate Week
1 Cup of Sugar
Add 1 Cup of dried fruits or drained pineapple.
Add 1 Cup of sugar on top.
Place the lid back (loose)
After two weeks, you can start enjoying the Rum Pot fruits with your favorite desserts or as is (in a small portion).
Always use Wooden Spoon to stir or scoop out.
Add Rum or Brandy when you feel it needs some kick or it started to taste sugary.
e.g.
Prepare your cake mix. Add 1 Cup of Rum Pot fruits. Bake it in non-stick Bundt cake pan.
My favorite fruitcake recipe is from the foodnetwork, but modified in my own way to add my Rum pot fruits in place, etc. and Spray the cake with juice in the rum jar using the sprayer everyday for a week+ before presentation. Serve it warm.
Subscribe to:
Posts (Atom)