Saturday, July 11, 2020

Homemade UMEBOSHI Photo Journal

There are so many varieties of UMEBOSHI in asian grocery store to choose from.  The ultimate winner that find its way into my home is the one that meets my expectation.  Less salt, no heavy corn syrup, no preservatives and no artificial color.  It's challenging to find them.  This year, my family gave me some Japanese UME / Plum.  I didn't work with it right away, so it became a bit ripe to make UME wine.  The alternative is to try making UMEBOSHI.  I used coarse sea salt, but a finer salt give a better result.
I am not too sure about using the plastic container either, but it says to press down on the plum after sprinkling salt for a few days.
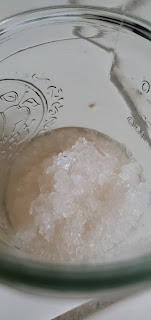
The coarse sea salt took too long to liquify to ferment UME.
Transfer them onto dry tray.  Keep the liquid and container intact.  They will be used again for 3 days.  Dry them out in the sun.
I used a net cover to keep bugs away.
Because the sun is so much hotter in Sacramento than in San Jose area, the salt crystallized on the surface much faster. 
At night, take it back in and put back in the same container.  Repeat the drying process 2 more times.
Because the sun is way too hot in Sacramento at 100'F, I only did the drying process 2 times.
Sanitize mason jars.
Gather and clean SHISO leaves.  Place them in the jar.  I added a little bit of ground Sumac.
Cap the jars and store in refrigerator for a couple of weeks.  It's read when SHISO leaves are shriveled.
Polly's Testing of KARA-AGE Chicken

After watching Japanese TV series "Midnight Diner" on the NetFlix, I thought I would try making the KARA-AGE Chicken.  Never thought, it is so simple and so delicious.  When it comes to preparing chickens, it's a major operation for me.  Sanitizing the kitchen sink and the counter.  Double precaution while cutting up the whole chicken that nothing in the surroundings get contaminated.  Kind of phobic about it.  Nonetheless, ingredients are any chicken cuts of your preferences, Japanese KATAKURIKO - Potato Starch, ginger, garlic, salt and pepper and frying oil, frying pot.  Sprinkle ginger, garlic, salt and pepper on chicken pieces.  Add potato starch.  Marinate for 30 min.
Deep fry at 180'C .  Deep fry -  twice to get crunchy shell - until golden.


Serve with Salad or saute'd chopped onions, celery and bell pepper with mixture of soy sauce and a bit of sugar.


Spiced Up Chewy Chocolate Chip Cookies with Cranberries

Daily telework needed some spiced up taste to awaken my senses after long hours of staring at the computer screen.  I finally concocted a batch of cookies that resulted in the chewiness that I have been looking for in my cookies.  The last three or four testings during the COVID-19 stay home baking did not turn out quite good.  The recipe was from here and there all claiming to be Chewy.  But almost all of them turned out to be cakey.  You can't blame it on other people's recipe.  After all, it's not my first time trying to bake cookies.  
So the ingredients are simple. 
1 stick room temp unsalted butter
1 C Brown Sugar
1/4 C organic Cane Sugar
1 tsp salt
1 egg, well beaten in a small bowl.  Set Aside.
1 tsp home make vanilla extract
1/4 tsp Cayenne Pepper
1 tsp Chili Pepper Flakes
1-3/4 C flour + 1/2 tsp Baking Powder = shifted
1/2 C chopped cranberries or anything you like
3/4 C semi-sweet European chocolate pistoles chopped
1/4 C Milk European chocolate pistoles chopped
Baked in 350'F gas oven for 12 min or there is a sign of browning around the edge.

Cream butter in a bowl.
Add brown sugar, cane sugar, salt, vanilla extract, cayenne pepper, chili flakes and mix well.
Chop cranberries and chocolate.  Add to the butter mixture and mix well.
Add shifted flour. and mix well.
Preheat oven to 350'F.
Scoop the dough with 1" cookie scoop, if you have one. Space 2 inches apart.
Bake till edges are slightly browned - about 13 to 14 min.
Very nice chewy result that I really like.  The cayenne and chili flakes snap you out of your telework mode. 
With the 2nd batch, I added 1 extra egg.  But it did not give the shiny brownie top effect and make the cookie a bit more spongy.
Should have stayed with 1 egg.  The left with 2 eggs; the right with 1 egg.


Sunday, May 31, 2020

Fresh Cold Leek Potato Soup - a Quick Way

Another crazy thing not to do is to cook soup in a hot summer weather.  But I cropped it from my garden.  I thought they were garlic that I planted but, the garlic don't grow big green leaves and thick tubes.  They were next to the leeks.  Although it is very hot, I had to cook it, then, I can have cold soup for lunch and dinner.
Here is my photo journal for fresh Leek Potato Soup for 2020.  If you do a search, you can find the recipe in my previous post from a few years ago.  However, this time, I made it real simple.  No milk or cream, just cook them with chopped onions, chopped potato, a sliver of thyme in butter, salt and black pepper to taste.  Added plain water.   Cook.  Processed in InstaPot blender in Smoothie mode (which actually would have cooked it for me, but I forgot.)  The smoothie mode will process it without heat.
Leeks are growing in left side of the box
Chop leeks, 1/2 onions, 1 potato, a sliver of thyme, salt and black pepper, etc.  Saute in butter. Then, add water to cook through.
Set to Smoothie - cold process mode.

Put through the Sieve.  After though - I think it was unnecessary. 
The Smoothie process mode did a real good job.
Very tasty even a day in the refrigerator.  Enjoyed the cold soup the next day on hot 104'F day.

You can heat it up in the microwave oven for 20 sec to warm it up a tidbit, but it was delicious as is out of the refrigerator.

Polly's Quick Summer Pickled DAIKON


The pickle juice is very basic - White Vinegar, sugar to taste - SHISO leaves, Chili pepper flakes - just a few flakes is sufficient.  Ignore my picture of potful of reddish pickle juice !!! I had an accidental pouring of it.  That's why it looks so red. I took as as much as I can, but it turned the juice red anyways.  Added a few whole black pepper.  And I forgot to add Lemon juice and Lemon peel.  Oh well.
Jarring them takes the usual canning caution.  Sterilization of the jars and lids, etc.
Ready for eating in 2 to 3 weeks.
Can't wait to each them.
Ug! looks like making Enchilada sauce.
Slice the DAIKON into 3 or 4 equal length.  Then, trim the DAIKON in a circular motion as though you are peeling a 2 to 3 millimeter thick ribbons.  Then, stack them up and slice them into sticks.
Stack them into the sterilized jar.  Add the juice.  Wipe the jar mouth with clean paper towel.  Place the sterilized cap and ring. Do NOT tighten the ring all the way.  Leave it loose 1 full turn.
(Not sure where my jars and caps sterilization pictures are, but I think you know how.)
Place the filled and capped jar into a large pot of cold water and boil till you see some juice in the jar bubbling.  Turn off the heat and remove the jar on top of a towel (not on any cold surface). 
Let it cool naturally and until the dimple on top of the cap sunks in.  Tighten the jar ring.  When completely cooled.  Store in the refrigerator.
Ready to eat in 2 to 3 weeks.
Uncap and place the cap on a clean surface with lid facing up in the ring.
Always use a clean utensil to take out the amount you need.  Never with dirty/used utensil.
Wipe the jar lips clean with clean moist paper towel.    Do not leave sweet juice around the jar lips.
Place the jar cap and ring back on and refrigerate.


Stir Fried DAIKON Greens

It's kind of terrible to stir fry in the house during hot weather, especially when it hit 104'F outside and your budget can't afford turn the AC on.  But you got to eat green veges.  
So, there are few ways to eat this, but I like to stir fry the DAIKON greens (Japanese white radish).  My family gifted me a fresh DAIKON from their local farmer's market.  I am very happy to receive it because it comes with the GREENs attached.  I don't know why our local grocery stores like Raley's and Sprout got them without the greens.  Anyways, they were wilted by the time I drove 2-1/2 hours back to Sacramento, then, in the refrigerator for a couple of days.  I just wash them and soak them in a clean tub of fresh water.  After 30 minutes, the greens started to revive.  After an hour, I think they were growing.
After slicing them off the top of DAIKON, I soak them in salt water for a while, then, wash them carefully to remove any UFO. 
I cut them into small bite sizes.  Crush the garlic cloves.
Heat up the skillet hot, add the cooking oil. Add garlic cloves.  Then, ZzChaAa!!  in goes the Greens with fantastic familiar sound when my mother cook greens with her 42+ years old Chinese iron wok.
Stir all green well with the oil.  A moundful of greens will shrink within minutes.
Keep stirring.
Add 1/4 C of water, a pinch of salt to taste and Cover to cook over medium heat.
Don't go far.  It cooks really fast.
Cook for 2 minutes.
Uncover and taste.
Serve.

The wilted greens looked lifeless.  This picture was taken after 10 min in water during washing.  Then soaking for 30 min.
After 30 minutes, it started to look alive.
After an hour, it started to stand up.
After an hour, it looks like it is growing.
Slice the greens off and soak them in salted water for further cleaning and washing.
The top part... I buried it in my garden.
After an hour and half.  Time to chop into bite size.
The pan is heated.  Oil is heated and shimmering.  Add garlic.
Add Greens and stir fry 2 to 3 min.  Add salt to taste.   Add 1/4 C water, Cover. Cook 2 min. 
I added some cooked extra long gran Basmati rice to make DAIKON Rice.

The DAIKON parts, I cut them into equal sizes and shaved it in circle to obtain ribbons of DAIKON.  Ready to make DAIKON sticks, so I can make DAIKON pickles.  I don't really care for the TAKUWAN because they can cause gassy stomach.  But I like refrigerator DAIKON pickles.
The root... I tossed it into my garden soil.