Sunday, September 05, 2010

Pandan Chiffon Cake with Strawberries

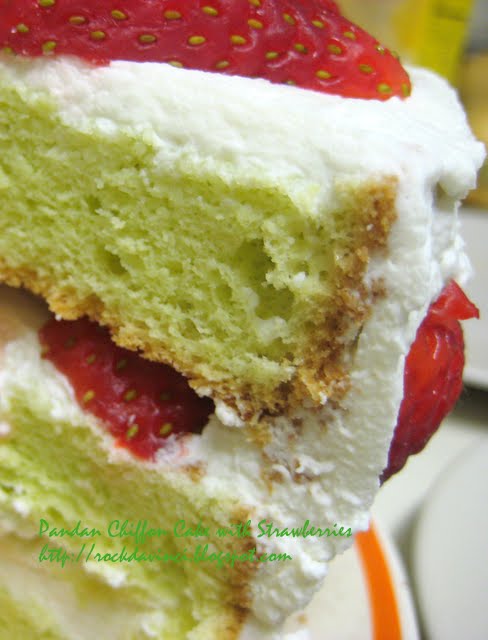
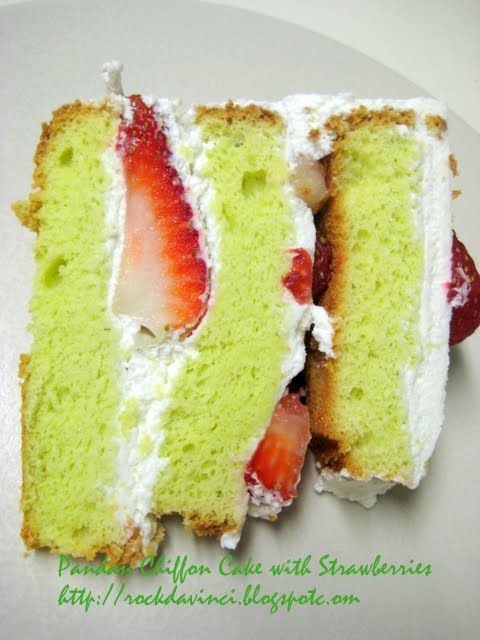
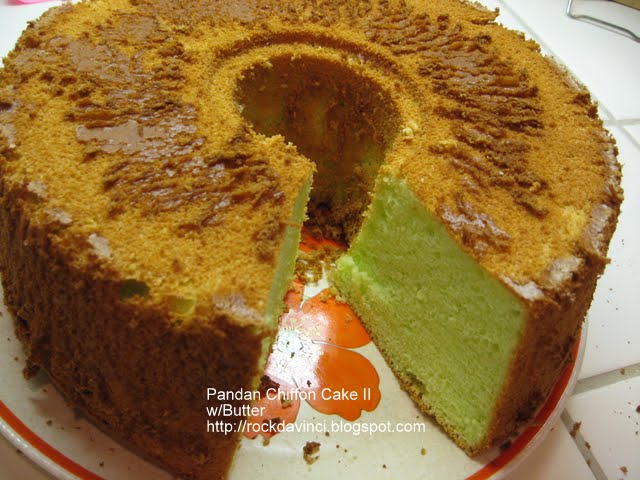
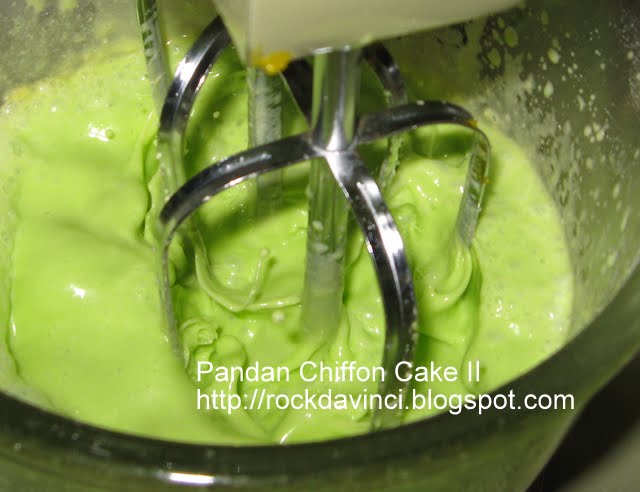
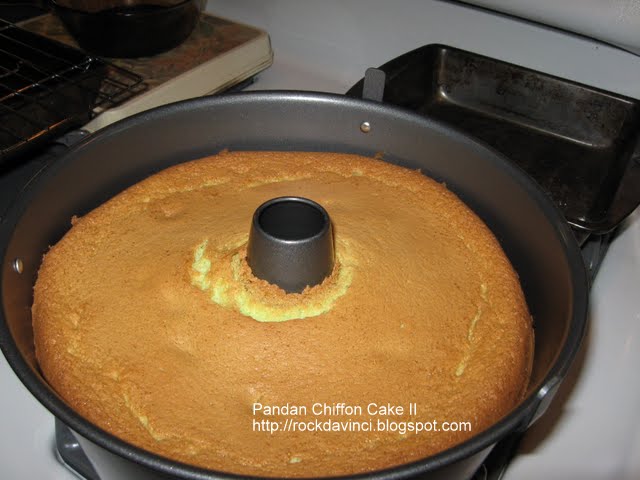
This is the Pandan Chiffon Cake version made with home prepared fresh coconut cream and freshly squeezed pandan juice. I find this adventure as fun as Canneles de Bordeaux. Simple ingredients, yet the mixing technique or the baking temp can break the cake.
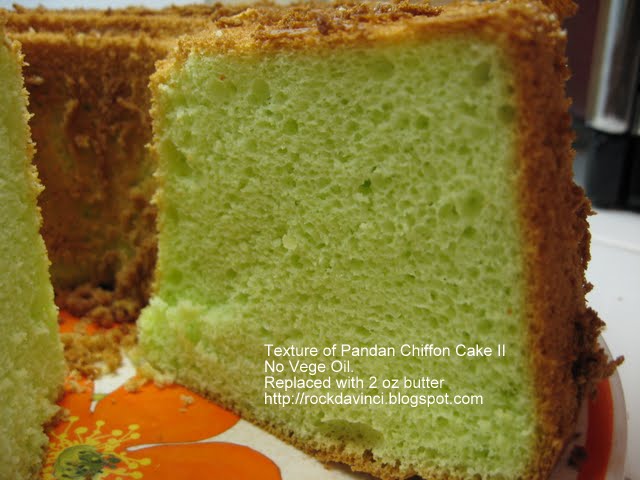
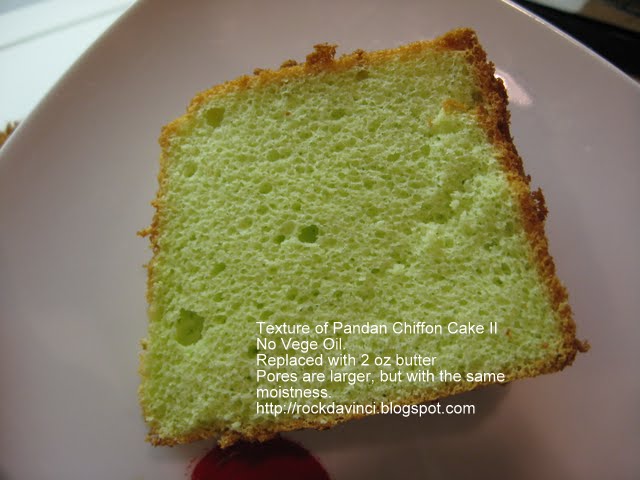
The recipe is the same as the last posting (from Seadragon). The photo shows the texture of the cake with larger pores than the 1st cake--very fine, pound cake like texture. I forgot to give it a quick snap tap before I put the pan in the oven. The moisture is just as great, however. Taste - great taste! Just the thought that you labored over squeezing the fresh coconuts cream and pandan juice really make the cake taste even better. If I have eggs from home raised chicken will add another plus to the taste bud, especially we are experiencing the Salmonella recalls on eggs.
The memorable part of producing fresh coconut cream and pandan juice this time will stay with me for a long time. Anytime I think about making my own fresh coconut milk/cream, I think about this metal bar coconut shredder tool of Viet-Nam. Well, that was back in the 70's. I don't have the shredder tool nor the time. It is already 8 pm on Thursday evening. I just got back from SF Supermarket in Sacramento after work. I luckily found Pandan leaves - "La Dau" is the descripton on the package. I also picked up Large Taro Root, and Wow! I found Drangon Fruits --- Wow! $3.99 a pound. But I can't possibly pass this chance. I bought two of them - $eleven Bucks!! I hope it will taste good when I try my hand on the Dragon fruit Sherbet bom bom I saw. So, where was I.... yes, the coconuts. I got one 'old' coconut and one 'young' coconut. I enclosed it in a plastic grocery bag and hammered down hard on the 'old' coconut's eyes. Yep! thick white coconut meat. Pour the juice into a bowl, filter it once through a strainer. Then, I used the pairing knife and remove the tough membrane-peel off the white meat. Cut into 1 to 2 inch chunks. Keep chunks in the juice to keep moist. Wash Pandan leaves thoroughly, cut the bottom steam - about 3 to 4 inches - ** this is my first time working with Pandan, and by 'touch' I find the stem to be quite tough. So I am guessing, like Broccoli or Asparagus to cut back some to the tender point? Cut the leaves into 1 to 2 inches. Add 1/2 C water + Cut Pandan leaves into food processor. Process it till it is .... wait, what's going on? I don't see any juice. It seems that the leaves have drank all the water. I barely see any juice or sqeezeable juice. So, what is going on here? I have the slightest clue because I have never seen this Pandan before nor how it is processed.
      Let me think about this. 
Back to the tool of choice to shred the coconut to produce coconut cream/milk... Of all the tools I have - 
Option 1: I could use the blender and puree it with some of its own juice, then squeeze. 
Option 2: Use the food processor. 
But after some thought, I decided on the "The Juiceman Jr." I might be able to produce the coconut cream and finely shreded coconuts that I can process further to get coconut milk. Bingo! I got the freshest and creamiest thick coconut cream. While it may be risky to use the Juiceman - as the coconut meat is quite hard, I was not sure if the Juiceman's fine shredder teeth could handle it. 
1 'old' coconut + 1/4 C coconut juice produced 175 ml coconut cream and 2 C finely shredded coconut. 
Back to the Pandan leaves. I was not about to give up on $5 worth of 15 Pandan leaves. The Juiceman is the answer. I processed the Pandan leaves with the Juiceman and I got 75 mil of Pandan juice. Whew! but wow! that's all? (I wonder how much do Pandan leaves cost in Malaysia or Singapore.)
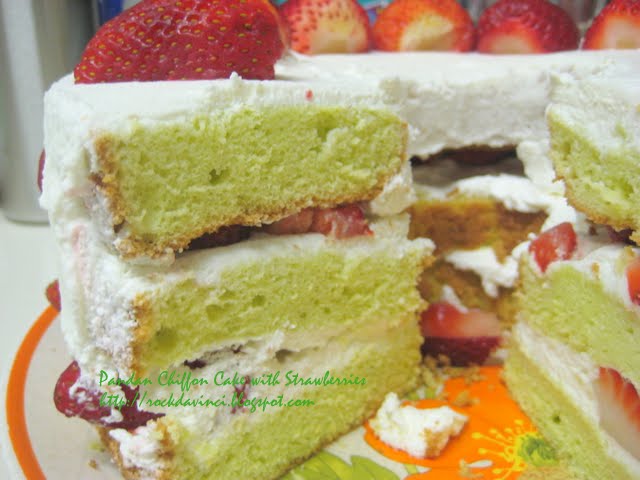
Instead of oil, I used 2 oz of soft butter. Chill. The next day, I whip up a pint of heavy whip cream... it is not enough to cover the cake. I should have prepared the pastry cream, additionally. But I have to make a do with it. We enjoyed every bite of the fresh taste of this Chiffon cake.

Tuesday, August 31, 2010

5 Minutes Breads and Soups

On my blogsite, there is a link to the YouTube Culinary Science video.  I noticed that one of the link is a demo on how to prep bread dough in 5 minutes and on the next day you have artisan bread for supper.  I thought I give it a try since I posted it there.  The bread turn out great.  The first bread was a tester, but it turned out just in time for my lunch with Chicken soup (canned).  Then, the next bread #2 turned out wonderful and finished in time for my supper.  I even had enough time to crop fresh corn from my garden and made them into soup.
So, the "5 Minutes a Day Bread" is worth giving it a try.  I might even buy the book.

Thursday, August 26, 2010

Pandan Chiffon Cake II

Here is how my Pandan Chiffon Cake with Butter, no vege oil, turned out.
I used the same recipe from the previous Pandan Chiffon Cake.  I omitted the vegetable oil and replaced it with 2 oz of butter.  I was careful to whip the egg whites to stiff peak but not dry, then fold it in gently to the egg and flour mixture.  This time the cake volume is higher than before.  The cake rose about an inch during the baking.  It is not as high as the Seadragon's Pandan Chiffon Cake.  In her photo, her cake rose above the rim.  I made sure the tube pan I am using is the same size.  The texture is not as 'fine' when the vege oil was mixed in.  But this is too early to decide if that is the reason.  I will need to bake a few more times.  It maybe because I have over beaten the eggs . . .  The cake is moist just like the Pandan Chiffon Cake I made previously.  It tastes delicious still - light and moist.   I am trying to upload the video to YouTube of how I folded the egg whites into the egg/butter mixtures, but it is taking a long time.
After over an hour, my video recording of mixing egg whites got uploaded to the YouTube:
http://www.youtube.com/user/UMECHANKICKS?feature=mhum  And I am happy to see so many other How To's at YouTube related to Chiffon Cake making.  I spent over an hour studying how others are doing it.  And I am convinced that mixing with bare hand would be the best method to mix the egg whites... and I would like to try that next. 

Monday, August 23, 2010

Chiffon Cake Testing

This is how my Chiffon Cake testing turned out. The recipe is from Happy Home Baking http://happyhomebaking.blogspot.com/2010/08/breakfast-chiffon.html
Her work is always an inspiration for me. I was limited with time, so, I quickly tried the basic ingredients. Okay, I misread her baking pan size. So, my tube pan is the regular size. If it had been the small angel food cake tube pan, it would have looked normal. It looks like a wheel. I think that's how the wheels are invented...
It taste so good that I did not make time to make any frosting or cream... I should have. Maybe not this time round, but I will try to give it a finished look the next time.


Posted by Picasa

Pandan Chiffon Cake Adventure

PANDAN CHIFFON CAKE - doesn't it sound mysterious and delicious? I came across this recipe while visiting few of my favorite food blogsites (listed under "My Inspiration". ) I always wonder what that peculiar flavorful aroma I smell when I go near Asian pastry with 'green' color to them. I thought it was coconuts. After understanding that 'stuff' is Pandan - I went to the local Asian market in Sacramento to search for it. I found the fresh Pandan leaves. It was named Landau or something like that. I was not sure what it was, so I asked other shoppers, and they confirmed that it is Pandan leaves. Sadly, after the purchase, my work got so busy, I did not have the time to prepare it. So, after a week, I had to discard them. But I had Pandan Paste in my pantry from the previous week's shopping. (I was bit hesitant to use it because of the food coloring, but I only used a drop... it turned out beautiful color and added a delightful complimentary taste to the coconut flavor.) I didn't have fresh coconut meat to shave either. So, I used coconut powder mix to suffice. It brought back the memory of how we used to shave the fresh coconut meat with a shaver and squeeze the fresh milk out -- that was a good ole' days in S. Viet-Nam. In San Jose area, there are several bakeries (Hong Kong style) in 99Ranch that are quite popular. And many people love their cakes. I could not figure out what type of cakes they are. Now, I know--it is this Chiffon. The recipe for this Pandan Chiffon Cake is from the Seadragon's site at http://cornercafe.wordpress.com/2010/02/20/pandan-chiffon-cake/#comment-1635 As many other experienced bloggers have commented at both Happy Home Baking site or at Seadragon, the final gentle folding of the egg white is indeed challenging. This Pandan Chiffon Cake turned out great. Baked in the Angel Food Cake Tube pan. Baking at 160C. I read other bloggers' comments that baking at lower temperature prevents cracking at the top during the rise. Irregardless, I am very pleased with the result and taste. It looks great and yummy.


Posted by Picasa

Tuesday, August 17, 2010

Melon Rum Flavored Canneles

I thought I would try baking Canneles de Bordeaux using Melon flavor Rum.  But ... I should have stayed with the Dark Rum.  Tonight's testing was to bake test with melon flavor rum, and using silicon baking mold.   Even though I do not have a "silicone Canneles molds", I improvised the regular silicone baking mold to test.
The baking result:   The copper canneles molds are still the best.   The aluminum canneles molds did a good job.   The silicone baking mold did not caramelize the outer part of the Canneles as copper and aluminum molds did.  But, it turned out interesting, I think. 
Taste testing:   The Canneles baked in silicon mold's outer shell did not pass the Canneles' egg shell crunchiness.   Even after 1 hr 40 min of baking, the caramelization is not 100%.  The texture is chewy.


I made petite canneles rather than the usual demi size because I wanted to quickly bake and find out the result.


Summer Garden Vegetable Lasagna

So, what to do with pounds of beautiful home grown Romano Tomatoes that my friend game me? and Eggplants?  and Bell Peppers?  I had a couple of ideas, but I chose to make Lasagna.
Lasagna seems so simple to make.  A layer of this and a layer of that.  But, the Lasagna pasta is not very forgiving to prepare since all our pots are round, and they are rectangle.  But I came across this pre-cooked lasagna.  It seems that all I need to do is add them between the layers of sauce.  I tried it and I love it.
Ingredients:
8 to 9 lasagna pasta, "No Boil Required"  by Barilla
1 small red onions - chopped
2 small green bell peppers (optional), chopped
3 Tbsp Traditional Basil Pesto sauce
3 lb Ripe Romano Tomatoes, washed, seeded and cut into chunks
10 pieces of Chicken strips grilled in George Foreman's Hamburger grill
1-1/4 lb Japanese eggplants, sliced and grilled in George Foreman's Hamburger grill
1/2 C Sun dried tomatoes - rehydrated in 1/2 C hot water
1-1/2 lb shredded Mozzarella cheese
Sea Salt - 1/2 Tbsp
1 tsp black pepper
1 jar - 24 oz Classico Spicy Tomatoes & Pesto sauce
1 Tbsp butter, unsalted
1 Tbsp olive oil
2 Tbsp Oregano.  Add 1 Tbsp at a time to taste.

Pan:  9x9x2-1/2 baking dish or any others, but don't forget to increase the amount of lasagna pasta.
Baking Temp:  Bake covered in aluminum foil at 400'F until the internal temperature reaches 165'F or higher and bubbly.
Preparation: 
Slice eggplants lengthwise and grill in George Foreman's countertop hamburger grill.  It should be somewhat translucent.  Cut with scissors into smaller pieces.  Set aside.
Grill chicken strips.  Tear apart into smaller strips.  Set aside

Saute onions in butter and olive oil till translucent.  Then, add bell peppers. Stir fry 1 min.
Lower heat and add Traditional Basil Pesto.  Stir to incorporate.
Add Romano Tomatoes.  Add salt, black pepper, and 1 Tbsp Oregano.   Turn to medium high heat. Cook 3 min.
Medium low heat - Add Spicy Tomatoes and Pesto sauce.  Taste and add more salt and Oregano, if needed.  Stir and cook till heated through.

Time to assemble -Preheat oven to 400'F.  Have aluminum foil handy.  Extra baking pan or sheet to catch spill.
In the baking dish:
1.  Add tomato sauce
2.  Add lasagna pasta
3.  Add tomato sauce
4.  Add Mozarella
5.  Add eggplant pieces
6.  Add chicken pieces
7.  Add Mozzarella
8.  Add sauce
9.  Add lasagna pasta
10.  Add sauce
11. Add Mozarella
Wrap up in Aluminum foil and place on top of baking sheet or another larger size baking pan.
Bake till bubbly and internal temperature reaches 165'F+.  Approx. 1 hr 40 min+


Taste test:  Delicious.  I am sure there are other ones out there that is also.  But I got to use all the homegrown veges in one dish, and thank goodness for the "no boiling required" lasagna pasta and George Foreman's grill.  It saved me time. I would consider to omit the bell peppers after stir frying them.  I tasted bitterness in the outer peel.  May be peel the bell pepper before stir frying?  that may be a good idea.