Sunday, December 13, 2009

FUYU Cake with Grand Marnier Frosting

In November, we had a Persimmon Party.  We had salad with persimmons and fennel; persimmon salsa, Couscous with Persimmons, cranberries, and hazelnuts; FUYU Cake with Grand Marnier Frosting; pot stickers and roasted pork.  Well, the pot stickers and roasted pork did not have persimmon ingredients, but they were sure good.
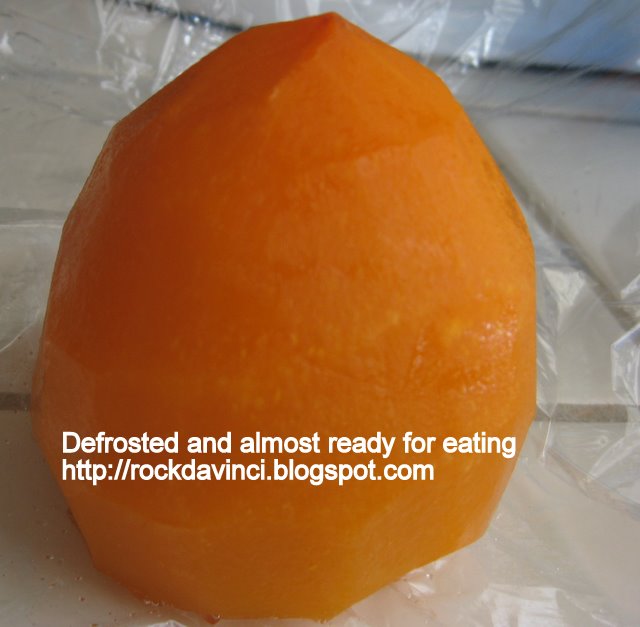
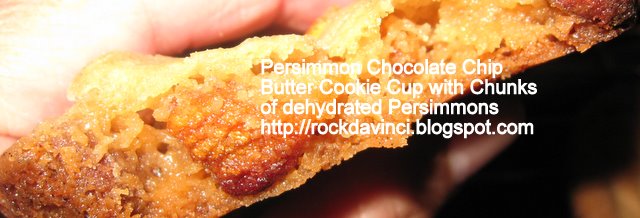
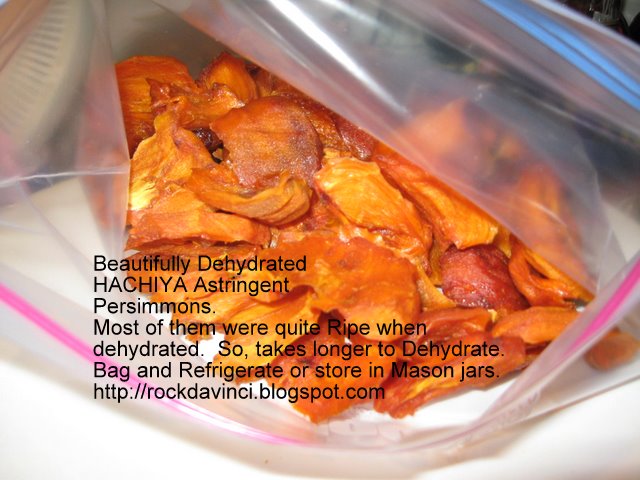
FUYU persimmon is the non-astringent type.  It looks like a squashed ball, like a fat saucer(??)
It is edible while it is still crunchy.  You can taste some low level of tannin in some of the FUYU type as you bite close to the core.  The best way to pick and eat the FUYU is when the outer skin is all evenly colored in deep orange, but not translucent.  When peeled, I prefer it peeled, you will see lines of brown all around.  I am not a food scientist, but I think they are concentration of sugar... like when banana starts to brown on the skin.
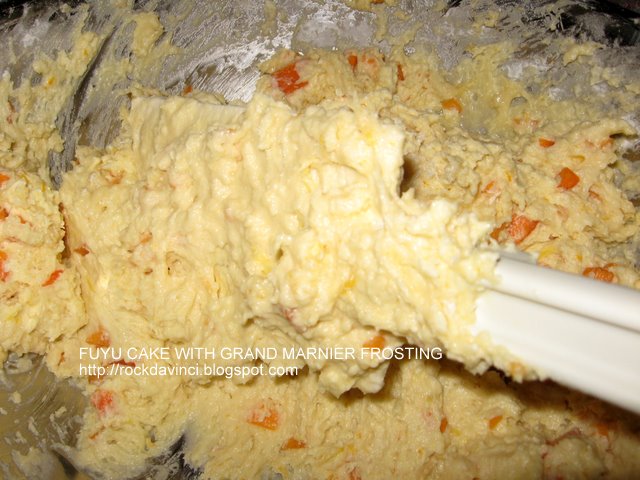
The original recipe to this cake with Grand Marnier Frosting calls for Cranberries.  I decided to test with the FUYU persimmons.  Chopped two small persimmons were just enough to make 2 cups.  There are about 1/4 Cup of Grand Marnier in the Frosting.  The cake is heavy and dense.  It's almost in the category of pound cake or bread.

Makes 2 regular loaves or 6 mini loaves.  Or use 1 Bundt Cake Pan plus 1 small loaf pan
12 servings per large loaf
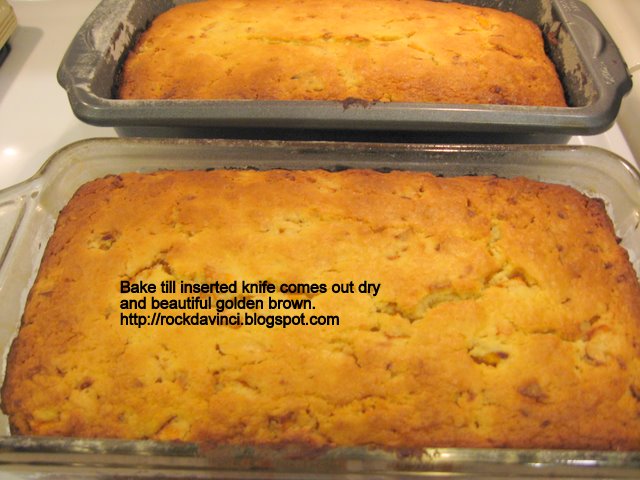
Preheat oven to 330'F.   Bake for 1 hr 10 min to 1 hr 15 min for large loaves & 60 min for mini loaves.
Ingredients:
1-1/2 C Unsalted Butter, Softened, plus more for buttering pan
1-1/2 C Sugar
4 Eggs
1 C Orange Juice
1 C Sour Cream
2 Tbsp Freshly Grated Orange Zest
2 tsp Vanilla Extract
4 C All Purpose Flour
1 Tbsp Baking Powder
1/2 tsp Salt
(1-1/2 C Dried Cranberries - Optional)
2 C FUYU Persimmons - Chopped
2 C Powdered Sugar
7 to 8 Tbsp Grand Marnier

Methods:
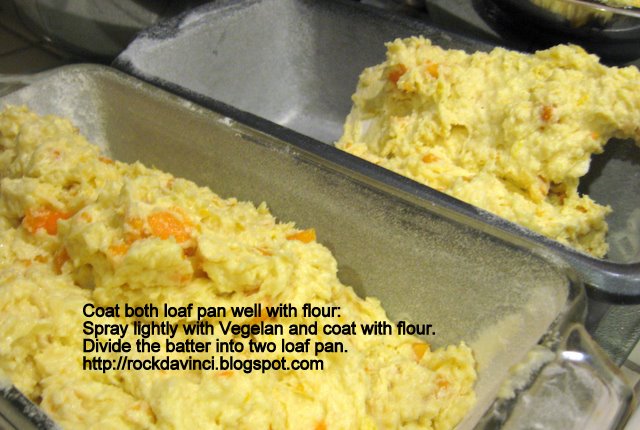
1.  Butter and dust loaf pans with flour
2.  Creaming Method: Medium speed, cream butter & sugar until fluffy and pale.
3.  Add eggs one at a time, mixing well after each.
4.  Add Orange juice, source cream, orange zest, and Vanilla.  Mix well until blended.
5.  Whisk Dry Ingredients:  In a large bowl, whishk together Flour, Baking Powder, and Salt.
6.  Folding:  Add Flour Mixture, Persimmons, into butter mixtures - Using the largest spatula you have in your kitchen, fold and turn, fold and turn until well blended, but do not overmix.
7.   Pour the batter equally into the loaf pan.
BAKING:
8.  Bake for 1 hr 10 min to 1 hr 15 min at 330'F or until the toothpick inserted in centers come out clean.
GRAND MARNIER GLAZE:
Whisk:  In a small bowl, Whisk together Powdered Sugar and Grand Marnier slowly to watch for the consistency - Glaze should have consistency of thick syrup or corn syrup.  If it is too thick, add additional liqueur.
COOLING & GLAZING:
Cool for 10 min, then remove and transfer to a cooking rack set over a large baking sheet.  (Except that I was taking mine early morning to the office, so I left them in the pan.)
1.  Using a long skewers of some sort, poke deep holes in tops of the cake.  Drizze with Grand Marnier glaze to cover the entire cake & seeps through the holes.
2.  Let the cakes cool completely, then slice and serve. (or wrap and freeze, if you would like.)


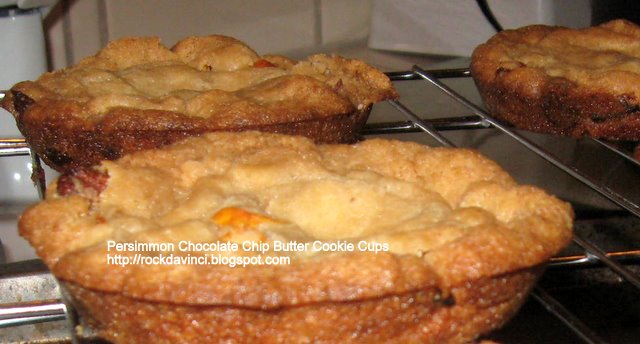
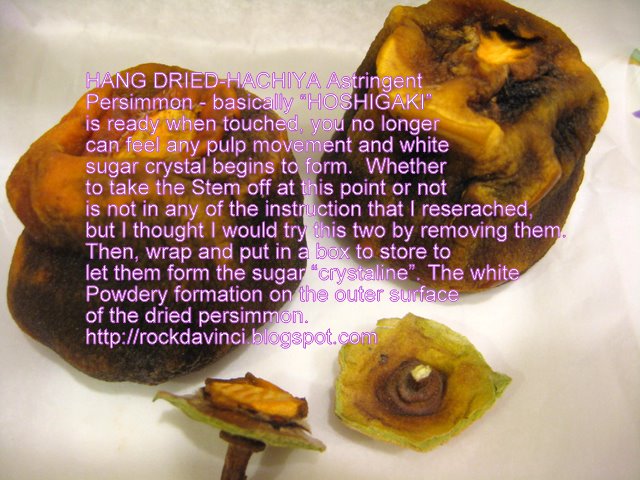
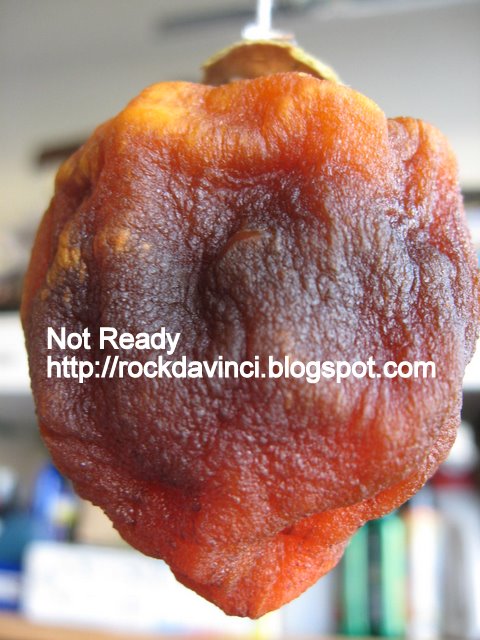
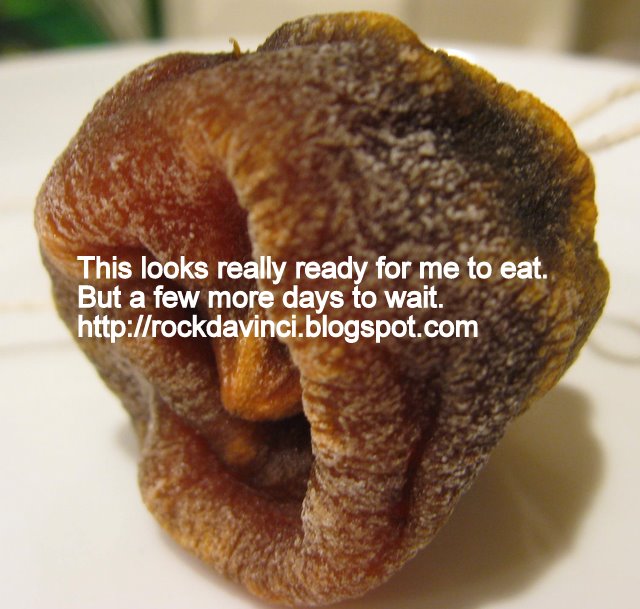
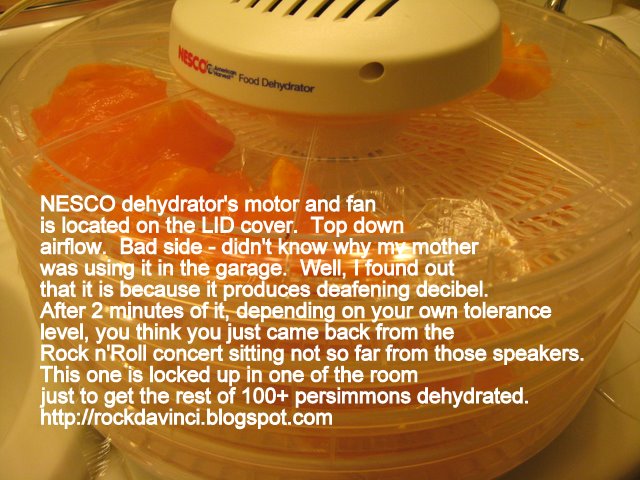
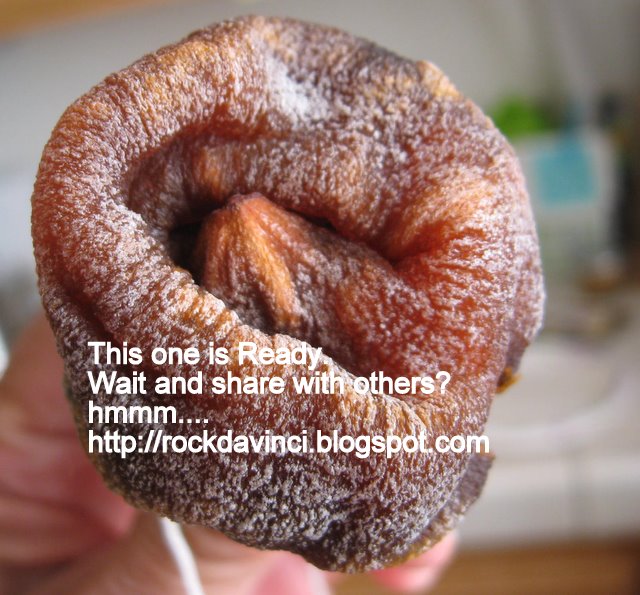
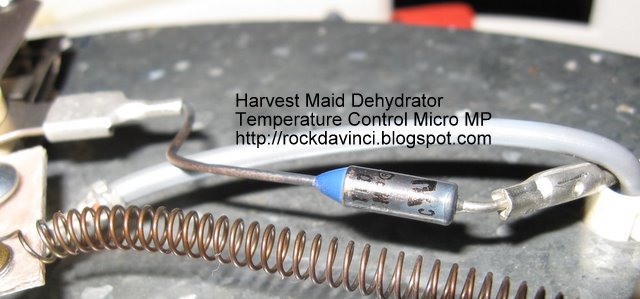
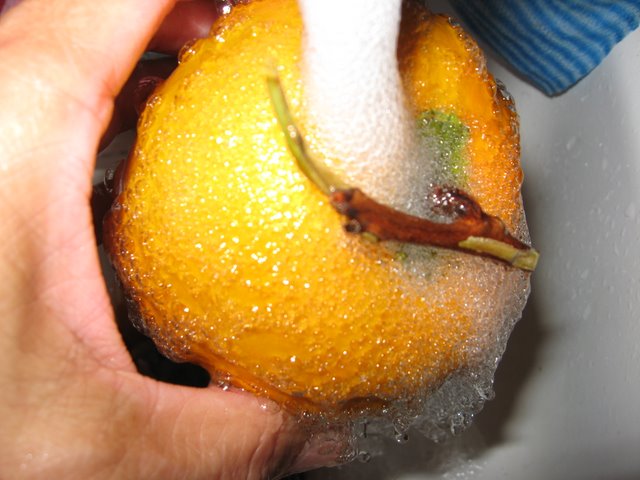
(Double click on each image to view comments included.)


Persimmons - Un'tannin' by Frozen Method

Many people probably has already tried this "Freezing" method to "untannin" the astringent persimmons / HACHIYA persimmons.  Here is the result of my testing.
Both persimmons were FIRM unripe HACHIYA persimmons.
1.  One with peel
2.  One without
Both were washed and leaves were taken off but with stem.
Both were placed in the Freezer on the same day for supposed 24 hours freezing period.
Because I was busy, I left them frozen for several days.
According to a couple of sites, the freezing method would cause the "tannin" to disappear.
This is how they looked:  (double click on each image to view comments included.)


So what or how did they taste like?  That is the most important question.
First, it went down smooth, sweet, and yummy, but Alas! the after taste of the tannin showed up right away.  It was too good to be true.  Although the level of tannin were much much lower - let's say by 85% when compared to the raw form of the HACHIYA.  My mouth and throat felt the unpleasant 'drying' effect a bit.  Not enough to make you sick, but it took well over 30 minutes before it all went away.  If you have had a better experience than I did, please let me know.

Saturday, December 12, 2009

Savory Pancake

My favorite fluffy Pancake is about 1" in height and about 6" round.  Pretty much like a cake.
The best recipe sometime happens when you are not really measuring quite so accurately with the measuring tools, but here is my best pancake from the pancake mix.  *I like to put 1 Tbsp of sugar when I am taking the pancake to the office.  This way, I won't need to dress the pancake with pancake syrup.


TOOLS:  6 inch frying pan, spatula, mixing spoon, measuring cup and spoon.

Ingredients:
1/2 Cup Krusteaz Buttermilk Pancake Mix (Plus 1 Tbsp & 1 tsp)
1 shake of grounded Cloves
2 shakes of grounded Herbs of Provence
1/4 Cup Milk
1 Tbsp Sugar
3 Tbsp of Butter for cooking.

Methods:
Mix all dry ingredients well. 
Pour milk in and mix gently.  It should be in medium thick consistency of the cake batter.
If it feels too watery, add the extra 1Tbsp of pancake.  Mix.  If it still feels liquidy, add 1 tsp more of the pancake mix.  The mixture should not be too thick, however.  If it becomes too thick, add 1 tsp of milk.  Stir, set aside
Over medium-low heat:
Heat up 6 inch Non-stick frying pan and melt 1 Tbsp of butter.
If using stainless steel frying pan, be sure to HEAT the frying pan well and all the way around, then put the butter in.
Move the butter around the pan to cover the entire bottom of the pan.  (Do not put pancake batter in the cold stainless steel frying pan.)
When the butter is melted and slightly bubbling, Pour the entire batter mixture in.
Move the pan a bit around to make sure the edges are bit brown and when the pan is shaken a bit, the batter moves around with the movement.
Turn the heat to low.
Splat two thin slices of butter on top of the raw surface of the pancake.
Turn the pancake over.
Cook till the bottom is light gold brown. - 2 min.
Serve with butter on the top with or without the Syrup.


Flaky Savory Biscuits with Cranberries


This is what I do to help myself with the breakfast.
Prep time: a Night before - 15 min. 
Prep time in the morning--1 hour before leaving for work: Give yourself 10 min to prep 30 min to bake.
Enjoy!

Persimmon Chocolate Chip Butter Cookie Cups


*This is candy like cookies that keep well.  Warm in Microwave before serving to soften a tad bit.  Great with afternoon tea or milk.

Serves: 6    *the remaining batter is used to make Cookies - see Persimmon Chocolate Chip Butter Cookies.

Bake at 400'F
Ingredients:
1 stick Unsalted Butter, Soft
1/2 Cup Brown Sugar
1/2 Cup Granualted Sugar
1-1/4 Cup All-Purpose Flour
Pinch of Kosher Salt
1 tsp Vanilla Extract
2 pinches of Cardamom, grounded
1 pinch of Cloves, grounded
1/2 Cup Guittard Real Milk Chocolate Chips
1 Cup Dehydrated Persimmons - Chopped

Method(s):
Cream Butter slightly, but not fluffy.  Add Brown sugar and sugar.  Beat together just to mix.
Add rest of the ingredients listed and mix with hand.
Press into Muffin Top pan.
Bake at 400'F for 8 min - 10 min.
Cool.
Serve.
Keep in air tight container.
Serve warm - microwave the cookie cup for 10 sec. Serve with Tea or Milk.
Variation:  Add 1 well Beaten Egg.  This will make the soft cookies.  Chopped up persimmons are mixed with batter mixture. 
Press into Muffin Top baking pan and baked at 400'F.  Bake - 8 to 10 min.


Persimmon Chocolate Chip Butter Cookies with Cardamom


This is the Persimmon Chocolate Chip Butter Cookies with Cardamom that you make from the rest of the cookie batter from the Persimmon Chocolate Chip Butter Cookie Cups.  There are cloves and cardamom in this recipe.  I seem to have become allergic to the new group of ground "Cinnamon" that showed up in the market ever since my jar of ground cinnamon got used up.  Not sure why but according to some information I gathered, the "Saigon Cinnamon" is different from the regular "Ceylon Cinnamon".  Since none of the manufacturer has identified their Cinnamon as which - Ceylon or Cassia Cinnamon on the label, unless you call, I assume that they have gone cheap and is using Saigon Cinnamon/Cassia Cinnamon instead.  That's where I am finding trouble because after eating baked goods with "cinnamon", my mouth gets puffy.  Here is a link where you can see the difference: http://www.ceylon-cinnamon.com/Identify-Cinnamon.htm

And a warning I just found out about "Coumarin" that's found in the "cassia" family Cinnamon. http://www.bfr.bund.de/cd/8487 Whether these are reliable source or not, they are talking about it. Because my mouth has been responding differently in the last 6 months to anything with Cinnamon, I am being cautious abou it.  So, I decided to test with Cloves and Cardamom and find them very tasty with dehydrated Persimmons.

From the rest of the batter left from making Persimmon Chocolate Chip Butter Cookie Cups, take a Tablespoonful of dough and spread them into 2" round disk. Sometimes I like my cookies in bite size, sometimes large. But if you are experienced baker, likely you can tell from the ingredients that this recipe will make 2 dozen cookies.

Dried Persimmons Progress Report #3

It's been a while since I last reported on the progress #2 of the Dried Persimmons.  I have been very busy with work and final exam week at the school.  I passed the ServSafe certification, so I am pleased with that.
(Note:  Please double clck on each image I posted to view some of the details I included.)
After 4 weeks of Air Drying of HACHIYA Persimmons "HOSHIKAKI" or "HOSHIGAKI" (in Japanese), these 1st group of persimmons look quite ready.
The first two HOSHIKAKI got wasted, however, after I reluctantly followed one of the instruction I got from the credible site.  It's not that it was wrong, but I believe the temperature and humidity level of where I live has something to do with it.  And as this is my first experience doing this "drying" persimmons, I expected some issues.
After making sure the Persimmons were totally dried - how do you tell?  by massaging the dried persimmon gently, carefully not breaking it open, there should be no more soft pulp movement & the exterior surface started to form white powdery sugar crystaline, remove from the hang line and place them in paperbag.  & Monitor carefully what happens each day.  (Of course, the real method would likely leave them to dry without disturbances in the dark storage, but I wanted to monitor the progress.)


The first two persimmons that I tried was wrapped in the plastic and placed in a clean cookie box to store away in dark place.  I was kind of worried about it because I was sure they will turn soft between the plastic / saran wrap and then stored in the air tight metal container.  Thinking that sugar and plastic and air tight container just don't go together.  Sure enough, Molds formed after 4 days.  So, they were discarded.  Out of the 11, I lost two.  Then, the 3rd one - I was not about to lose this one.  It looked so ready, I could have eaten it without waiting.  But for the sake of testing, I left it on a clean plate in my kitchen for a few days to see if any more sugar crystaline would form.  (*Note:  my house is at about 59'F - no heater for the winter is turned on, yet.   So, if you have a warm kitchen 60'F and above.  I would move it to somewhere cooler.)
 After a few days, I see quite a bit of crystaline.
That's enough testing.
I cut it open and savored every bite.  It was great!
It almost tasted like dates, but it's persimmon.  It was chewy and very sweet.  Very satified wth the result.


Recently, I stopped by MITSUWA grocery located in San Jose (Saratoga Ave.) and spotted trays of dried persimmons.  It contained 6 dried persimmons.  Each one is not much larger than the Jewel Dates I buy.  The tray costed $6.99.  However, I still have not seen my electric bill this month, yet.  Not sure buying from the grocery store is better or doing it yourself if better.  The benefit of doing it yourself maybe that you know 100% what is in it.  Thus far I have dried over 100 some HACHIYA persimmons.  Hand washed, peeled, and cored, and sliced.  And I got 100 more to go. To accomplish this, I have two electric dehydrators going.  I had to borrow my mother's NESCO Dehydrator, which I gave her for her birthday, to get the job done.  NESCO Dehydrator is 500 Watts, and has very powerful motor and fan.  Comparing to my Harvest Maid Dehydrator (mine is 20 some years odl), NESCO dehydrator can dry 4 trays of firm sliced persimmons in 12 hours.  It takes 16 to 18 hours if every tray is loaded with slices of "ripened" persimmons.  Ripened persimmons are tricky to dry because they are really 'slurpy' and high in sugar content.  I don't have one of those fine net or tray to make "fruit wrap" so I cut and place them on cup cake cups, parchment paper, or saran wrap.  Half way through dehydration, remembering to wake up to remove them and flip each one.  As for my dehydrator, after drying 65+ some persimmons, my Harvest Maid Dehydrator had a heat control failure this Tuesday night.  The fan runs, but I am afraid the "temp" control capacitor or IC whatever that is controlling the heating is dead.  (I took the dehydrator apart to check.) But, when running, those ripened persimmons would have taken it 24+ hrs at 115'F.  I guess you could run it at much higher temp, but I would not know now since it is dead.


Regardless, the important things about preparing persimmons before drying is good Sanitation, Cleanliness - from your hands to tools - knife, cutting board, "everything".
Wash persimmons, remove leaves, Coring, Peeling, slicing on absolutely clean cutting board for fresh produce only and use clean knife.  Clean hands.   Clean dehydrator trays.
Enjoy!