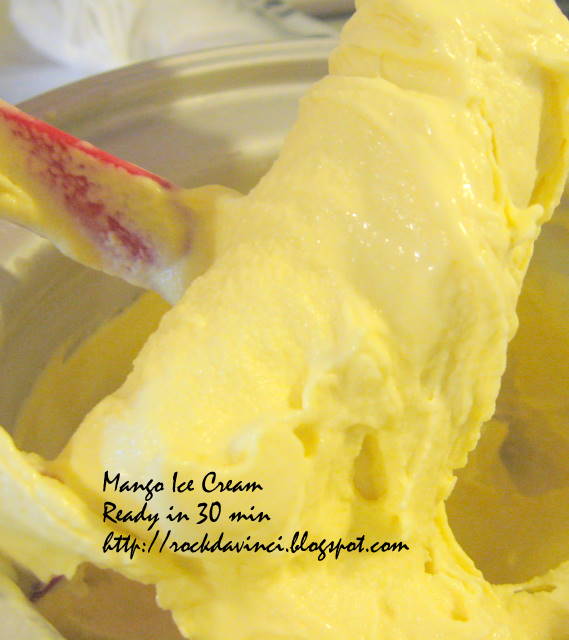
MEOW!
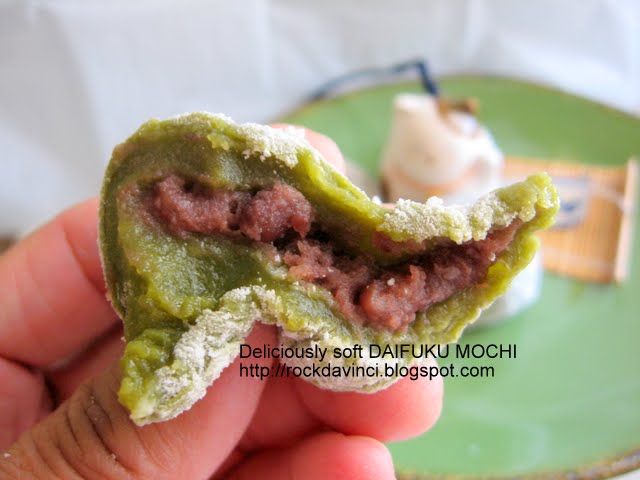
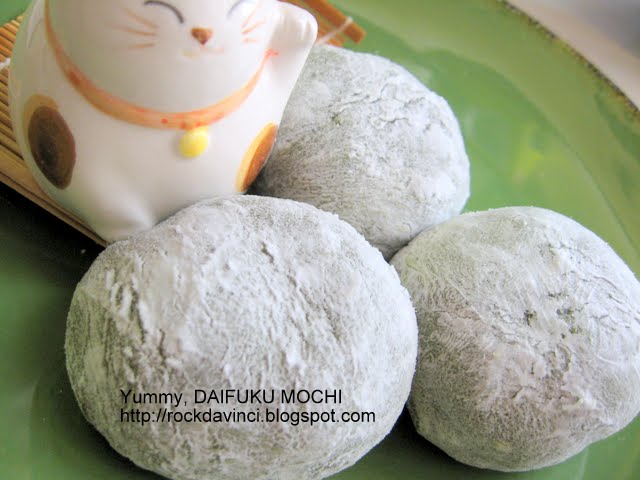
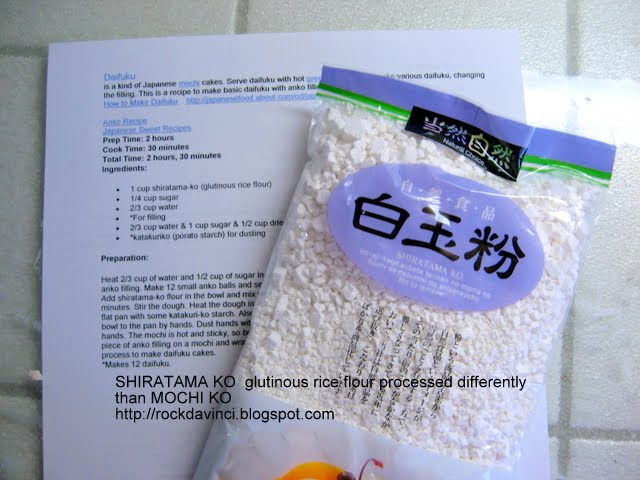
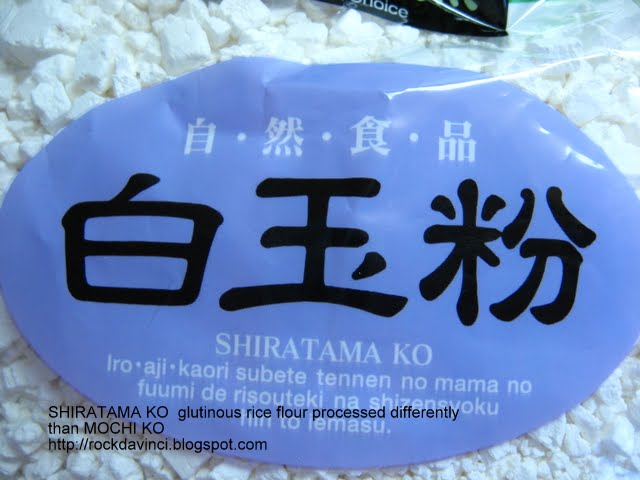
I did it! I finally got the DAIFUKU MOCHI the way I like. I wanted to make this successfully for so long, and I ate three of them while I was taking the photos. Even though I have involved in the Japanese New Year MOCHI-ZUKI experience in childhood and watched how to make fresh DAIFUKU MOCHI, I am not familiar with the functions of rice flour available in the market. I've tried a few recipes, but did not understand the difference of SHIRATAMA-KO, JOSHINKO, and MOCHIKO. Well, I know now. To make this DAIFUKU MOCHI and keep it soft for hours--use SHIRATAMA-KO. It is it! Not MOCHIKO or the "glutinous rice flour" (Chinese brand), or the JOSHINKO. The way the rice flour were processed make quite a difference in the result, just like cake flour, pastry flour, all purpose flour, bread flour, etc. Check this website on the difference of SHIRATAMA-KO (glutinous rice flour) and JOSHINKO (rice flour). http://kokonuggetyumyum.blogspot.com/2005/09/offered-to-harvest-moon.html 'OBACHAN" explains well for me in her comment chat. My recipe below is from the ABOUT.COM, and it has been modified. I am a fan of MOCHI first and sweet filling 2nd. I am a fan of dough than 'filling' of anything. The filling can be as little as a tablespoon, and I am satisfied when the dough taste delicious. Just like PONCHIK. I love the bread part more than the cream filling. I added 1 tablespoon of MATCHA in my DAIFUKU to counter balance the sweetness of the heavily sweetened AZUKI ANKO - Red Bean Paste. I also like to use the whole red bean paste than the straight red bean paste. This is just my preference. You can always make your own red bean paste from scratch, but I don't think it's worth the time and effort. (Try it and you will see what I mean. And, let me know otherwise.)
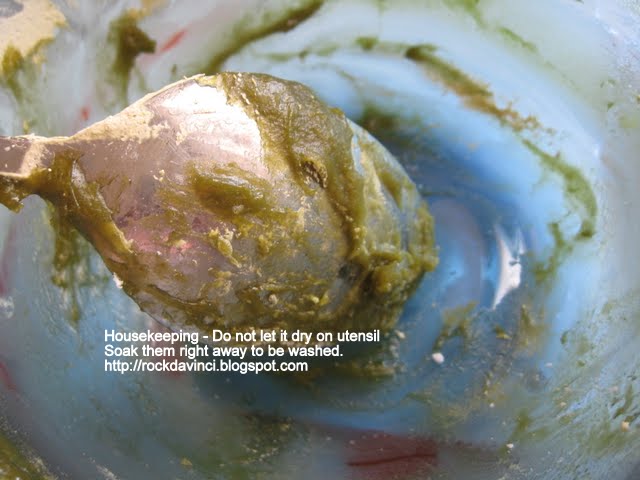
Before you start, read the preparation instruction once. You should remember the color and texture of the mixture when you started raw and know how it has changed when cooked in microwave and not to burn yourself. As this MOCHI dough need to be handled quickly while it is still in "hot to warm" temp, the prep work items should be completed and readily available and set aside. And be caution when handling "hot MOCHI" and never taste/eat "hot MOCHI" until it has cooled down to warm temp.
(Click on the picture to view larger image and comments.)


Referenced original recipe from: http://japanesefood.about.com/od/japanesedessertsweet/r/daifuku.htm
Yield: (The orig recipe yields 12)
Prep Time: 2 hours
Cook Time: 30 minutes
Total Time: 2 hours, 30 minutes
Tools: small saucepan, whisk, Large spoon, measuring cups and spoons; heat proof/microwaveable bowl; large non-stick baking sheet with rim; plastic wrap; straight 12 inch 1" min dowel rolling pin (get from Asian market) or make one from hardware store-just make sure it is food safe; Plastic bowl scraper or strong plastic knife; 1" cookie scoop, if you have one; a 10" plate.
Ingredients:
For Dough -
1 C SHIRATAMA-KO (**glutinous rice flour, but not just "any" glutinous rice flour.)
1 Tb Vanilla Sugar Powder + 1/4 C minus 1 Tb sugar
1 Tb MATCHA (Green Tea Powder)
2/3 C water
For Filling - ANKO
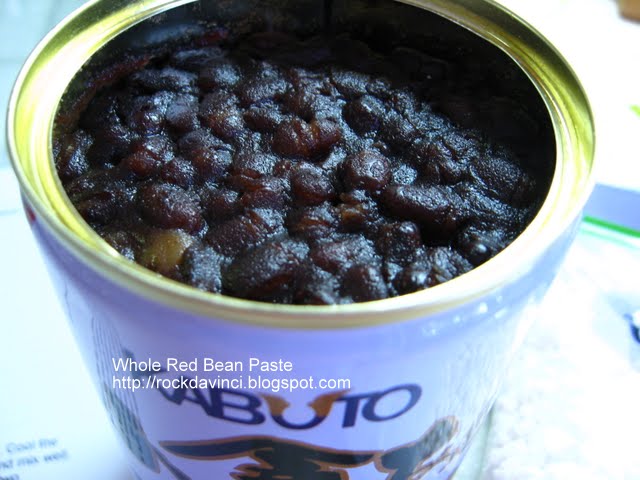
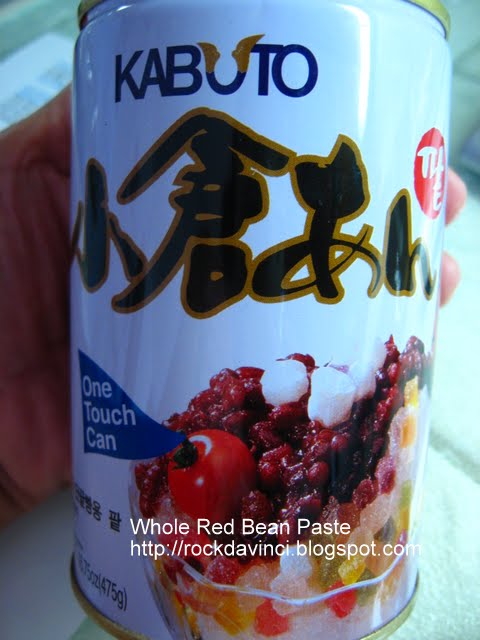
1 Can - 16.75 oz (475 g) Whole Red Bean Paste "TSUBUISHI ANKO" (or ANKO PASTE)
The original recipe calls for: 2/3 cup water & 1 cup sugar & 1/2 cup dried ANKO powder, or 1 1/4 cup premade ANKO
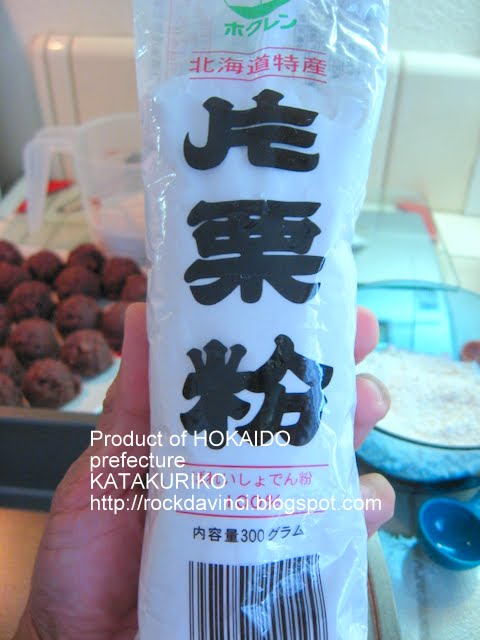
1/2 C KATAKURIKO – Potato starch - (made in HOKAIDO, Japan) for dusting. *The original recipe calls for Potato Starch for dusting.
Preparation:
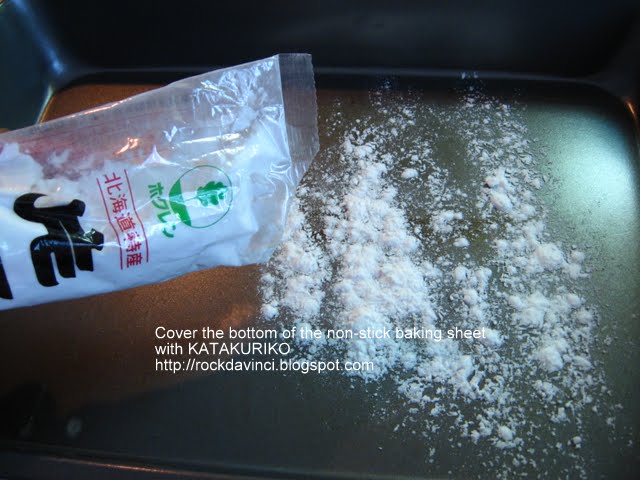
Prepare the non-stick sheet pan with rim - cover it with 1/2 C of KATAKURIKO. Set aside.
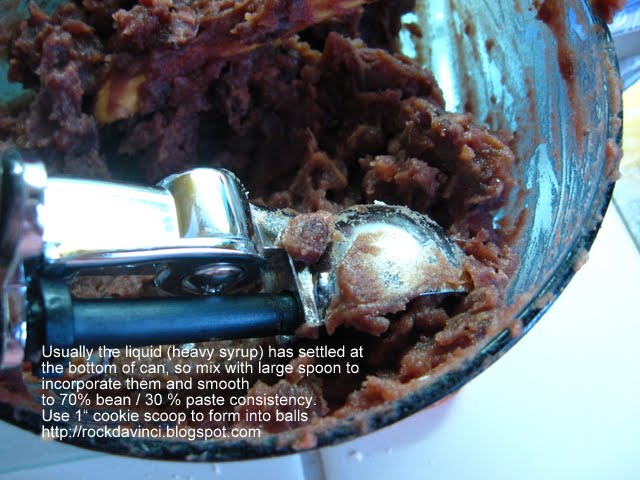
ANKO PREP: TSUBUSHI-AN with "whole" red beans. Pay attention to the picture on the CAN because both have printed "Red Bean Paste" as description.
Transfer the ANKO into a bowl and stir it for 2 – 3 minutes to create 70% whole / 30% paste consistency or the way you like.
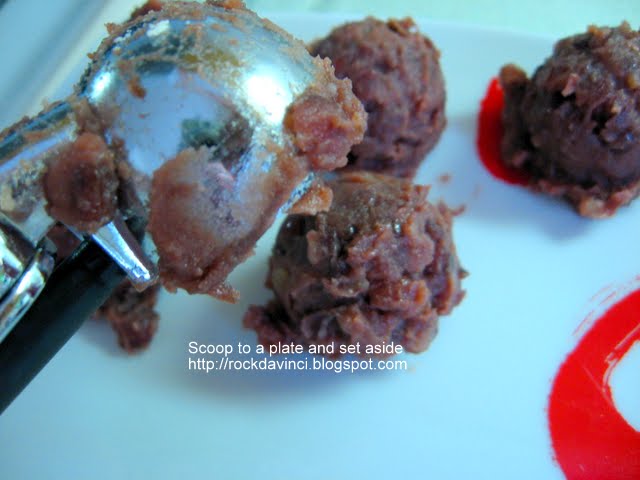
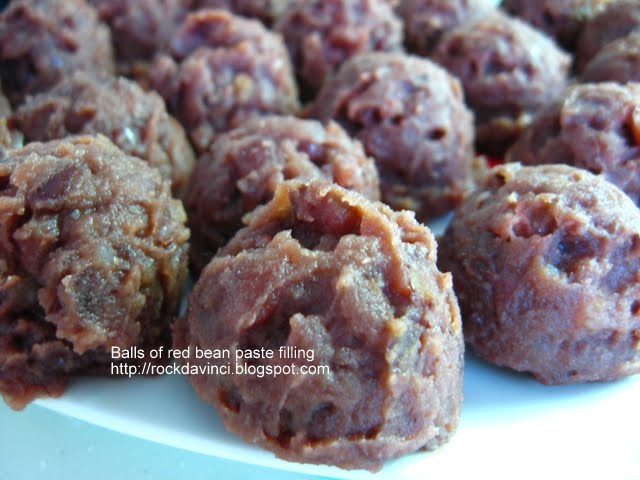
Use the 1" cookie scoop and form balls and place it on the plate. Or use hand and roll into balls. Set aside.
*I had more than I needed. *suggestion: Freeze them in zip-lock bag for next use. or Double the dough recipe, which you will see at the end that - "Yes! This is a great idea." Because it is so delicious.


DOUGH PREP: You need to move quite quickly on the next few steps, especially when ready to microwave the dough mixture. So, be sure that you understand beforehand the texture and color of the "cooked" MOCHI starch - translucent, tacky firm dough.
1. Transfer 1 C SHIRATAMA-KO in a heat proof/microwaveable bowl. Set aside.
2. Sugar Mixture for the dough: In a small sauce pan, add 2/3 C water, 1/4 C minus 1 Tb sugar mixture.
If you don't have Vanilla Sugar Powder, don't worry about it. Just use sugar. Add 1 Tb of MATCHA.
Do not bring to boil - and Heat mixtures over medium heat to melt sugar and incorporate MATCHA - approx 1-1/2 min.
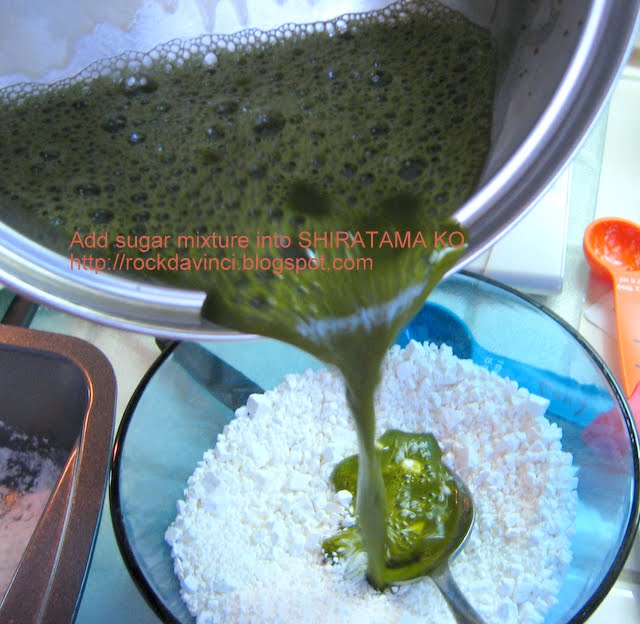
3. Remove the sugar mixture from the heat. Whisk until all MATCHA powder lumps have been incorporated. Pour the sugar mixture into the SHIRATAMA-KO. Use large spoon to mix to smooth.
Notice the color - shiny tacky paste like goo.
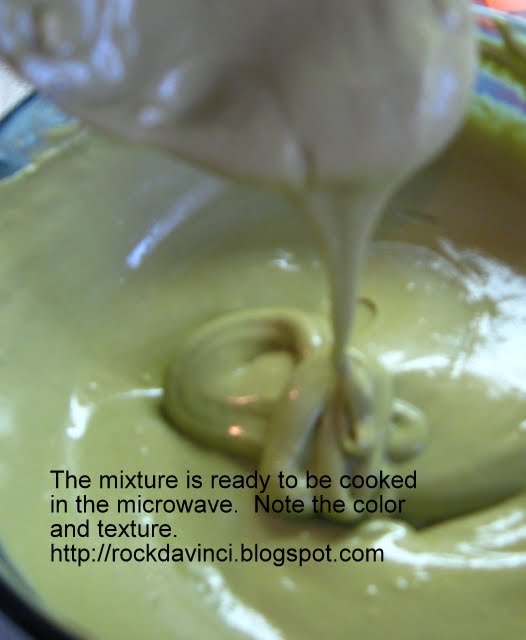
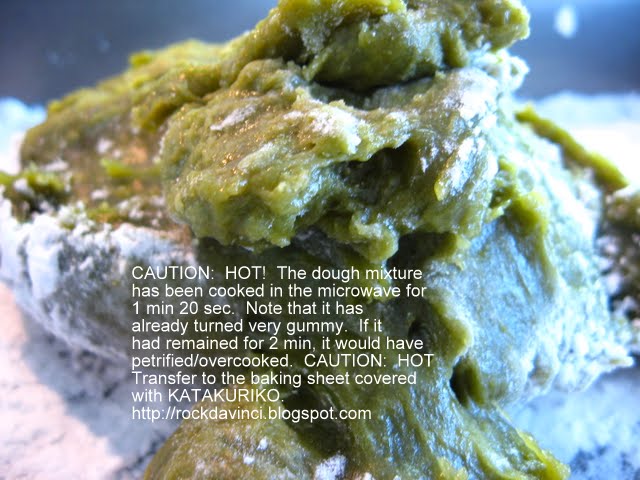
4. Place the plastic wrap loosely over the dough bowl - leaving a 1 cm (1/2 inch) opening on one side. Put the bowl in microwave on top of microwave heat proof tray or plate (as the bowl will be very hot). Heat the dough for 1.20 min**
The original recipe calls for 2 min heating, but Adjust the heating time based on your microwave's power.
5. Remove from microwave. Using a large spoon, stir the dough quickly. (Notice the change in color of the dough- from pasty to 'translucent'.)
Dust hands with some KATAKURIKO
6. Transfer the MOCHI onto the dusted sheet pan.
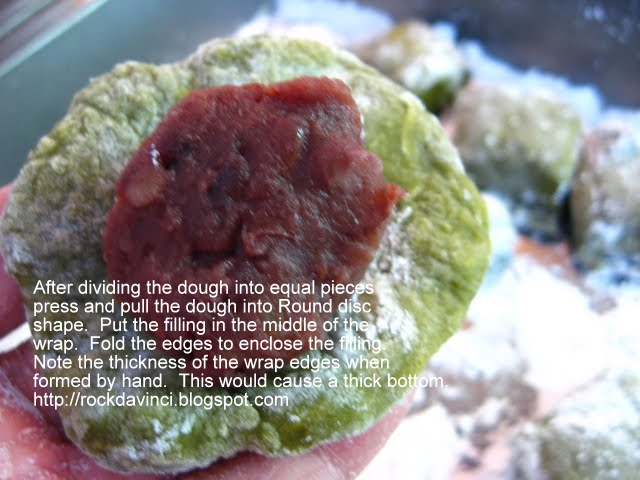
7. Divide MOCHI into 12 pieces - I only had 9 pieces: Quickly with hands, pat the dough into a manageable form so that you can use the strong plastic knife or plastic bowl scraper (plastic - only because you are using the non-stick baking sheet. If not, use any sharp edge tool or hand.) and divide the MOCHI into 12 pieces. Place them directly on top of KATAKURIKO and keep them covered with plastic wrap that is coated with KATAKURIKO also. The MOCHI is hot and sticky, so be careful not to burn your hands.
8. Form the MOCHI into round disc wrap - Use your hand to form the MOCHI into a Round wrap. Or use the straight rolling pin and roll the dough out the same way to make Pan Fried Potsticker /GYOZA skins as illustrated in my previous blog.
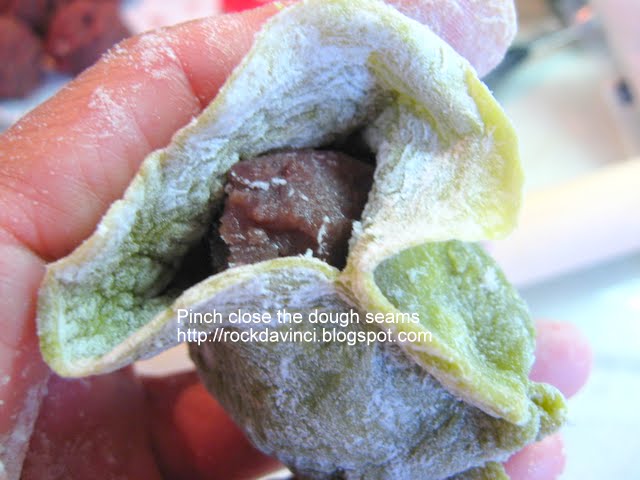
9. Place a preformed round ANKO in the middle of the wrap and start folding the dough to enclose the ANKO. The technique is pretty much the same as folding potsticker or BAO (Bun) - Use your free hand's thumb and side of the index finger to pinch close the wrap to enclose the ANKO.
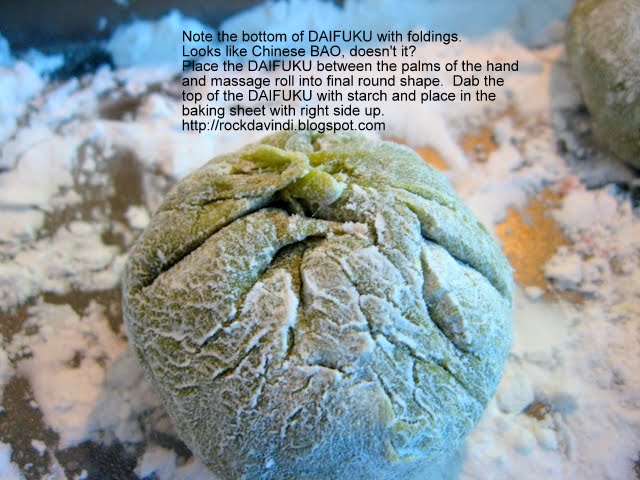
10. Place the filled DAIFUKU on top of the palm of one hand with seam side down. Enclose the DAIFUKU between the palms and gently give some rolling motion to form into better looking smoother bun. Place the finished DAIFUKU on top of the KATAKURIKO covered sheet pan. Complete the rest.
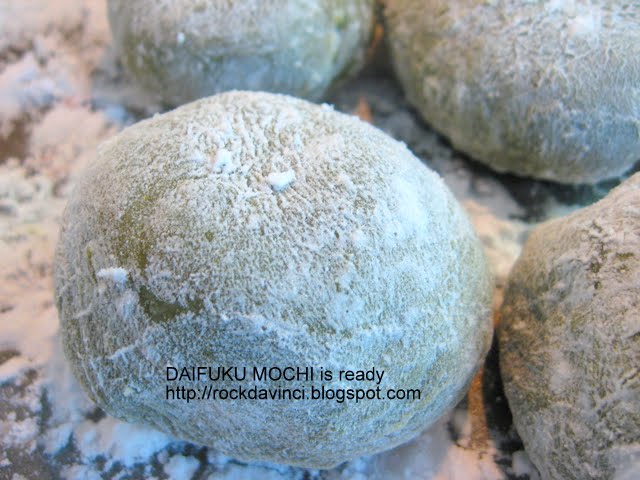
11. Cut some plastic wrap into wrapping size. Dab each DAIFUKU's top with KATAKURIKO. Wrap close the DAIFUKU if not eaten right away. Beautiful!
The original recipe yields 12 DAIFUKU, but mine came out 9 because I like mine with more MOCHI.