This is made from home grown Lemons and Limes.
My co-worker didn't know what to do with all the lemons in his garden... natural things to do is to share them, and we all benefits from the final product.
Makes 32 bars
Ingredients:
2/3 C butter, softened
1/2 C packed brown sugar
2-1/2 C flour, divided
1 TB + 1 tsp of equal amount of Lemon and Lime Zest from the home grown. About 2 large Lemons and 1 large Lime Zest
6 eggs
2-1/4 C granulated sugar
1/2 C Lemon Juice
3/4 tsp baking powder
1/8 tsp ground nutmeg
1 tsp finely shredded lime peel - from 1 lime
2 TB sifted powdered sugar
1 beaten Egg white
Preheat oven to 350'F about 5 minutes before baking (*to conserve energy.)
Line 13x9x2-inch pan with parchment paper. Set aside.
For crust, beat butter on medium to high speed for 30 seconds with paddle attachment. It should become fluffy. Add brown sugar; beat until combined. At low speed, Add 2 Cups of flour and mix until crumbly.
Add 2 tsp lemon peel.
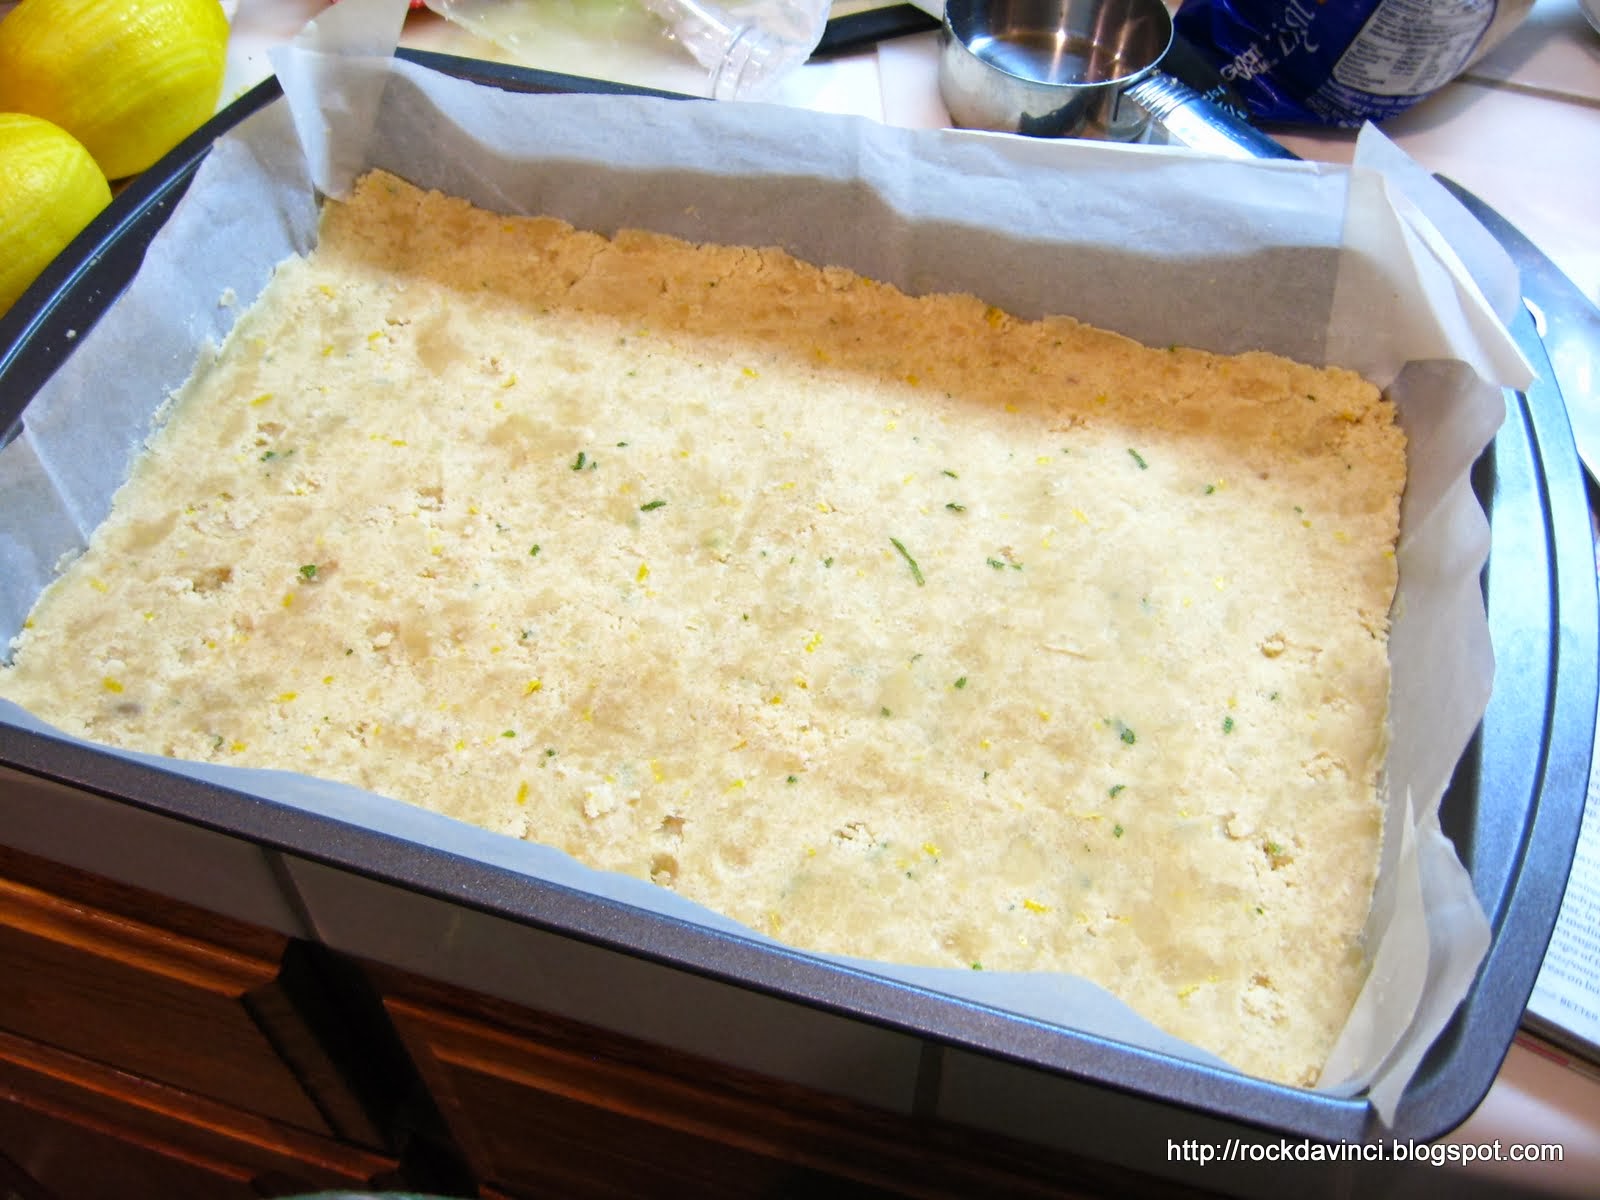
Transfer the mixture into line pan. Preheat the oven to 350'F.
Press down gently but firmly >> I used a small bottle to press down evenly.
Do not compact the mixture, but roll out evenly. The butter and flour mixture will naturally pack itself down.
Poke the dough with fork to prevent rising. Bake for 10 minutes. In the meantime, make the Filling.
*Do not brown it like some other recipes calls to do. Take out and set aside.
FILLING:
In a mixer bowl, combine eggs and granulated sugar. Beat well for 2 minutes at medium speed. Add lemon Juice. Take a quarter cup of the mixture out in a bowl or in a large measuring cup. You are about to add some dry ingredients to it.
Tip: If you were to add the rest of the dry ingredients into a large amount of liquidy mixture, likely result is unmixed chunks of dry ingredients floating every where. To prevent this. Add the dry ingredients into the 1/4 C of egg mixtures that you set aside. Premix the dry ingredients with it to make a nice slur.
Mix until well blended. Making sure that there are no lumps. Add more egg mixture into to make it even more smoother mix. Then, Add to the egg mixture
Beat an egg white.
Brush the bottom of the crust all around with the egg white.
Tip: This technique will prevent the moist, liquid from soggying up the crust.
This technique would work with pie crust as well.
Ready for the filling.
Add the filling
Bake for 30 minutes --- depending on your oven - until it is set.
Remove from oven. Cool for 1 hour. Lift it out of the pan carefully.
Peel away the parchment paper.
Use a pizza cutter to slice through.
Place it back in the pan or as is, Sprinkle white powder sugar through a strainer.
Yum!
My co-worker didn't know what to do with all the lemons in his garden... natural things to do is to share them, and we all benefits from the final product.
Makes 32 bars
Ingredients:
2/3 C butter, softened
1/2 C packed brown sugar
2-1/2 C flour, divided
1 TB + 1 tsp of equal amount of Lemon and Lime Zest from the home grown. About 2 large Lemons and 1 large Lime Zest
6 eggs
2-1/4 C granulated sugar
1/2 C Lemon Juice
3/4 tsp baking powder
1/8 tsp ground nutmeg
1 tsp finely shredded lime peel - from 1 lime
2 TB sifted powdered sugar
1 beaten Egg white
Preheat oven to 350'F about 5 minutes before baking (*to conserve energy.)
Line 13x9x2-inch pan with parchment paper. Set aside.
For crust, beat butter on medium to high speed for 30 seconds with paddle attachment. It should become fluffy. Add brown sugar; beat until combined. At low speed, Add 2 Cups of flour and mix until crumbly.
Add 2 tsp lemon peel.
Transfer the mixture into line pan. Preheat the oven to 350'F.
Press down gently but firmly >> I used a small bottle to press down evenly.
Do not compact the mixture, but roll out evenly. The butter and flour mixture will naturally pack itself down.
*Do not brown it like some other recipes calls to do. Take out and set aside.
FILLING:
In a mixer bowl, combine eggs and granulated sugar. Beat well for 2 minutes at medium speed. Add lemon Juice. Take a quarter cup of the mixture out in a bowl or in a large measuring cup. You are about to add some dry ingredients to it.
Tip: If you were to add the rest of the dry ingredients into a large amount of liquidy mixture, likely result is unmixed chunks of dry ingredients floating every where. To prevent this. Add the dry ingredients into the 1/4 C of egg mixtures that you set aside. Premix the dry ingredients with it to make a nice slur.
Mix until well blended. Making sure that there are no lumps. Add more egg mixture into to make it even more smoother mix. Then, Add to the egg mixture
Beat an egg white.
Brush the bottom of the crust all around with the egg white.
Tip: This technique will prevent the moist, liquid from soggying up the crust.
This technique would work with pie crust as well.
Ready for the filling.
Add the filling
Bake for 30 minutes --- depending on your oven - until it is set.
Remove from oven. Cool for 1 hour. Lift it out of the pan carefully.
Peel away the parchment paper.
Use a pizza cutter to slice through.
Place it back in the pan or as is, Sprinkle white powder sugar through a strainer.
Yum!


