Wednesday, March 20, 2013

Buttermilk Biscuit Testing - Butter or Shortening or Lard?

I have been baking biscuits for many years.  The ones that I love the most are the ones that I made for my boys.  Of course, they are all grown up, so I bake for my grand-kids.  There are times, for whatever reason I don't know why, the biscuits just don't come out the same.  A carton of buttermilk is only used once, then, the rest end up discarded ... despite the fact that you can use buttermilk for a few other dishes.  It's quite easy when you have a crowd, but for a single serving, it becomes challenging.  I decided to test on my biscuits using three different shortenings - lard, vegetable shortening, butter.
I really thought the lard would have tasted better but there is no "SHANG WEI" - "wonderful aroma".  It was disappointing.  I remember using the actual 'renedered' pork fat - that we saved after cooking fat pork when I was young for Chinese pastry.  The pastry tasted very nice.   I actually had never used "Lard" out of a box to bake the biscuits.   I have seen the bacon grease used to make biscuits, and I have used it by mixing it with butter chunks, etc.  It turned out quite tasty.  The biscuits made with self-rising flour is always the fluffiest, but I want to control all the ingredients, so all purpose flour is used.  To make the test production portion size small, I used the following measurements:
Preheat oven 435'F - 450'F - depending on the power of your gas oven or electric oven.


Butter Buttermilk Biscuits:
Portion:  4 to 5

1-1/2 Cup all purpose flour, shifted with the followings 3 times
1/2 Tb Double acting non-aluminum baking powder (Red or Silver can)
1/4 tsp Kosher salt
1/8 tsp Baking soda
1/4 Cup cold butter cut into chunks
Rub the butter and flour together between thumb and fingers until they form flat flakes. 

Then, Add
1/4 Cup Buttermilk - if the flour mixture feel dry, add water a teaspoon at a time.
Tips:  The dough should feel quite moist..

Mix gently at first with spoon maybe or with hand till flour is moistened.  The dough should be shaggy and moist.  Then, mix gently in fold and layer, add bit more buttermilk, then, fold and layer motions to form a flat disc.  Roll it out with a rolling pin with gentle press or simply pat it down with floured finger tips to disc shape.
Then, cut out with biscuit cutter or with a rim of a glass cup.  Transfer to baking sheet.
If a tender side is desired, place biscuits close to each other on top of a aluminum foil.  Then, fold up the aluminum foil to make a wall.
Bake till golden brown.


Shortening Buttermilk Biscuits:
- use the same ingredients as above, but replace butter with vegetable shortening.

1/2 Cup all purpose flour, shifted with the followings 3 times
1/2 Tb Double acting non-aluminum baking powder (Red or Silver can)
1/4 tsp Kosher salt


1/4 Cup cold vegetable shortening, or room temperature
Rub the shortening and flour together between thumb and fingers until they form flat flakes. 

Then, Add
1/4 Cup Buttermilk - if the flour mixture feel dry, add water a teaspoon at a time.

Mix, form, and portion the same as above, and bake till brown.
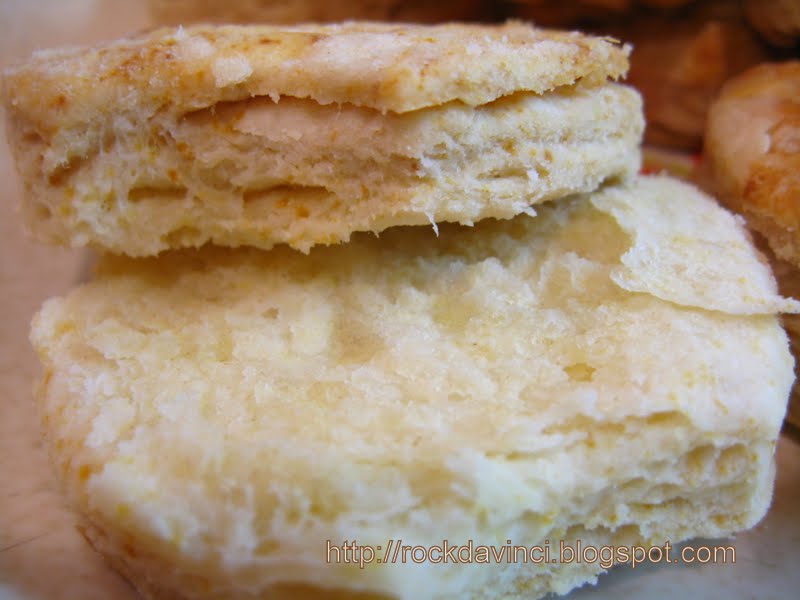
Actually the picture below shows that the biscuits could use some more liquid.

The result - You can see the difference. 
But I am not quite convinced that my test is true.  So, I will repeat it three more times to say, the ingredients listed here will produce the same results each time.


No, I am not crazy.  I just finished baking twice the Banana Buttermilk Biscuits the other evening and plain ones.  The results?  I ate them all... do I have pictures for evidence?... I will check on it.

Sunday, March 17, 2013

Polly's Cashew Chicken - YIAO GUWO JI DIEN

Sometimes, you really wanted to eat well, and wondered what to do with all those celery in the vegetable compartment?  Make fresh health drinks, eat raw, etc... a number of recipes come to mind, then, again, noooot... I don't know why, but sometimes, you just don't feel like it.  But this time, I see a jar of nuts that I bought from COSTCO with various types of nuts in it.  And I noticed there are bunch of cashew nuts in it more than other nuts.  The Cashew Chicken! I thought.  Cashew Chicken is not our traditional family dish when I was growing up.  Because cashew nuts were not available at the local markets,  they are imported.     But here they are, right before me are the great tasting cashews.   So, for my office lunch, I made this in the morning right before I left the door.... nope! it didn't last till lunch time.  I end up eating it as a breakfast.  

Tip:  In Chinese cooking, you often stir fry ingredients and set aside to stir fry the next ingredients, then combine them together for the finale. 

I remember my mother always marinate the meat in KATAKURIKO (Japanese potato starch) with some seasonings.  It makes them taste tender, seal the flavor, etc.
INGREDIENTS:
1/3 - 1/2 Cup Cashew nuts - Toasted in some olive oil in the Wok and set aside.
Slice chicken breast thinly (as you know they normally shrink and become thicker as they are cooked.)
Marinate with 2 tsp of KATAKURIKO and pinch of salt (potato starch or Corn starch.  *FYI - Cornstarch prepared food tend to form 'water' in the overnighted dish in refrigerator.)
Salt 
White ground pepper
Some water
3 Defibered/deveined celery sticks - sliced slanted into 1/2 chunks.  To defiber - pull down (toward back - convex side) at the stalk joint where leaves start to grow and pull down toward the root.  It will pull the stalk fibre off to make it more tender and less fibrous when chewing.) 


 I didn't remembered about thinly slicing the chicken until afterwards, as I have not cooked the chicken this way for a while.  Then, I remembered what my mother said, to slice chicken fairly think for better taste.
Stir fry the chicken breast - Medium high heat just enough till most of the pink is gone. 30 seconds to 45 seconds.  Normally for a larger family dish, meat will be taken out and set aside and celery is stir fried next in the same Wok and in the same oil left behind.
 As this is a small batch, and I am in a hurry, I add the celeries.  Stir fry for 30 seconds at medium high heat. 
 Add Cashew nuts.  Add salt and white ground pepper to taste.  
** If  liquid is desired in this dish, add 2 Tablespoon of water.  This will cause the interaction with the starch enveloping the chicken slices and thicken.  Otherwise, make the starch slur and add to the Wok and bring the liquid to boil and cook for a minute longer.  
Remove from heat and serve.
 Taste the celery.  If you like the crisp state that it is in.  It's done!.

Family Hamburger Steak - Nie`O ROU Biean

We were very lucky when it comes to exposures to various food types in our younger days.  We were exposed to TV dinner, waffle, sausage, apple sauce, chocolate cakes, Hershey chocolate bars, Foremost ice-creams, milk shakes, soft drinks, ketchup, hotdogs, and hamburgers that other kids in the neighborhood have never seen or heard before.  This is one of our favorites that my mother prepared for us.  I always enjoyed it because I can't believe that on one plate, you can have rice, meat, vegetables, and a fruit all together and served with our favorite TONKASTU sauce (*thick Japanese Worcestershire sauce.)
Serves 2
Ingredients:
Wash and clean  1/4 head of cabbage - finely julienned.  Set aside
10 oz ground chuck (home grounded)
4 Tb onions fine brunoise
1 tsp finely chopped fresh ginger
1/2 tsp salt
1 egg
Pinch fresh ground black pepper
Cooked rice to serve with
Sliced apple of your choice
Japanese TONKATSU sauce (thick Japanese Worcestershire sauce)

It's important that the cabbage is finely sliced.  My mother can slice them hair thin-threads.   This will effectively taste less 'bitter'.  Mix all the ingredients, except cabbage in a gentle tossing motion until all is mixed well without the fat to get gelatinized/integrated with meat.  Pan fry the hamburger.
 Serve with rice, cabbage, and apple slice.  Topped with TONKATSU sauce.