Sunday, January 18, 2015

Homemade Pizza topped with Mushrooms, Basils, and Honey

This pizza is one of the product I prepared yesterday.   To store the proofed dough overnight in refrigerator, for tonight's dinner, I wrapped it tightly in a saranwrap and then in a plastic bag, then in a plastic container of the similar diameter as the dough.
The recipe is for two portions of single size pizza.  
Ingredients are reduction of full recipes by 3 from Nancy Silverton's Mozza cooking book.  Modification is substitution of wheat germ with hemp hearts and Bread Flour wth AP Flour.
Ingredients:  
7.3 oz warm water
0.33 tsp yeast
8.66 oz flour + more for dusting
0.166 oz rye flour, dark or medium 
0.5 tsp organic Hemp Hearts 
0.5 tsp honey
0.33 Tbsp kosher salt 
EVOO

Preferment:
Mix 3 oz of warm water with pinch or 1/8 tsp yeast, 2.3 oz of flour. 
Mix well with spoon and cover with plastic and place in microwave oven with a bowl hot water, if your microwave has internal rack. At 800 Watt power microwave for 17 seconds. Stop and let it rise.

To prepare Dough:
Using paddle head, Mix the rest of the flour, yeast, rye flour, hemp hearts in the mixer.  Premix honey and the rest of the warm water in a small measuring cup.  Add to flour mixture.  Mix for 30 seconds.  Add preferment. 
Mix at low for 2 minutes.  
Add salt.
Mix for 4 minutes, and see if the dough is starting to form - not shaggy.
Change to dough hook, knead until the dough become tacky and dough leaves the side of the bowl.
Spray a bowl lightly with vegalene.
Place the dough in to rise.  Cover.
To store overnight, place the dough over a sprayed saranwrap. Wrap the dough tightly and place in a zip lock bag.  Then place in a plastic container of the same size.   Place in refrigerator.

To Bake Pizza:
Organic Tomato Sauce mix with minced garlic and chopped basil
12 oz Mozzarella cheese block cut into small slices or pieces or shredded
Pre-sautéed mushrooms
Fresh Basil leaves
Pizza paddle 
Some semolina flour...2 Tbsp
Remove the dough from refrigerator and let sit for 30 to an hour depending on your kitchen temperature.

(Read thru once first the following steps). 
Remove all oven racks or move them to the top.  (They are not used.)
Preheat home gas oven to 460'F with baking stone directly at the bottom of the oven.  
Turn the dough out on a well floured work surface.
Dust the pizza paddle with some semolina flour and set aside.
Divide the dough into (approx) 7 oz each
Using flour coated fingers press the dough into disc form, but leave 1 inch outer rim alone.
Then with a floured knuckles (of your hands) place the dough over and flip flop the dough over opposite each to extend the dough slightly.  As this is a 'personal' size approx. 10" size pizza 2 to 3 toss over is sufficient.  Transfer the dough at last toss onto pizza paddle. 
Top with sauce, mozzarella, mushrooms, Basils, except the 1 inch rim of the crust. 
Open the oven door and with a controlled single push slide the dough over to the baking stone.
Set the timer to 8 minutes.
Into 5 minutes, open the oven and brush the outer edge/crust of the pizza with olive oil.  Bake till cheese is slightly brown. 
Remove the pizza with paddle.
Drizzle with wild honey.
Slice with pizza cutter.  Serve


Saturday, January 17, 2015

Polly's Rum Cream filled Ponchiks

It seems the Eureka always happens when you least expect it.  And especially when you got the perfect tasting filling without a recipe.  This is my sixth day since my surgery.  Beside feeling weak all week long today I felt the need to move around a bit more to keep my circulation going.  Then, I end up with three bread category products.   Bread, doughnuts, pizza dough. Thursday, I managed to bake Morocan chicken pies enough to last me three days plus cabbage pancakes and paella rice Polly style.  I can't move around as usual but I decided to make small portion size of each. 
What I am really happy is the pastry cream fillings I made for the Ponchiks.  It turned out 99% and even tastier than the ones I used to buy from European Deli. 
The ponchik dough recipe is the same one I posted in my previous blog http://rockdavinci.blogspot.com/2010/05/ponchik-your-ponchik-then-there-is-my.html
or if you would like to try my modified recipe - and for a small batch, it is posted at the bottom of this page.

 As for the Cream Filling it's difficult to describe. 
The filling is a combinations of 2 Cups of meringue frosting for cake that didn't work out ... that I kept frozen and thawed out in a small pot over a low heat.  
1 cup of milk - half for starch slur 
1/4 to 1/3 C Potato Starch mixed in 1/2 C of milk. 
2 to 3 TBsp of Gold Rum
Big drop of Madagascar Vanilla paste
1 beaten egg
Heat meringue over low heat in a heavy bottom steel pan. Use whisk to stir.
Mix half of potato starch with 1/2 C of milk.   Stir well with spoon. Add beaten egg and stir well.  Scoop some warmed up meringue mixture out of pot and add to egg mixture.  Stir well.  (Egg should not curdle up at all.)
Add egg milk slur into the pot and rest of the milk.  
Increase the heat to medium.  Keep whisking.  About 5 minutes.   Add rum and vanilla paste; It should start to thicken.   Keep stirring until it thickens enough to lift up and sticks to the whisk.  Set aside.  
Fry the raised dough.
Pipe the filling into hot Ponchiks.
And ... Eat!!
The texture of this Ponchik is so soft, it disappears in the mouth magically.
All right, here is the recipes.   The original recipe is found at http://mypersiankitchen.com/persian-pirashki/
The following recipe and methods have been modified to fit my kitchen tool and for the product result.
Polly's "Small Batch" PONCHIK filled with Rum Cream  
Makes 8
Instant Dry Yeast 1/4 tsp
Flour 1-1/2 C + 1 Cup more for worksurface
Sugar 1 TBsp
Salt - Pinch
Warm Water 1/4 C
Oil 1 TBsp
Yogurt 1/4 C <<< ***Polly's Substitute with 1/4 - 1/3 Cup SOUR CREAM
Egg 1

Deep Frying Oil - I used EVOO
Deep fryer pot
Wire rack over the baking sheet
Paper oil catcher/paper towel

Dough Preparation:
With Paddle attachment, Combine dry ingredients in the electric mixer bowl at low speed or by hand.
Then, add, water, oil, and Sour Cream.   Beat with paddle attachment until shaggy dough forms, then, add egg. 
At medium speed, beat until the dough start to be sticky.   About 5 minutes.
Then, switch to Dough Hook.  Scrape the side and bottom of the bowl.
Increase the speed to medium high - about 4 on your Kitchen Aid mixer, and knead until the dough is tacky and comes away from the side of the bowl.   About 20-25 minutes.
Add 2 Tbsp more of flour, if needed, but no more.
Tranfer to a greased bowl with lid to proof until double in size.   I just use a plastic container, sprayed lightly with vegalene, cover, and proof till double in size.

Forming the dough into Ponchik:
Spread 1 Cup of flour over the work surface.
Unlike other Ponchik blog I posted, this batch's Dough is very sticky and soft in this recipe.
With dough over the well floured surface, coat the top of the dough with the flour also.
Roll out the dough gently with a well floured rolling pin.    About 1/2" high.   Do NOT push down on the dough.
With a good size Ring cutter.  I used 3-1/2 inch ring.  Flour its rim, and poke a dough out, and transfer to a Silpat on a baking sheet.

To fry:
Heat EVOO, Medium high (adjust as you go during frying)
Gently slide the dough into the heated oil.
Carefully roll it over when one side is golden brown.
Remove the fried Ponchik over the wire rack over the baking sheet.
When cooled to the touch, transfer them to 'tempura' paper/paper towel to catch remaining excess grease.

Pipe the cream in.
Sprinkle with Powder Sugar, if you wish, and serve.


Thursday, January 15, 2015

Inside-Out Carrot Cake Cookies

Everyone loves creamy cheese frosting on the cake.   To make it easily transportable, there are recipes for cupcakes and this Inside-Out Carrot Cake Cookies.
Basically, the cake becomes the cookies and creamy frosting is between the two carrot cakes cookies.

I made this a few years ago.  The recipe was shared by one of my son's co-worker. I thought it's time to revisit and enjoy them with family.

Ingredients:
1-1/8 C Flour
1/2 tsp baking soda
1 stick (1/2 C) unsalted butter, softened
1/3 C sugar
1/2 tsp vanilla
1/2 C walnuts, chopped (switch with other nuts are all right)
1 tsp Ceylon Cinnamon
1/2 tsp salt
1/3 C light brown sugar
1 large egg
1 C (2 medium) peeled and coarsely grated carrots (I just used mini food processor)
1/2 C raisins

Directions
1.  Put oven racks in upper and lower thirds of oven and preheat to 350'F
2.  2 backing sheets with silpat or parchment paper
3.  Whisk/Shift together flour, cinnamon, baking soda and salt in a bowl. 3 times.
4.  In a large bow, beat together butter, sugar, egg, and vanilla until pale and fluffy, about 2 minutes.
5.  Mix in carrots, nuts, and raisins with a wooden spoon/spatula, then add flour mixture and mix until just combined.
6.  Drop 1 TBspoon batter, 2 inches apart.
Bake for 10 to 12 minutes or until cookies are lightly browned and springy to the touch.
Remember to switch position of sheets halfway through baking.
7.   Cool cookies on sheets on racks 1 minute, then transfer cookies to racks to cool completely.
8.  While cookies are baking, prepare frosting.   With an electric mixter, blend the cream cheeses, butter, and confectioner's sugar in a small bowl until smooth.
9.  Sandwich flat sides of cookies together with a generous tablespoon of cream cheese filling in between.   I used pastry bag.

Saturday, January 10, 2015

Lemon Bundt Cake with Chocolate Glaze and Candied Lemon Wannabe

Found the recipe.  It's from foodnetwork, Giada De Laurentiis' recipe collections.
This cake recipe was found just in time to use all the wonderful fresh lemons my co-worker gave me.  And I find it interesting to add candied lemons.
My kitchen temperature is 61'F.  Butter is not getting creamed.
Depending on your kitchen's temperature, your butter mixture may have a difficulty creaming.  Tip:  Take a small amount of butter - 1/4 C mixture into a microwaveable bowl.  Microwave it just enough to soften, but not melted.  Add it back into the mixer bowl.  And continue beating.  The warmth from the softened butter mixture would help the grainy sugar blend in more with butter resulting in smooth creamy butter batter.
After adding the cake batter into Bundt cake mold, smooth out the top, and tap the cake mold on a cushion to help release some trapped air in the batter.
While the cake is baking, make the chocolate glaze.
This recipe was found in foodnetwork's cake recipe collection.  I made a couple of modifications to meet my kitchen requirements. 
Recipe courtesy of Giada De Laurentiis
Ingredients :

Candied Lemon:
1 1/2 cups sugar
1 1/2 cups water
2 lemons, sliced into 1/4-inch-thick rounds

Cake:
Nonstick vegetable oil spray
1 cup (2 sticks) unsalted butter, room temperature
2 cups sugar
4 eggs, room temperature
1 cup Sourcream, room temperature    << Modified from yogurt
1 teaspoon pure vanilla extract
Zest of 2 lemons
1/4 cup fresh lemon juice (about 2 lemons)
3 cups all-purpose flour
1 teaspoon baking powder
1/2 teaspoon baking soda
1/2 teaspoon fine salt

Chocolate Glaze:
1/2 cup bittersweet chocolate chips
1/2 cup whipping cream


Directions

For the candied lemon: Combine the sugar and water in a small saucepan and bring to a boil over medium heat, stirring to dissolve the sugar. Add the chopped lemon and simmer until tender, about 5 minutes. Transfer to a wire rack to drain. Let cool to room temperature, about 15 minutes. Set aside.

For the cake

* Flour shifting modification from the original recipe:  Sift Flour 3 times and then measure our 3 cups of flour.  Add baking powder, baking soda and salt and shift again 3 times.  Set aside.   
In a stand mixer fitted with a paddle attachment or using a hand mixer, beat together the butter and sugar on medium speed until light and fluffy, about 3 minutes.
However, if your kitchen is as cold as mine in the winter – about 61’F, the butter remains likely in solid state even after a good mixing.  
TIP:
Take a ¼ Cup of the butter and sugar mixture out and microwave it to “SOFTEN”.  DO NOT MELT.   Then, return it to the mixer to continue mixing.  A slight rise in the butter mixture would help in smoothing out the rest of the butter and change the texture into silky smoothness.

Mix in the eggs, one at a time, scraping down the sides of the bowl as needed. On low speed, slowly add the Sourcream and the vanilla. Stop the mixer, add the lemon zest and juice, and mix to incorporate. The batter mixture might look curdling.  Keep mixing, it will become smooth.
Preheat the oven to 350’F..
(Original recipe direction in mixing in flour - With the mixer on low, add the flour, one cup at a time, until combined.  Finally, add the baking powder, baking soda and salt. Raise to medium speed and mix for 1 minute, until the batter is fluffy and smooth. )
<< 
Stop the mixer and Fold the Flour into the mixture to prevent gluten development.
Mix in the chopped candied lemons.
If you have an aluminum Bundt Cake pan prepare it as usual with oil/greasing and flouring.  If you have a Teflon coated 'dark' surface Bundt cake pan, I don't recommend greasing and or flouring it.
With a spatula or wooden spoon, transfer the batter to the prepared Bundt pan and smooth out the top.  Tap the cake mold to release trapped air in the batter.  Set the pan on the middle rack of the oven and bake until golden and a cake tester comes out clean, about 50 minutes. Let the cake cool on a wire rack for 30 minutes before turning it out onto a plate. 
If greased and or floured Teflon cake mold is used, be watchful for the browning before the baking time is up.
Slide sturdy plastic knife all around to loosen the cake.


For the glaze: Place the chocolate chips in a medium bowl. Bring the cream to a simmer in a small saucepan over medium-high heat. Once bubbles have formed around the edges of the cream, pour it over the chocolate. Whisk the cream and chocolate together until smooth. (Optional:  Add a teaspoon of heavy corn syrup) Pour the glaze over the Bundt cake, using a spatula or spoon to push the glaze down the sides and center of the cake.

Read more at: http://www.foodnetwork.com/recipes/giada-de-laurentiis/lemon-bundt-cake-with-chocolate-glaze-and-candied-lemon.html?oc=linkback

 The candied lemon gives an interesting burst of tangy taste.


Friday, January 09, 2015

Best Holiday Biscotti

Another great holiday Biscotti that I can always trust on for its best turnout.   Actually, this Biscotti is good for/with dipping in coffee, tea, hot chocolate, milk any time of the year.
The recipe can be found at:
http://www.foodnetwork.com/recipes/giada-de-laurentiis/holiday-biscotti-recipe4.html
Chopped pistachio, chopped raisins, drained and dried overnight maraschino cherries-chopped.
After making the initial form of the dough between a saranwrap, transfer the dough on silipad on baking sheet.  Use your outer edges of your palms to form / mold the edges of the doughs to 'round' corner.
While they are still quite warm, about 3 minutes after coming out of the oven, transfer to a cutting board, use a 'sharp' serrated knife slice them.  Slice down evenly with blade moving horizontally back and forth.  Let the serrated edges do the work of slicing to prevent crumbling.
Place them side ways in the baking sheet and bake again.    Follow the recipe link's instruction above
If you do not want them baked dry crisp, then, serve them as is.


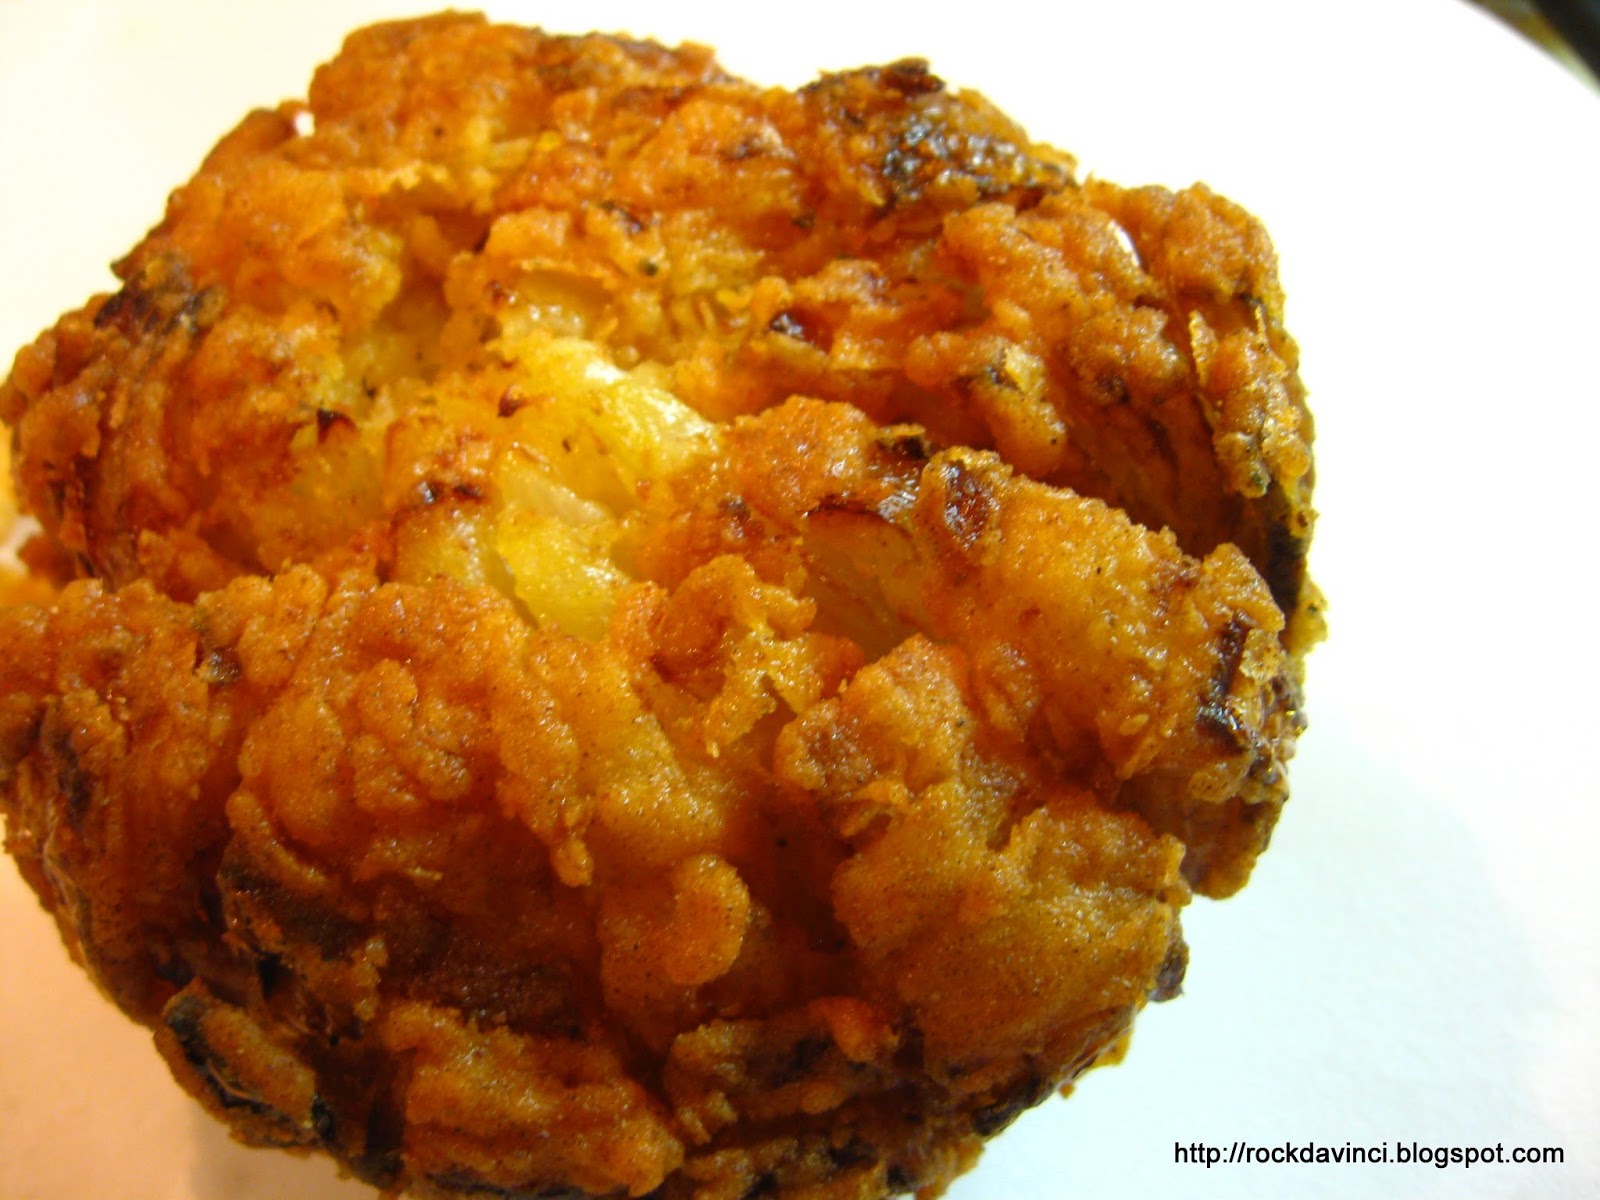
Homemade Fried Blooming Onion Flower - a flop!

Wow, I found this homemade fried blooming onion flower recipe, and I thought "Awesome!"  .... sadly mine turned out.... disappointing.  And of course, it has to do with my equipment, and also likely I was not following the direction totally.... as I lost the instruction part of the recipe and tring to do it through memory and my own frying experience of know how.   Anyways, ...
A few years ago, I tried to make one and flooded the mini-size electric fryer for the French fries.   I didn't 'think' that the oil would overflow out of the deep fryer as you drop down the battered onion flower.
This particular post is about my flopped fried blooming onion flower and what not to do and how I aim to do it better the next time.  Of course, follow the instruction will be a good advice fro myself.
I won't list the ingredients, as this is a flop and rather a troubleshooting blog.

1.  The instruction says to slice the onions open without cutting through the bottom.

2.  Coat/dust the onion flower in a bag filled with seasoning.
3.  Dip it in beaten egg mixture with seasonings in it.
4.  Dust with flour mixture again

 Open up the slices a bit and make sure the seasoned flours are in each layer.   Now I know, the original recipe says to put in a bag with flour and shake it.
5.   Dip in egg mixture again, then, refrigerate for 30 minutes.
6.   I placed it in a basket to ready to lower it into hot frying oil
 So far so good.  I added enough EVOO up to the marked MAX oil point in my fryer pot I use for Tempura frying.
But looks loke it could use a bit more oil, but that's okay, as I would turn the onion over in a few minutes.
7.  Turn it over after 7 minutes   (...after thought... obviously this is not long enough or the heat is not high enough 'Dry' or cook the onion through in the center.  The oiriginal instruction says medium high heat ... about 400'F.)
 6.  Fry for another 7 minutes   (... after thought... obviously this is not long enough also)
 7.   Transfer to a serving plate with 'tempura oil extracting sheet' that you can purchase or paper towel to catch excess oil.
 7.  Pry open and serve with your favorite dipping sauce.
So, why is this a flop?   I didn't like the taste of the onion.  They were still quite moist or 'wet'.   I was looking for a dryer crisper texture, I guess.

My method for next time would be - oven method?  and I don't know the measurement, yet, until I test it.
1.  Slice the onion without cutting through at the bottom.
2.  Place the onion in a large bowl of ice to flower it.
3.  Once the onion flower it, remove and turn it upside down in a strainer to strain the excess water.
4.  Beat the egg with milk or buttermilk plus some cornstarch.  Plus EVOO.  Add seasonings and spices.
5.  Coat/dust the onion layers lightly with flour using a shifter.   Because onion layer is slippery, the dusted flour will help egg mixtures to cling on.  Place the onion in a large plate with rim like a large soup bowl.
Preheat the oven to 425'F
6.  Pour egg mixtures evenly over the top of onion in a circular motion.
7.  Transfer the readied onion onto a baking sheet.
8.  Bake till brown.
Will it work?   I have no idea.   I am sure other bloggers have already mastered it, but may be this is another one of the snacks that should be enjoyed at the restaurant..... but it is such a low cost snack to make at home.... will see, how it will turn out, and I will report back on its result.