Sunday, February 09, 2014

My Grand-daughter's Gymnastic Achievement Cake

I made this cake for my grand-daughter who worked very hard for her very first gymnastic achievement presentation a few weeks ago.
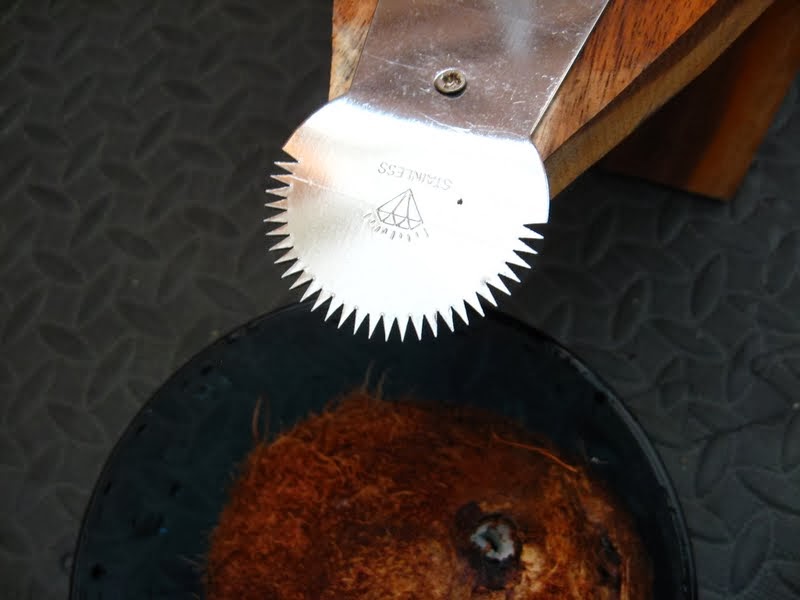
Cake is made of Chiffon Pandan Coconut and gymnasts are made of fondant standing on KitKat chocolate bar.
 Prepare Chiffon cakes as usual.  I made double batch using my commercial mixer
 Here is another tip that I promised before.  Yes, Aluminum chiffon cake pan works best.  If you are using the non-stick dark chiffon cake mold to bake, be sure to turn the heat down from 325 to 310 or 300 to make sure that it is not over baked or shorten the baking time.
 After cooling, remove the cake out of the mold using sharp knife to gently separating the cake from the mold.   Try to slice down in single motion if you want to keep the nice brown crumbs intact all around the cake.


 Make Chocolate ganache.  Or make your favorite frosting.
 Prepare the center filling.  This one has sliced banana - sprinkled with "FruitFresh" ascorbic acid powder to keep banana from browning.  And covered with fresh whip cream.
 Lift up the top half of the cake when the ganache is all set/firm.

 Set the top cake.  *It was a bit challenging.   The cake of course would not slide off.  Maybe the trick would have been to cover the cake spatula with powder sugar?   I used a long frosting spatula to lift and slide it to top the bottom cake.   Luckily it transferred smoothly.

 Since the cake has to be transported up the hill from where I live to Placerville.  To avoid cake slide during the driving, I decided to insert  bamboo skewers to hold the cake in place.
Upon arrival at the location, I placed the KitKat chocolate bar and inserted the fondant gymnast figurines on top by sticking toothpick thru them.


Thursday, December 26, 2013

Merry Christmas Egg Nog Biscuits

This Bud's Egg Nog Biscuits turned out deliciously fluffy and tasty, and I am glad that I was brave enough to have tried it.
 Anyway you look at it, they were light and fluffy.  Full of vanilla flavor.
Ingredients:
2 Cups AP Flour + 1/2 C more for counter
2 tsp Baking Powder
1/4 tsp salt
6 TBsp of butter cold, cut into big chunks
1/3 C Bud's Egg Nog

Shift flour, baking powder, and salt together, including the extra 1/2 C more flour into a large bowl.   Set 1/2 Cup aside on the counter top.
Add cold butter chunks.  Using fingers and mash flour and butter chunks between fingers.  Leaving pea size butter here and there.  Add Bud's Egg Nog.   Mix.
Dump the sticky dough onto the counter.
Gently knead to form a very "soft" ball.
Roll it out - Let dough rest for 10 minutes.   
Preheat oven to 425'F.
Roll dough out to 1/2 inch thick.  And cut with biscuit cutter.
Place closely to each other if you like soft side biscuits.  Let them rest for 3 to 5 minutes.
Bake until golden on the top.
Serve with crispy bacon, etc, etc.
 

Tuesday, December 17, 2013

TAKOYAKI


TAKOYAKI is one of my favorite childhood snack after going to the bathhouse.   It's easy, and fun to make them.
Special Tools - TAKOYAKI Fry Pan/Griddle, frying "pick", and oil brush

Ingredients:
1 C flour
1 beaten egg
1 C water
pinch of salt

Vegetable oil 

Cut Octopus tentacles into 1 inch long strips -or chopped -  set aside.

Optional:  chopped vegetables  - cabbage, carrots, onions, chopped shrimps, etc.

Sprinkles:
Red pickled Ginger
Katsuo - Shaved Bonita  or Powder form
Green seaweed powder
TAKOYAKI sauce or TONKATSU (Thick Japanese Worcestershire sauce)

Mix flour and beaten egg a bit, then add 1/8 C of water.  Mix.  Then, add another 1/8 C of water.  Mix, then, add 1/4 C of water, MIX.  and repeat.    Until the batter is thin, but not watery, nor thick.

Heat the pre-seasoned TAKOYAKI fry pan/griddle.  If this is the first time ever using it, oil it well  with the dedicated oil brush.

Tester:   If this is the first time the TAKOYAKI griddle is being used - be aware of the Murphy's law.  The first batch will most likely get stuck to the grill.  Be ready to experiment and throw away the first batch or enjoy it just the same.

 This is my first tester - not filled all the way was a mistake.  It has been a long time since I made them last, so I forgot.  And since I added all the goodies in the, I enjoyed the flops, too


Add the batter full in each section of the TAKOYAKI fry pan.  Add ingredients to the center of each section.   Cook until the side of each section appear translucent.  Use the Pick to flip the ball over.  Tuck all the dough under.   Cook for 1:30 min to 2 min, depending on your stove's heat power.  Take one out and check for doneness.


 Serve with all the sprinkles.
Your flipping skills will improve after the tenth flip, and they will turn out just great.
Much better.


Polly's Sufganiyot - Hanukka Jelly Filled Donuts Adventure

Do you ever come across a recipe that haunts you?  the recipe that you want to master?  or wonder why it turns out this or that way, and you want to find the correct ingredient portions to make the food turn out perfectly?  You search and you ask and you listen, and you try... and here is a winner recipe I found for making Sufganiyot.   I've tried one that was listed in the Sunset magazine before.  I am not sure because I used my commercial mixer to knead the dough that added to the difference in the result or it is a result of right combination of ingredients, but the Sufganiyot turned out very good for me.  I acquired this recipe while doing the search for the PONCHIK recipe.  Yep, I already have a very good recipe from the mypersiankitchen.com blogger's site that I am keeping, but there got to be some other perfect PONCHIK recipes out there in the Internet, right?  This time, I used the different wordings in the search engine, I tried "International Ponchik" recipes.   Wow! what a difference an additional word made.  It gave me several links to the PONCHIK recipes.  Of all the ones I found, I still think the recipe from mypersiankitchen.com gave the best result, however.   Before I start trying each new Ponchik recipe found, I decided to try the recipe for the Sufganiyot.  I couldn't do it on the Thanksgiving Day, nor do I want to miss the excitement or wait another 700 years for the Thanksgivings Day and Hanukkah falling on the same day, I made it on the week after I returned from the holiday.  It turned out great.


It only took the commercial mixer to knead the dough to a perfect texture in 8 min.
 
 Use biscuit cutter to cut into disc shape.
Try a few different sizes.   Cover and rest for about 30 min.
 Heat vegetable oil to 385'F
 Don't forget to Wobble the dough in the frying oil with spoon to help expand.
40 sec each side.
 
Cool on rack.
Fill with Jelly and or sprinkle with powder sugar.

 Yum!!  great texture and taste.
This wonderful Sufganiyot's recipe was found at


Please stop by there to obtain the recipe.
Thanks.

Saturday, December 07, 2013

How to make Home Made Coconuts Cream and Sweet Shredded Coconuts

 I was very lucky to find the Old Coconuts and Fresh Coconuts.   For the longest time, Old Coconuts became a rare find at some of the grocery stores.  They only carry the fresh young coconuts.
If you didn't know, the old coconuts is usually brown - its husks have been shaved off.    When coconut's husks are exposed to the air, they will eventually turn brown.  Depending on the age of the coconuts and size, there maybe a little coconut 'milk' << clear liquid in it to drink.  The white tender jelly like flesh also would turn firm and difficult to ply off from its shell.
Here is the picture of the Old coconut and young coconut.  The young coconut is usually sold with thick white husk still attached.   If you get to eat really fresh coconuts sold by the street vendor in Asia or in tropic, you will notice that there is hardly any 'hard' shell forming in the coconut.  The vendor can use the machete to slice off the top after shaving off the husks and pour the 'milk' / juice right into a cup.  With a large spoon, the soft jell like coconut fresh is scooped right out and served with the drink.   Yum.... that brings back a good memory. 
To open the coconut, locate its eyes.  Poke it.   Turn it over a cup or bowl with a filter to catch debris.

 
 I like to use my micro coffee filter to re-filter the milk.
Drink some and save about a 1/2 C for making Coconut Cream.
To hammer open the coconut, place it in a plastic bag.  Use a heavy hammer and crack it open.

 Ply the coconut flesh away from the shell.  Clean the peel off if you want to use it for cooking.    To shred it to make your sweet shredded coconut.  See the tool I used below.
 I was able to find this Coconut shredder make in Thailand at one of the Asian market in San Jose.   I was hoping to find the ones with a hole in the center and attached to a bar or made from a one piece metal with the shredder head at its one end.   But this worked out fine,
 You have to place one foot on the stool while sitting on a low stool.  With a bowl underneath, you start scraping the coconut across the shredder. 


 Try not to shred too close to the shell; otherwise, the shell will be shredded and become part of the wonderfully shredded coconut flesh.
Spread the shredded coconuts over the parchment paper on a baking sheet.   Sprinkle some sugar.  Mix with fork in a raking motion .Taste it.  Adjust the sweetness.   Dry in oven set to the lowest available temperature.   Rake it often until dry enough to store away in an air tight container.
I will post how to make the coconut cream later.