Sunday, November 16, 2014

Sunday Test Cooking - Chinese Steamed Meat Bao and Shu-Mai


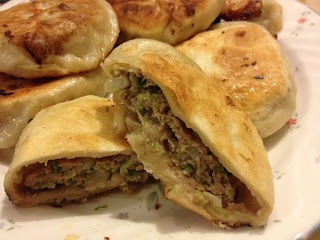
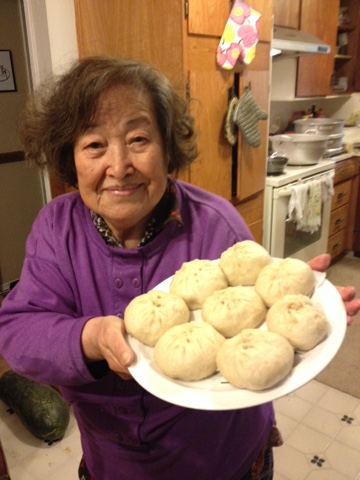
Another fun day test cooking our favorite Dim Sums at home.  They turned out quite good.
To Prepare STEAMED MEAT BAO DOUGH: 
600 g flour
1 tsp Rapid Rise Yeast
1/8 tsp salt
350 ml warm water
To make dough mix everything and knead for good 8  to 10 minutes or until a smooth ball forms.  Set aside in a bowl, covered and let rise until double.  You can use bread machine to make the dough also.   
Prepare the meat filling just like Shier' Bien in my previous post.  

To make SHU- MAI / SAO MAI:   
chop 4 green onions, 1/4 C fresh gingers; 1/8 tsp salt. 2 tsp cooking wine; 2 tsp Sesame oil; 1/2 lb shelled and deveined shrimps.  Process in a food processor, pulse mode till shrimps are chopped finely.   20 round ready made Gyoza skin. 
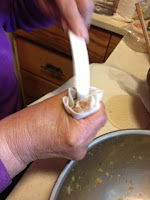
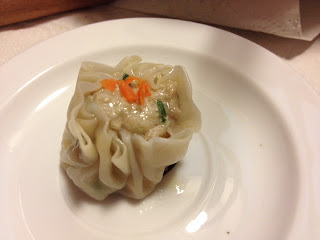
Place some meat filling on half of Gyoza skin and shrimp filling in the other half.   Gsther the skin using first four fingers of your hand.  Then set on work surface to form better.   Place on a plate that will be going into a steamer.  
Heat steamer pot.   Continue making SHU-MAI.  Decorate each filled segment with tiny bit of your favorite sprinkles of carrot, peas, etc, to add 'color'.
Steamer's lid should have 'sack' cloth/ towel spreaded across to catch steam condensation from making the BAO SOGGY.  
Steam over medium heat for 15 minutes.  
Remove and serve.

To prepare Meat Bao:  
Divide the risen dough into halves.  Cover one half and work with the other half.  
Cut the half into another half then form into a rope.   Keep the other half covered while working with the other. 
Divide and cut the rope into 5 pieces. 
Cut 20 pieces of 3x3 inch parchment paper squares. This is for the Bao to sit on during steaming.
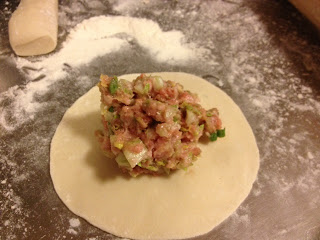
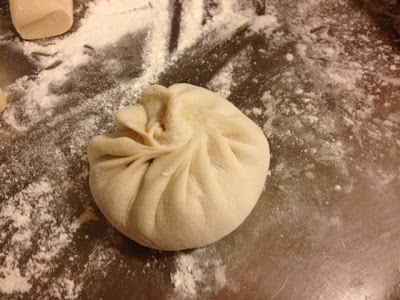
Roll out the dough into disc.  Thin at the edge just like rolling out potsticker skin.  Fill with meat filling.  Gather the edges together to enclose the filling.  

Place a piece of 3x3 cut parchment paper on the bottom and place in the steamer basket. Keep the basket covered while preparing the rest.   Steam over medium heat for 15 - 20 minutes.  Turn off the heat.
DO NOT OPEN THE LID TO PEEK.  
Let the steamer sit for 15 minutes. 
Open the lid quickly and away without letting the condensed steam water drops from dripping over the BAO.  
Serve with favorite dipping sauce.   Ours is - bit of soy sauce, seasoned sushi rice vinegar, finely thread cut fresh gingers.
Friday, November 14, 2014

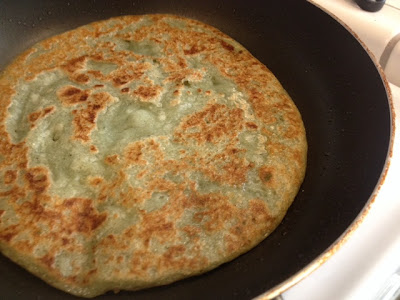
YOMOGI / KABOCHA Mochi Pancake

Mochi pancake is one of my father's favorite breakfast.   Ingredients are very very simple:  glutinous sweet rice flour, water, sugar, oil for cooking.
Let's say 1 cup of sweet rice flour, add enough water to mix till it is thick lava that when scooped and dropped from a tablespoon, the batter would swim down continuously and slowly to the bowl.
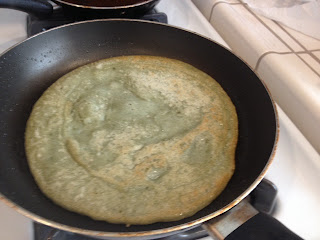
 Heat up a skillet over medium low heat.  Give a good 'coating' of cooking oil.  Wait for it to shimmer.  Add the batter and spread into pancake. Turn heat low high. Cover with a lid.   
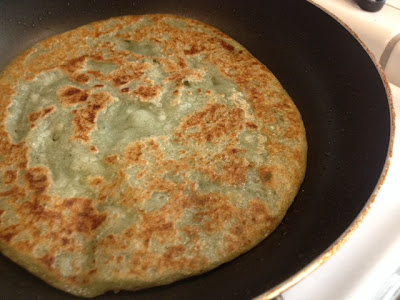
Cook until bottom is beautifully browned. Move the skillet every couples of minutes to create even browning.  Turn it over and cook till beautifully browned.  Serve with sprinkles of sugar.  **!! Warning: Cut it open and cool before biting in.   Teach children to do 'Heat test' with their lips before biting into anything served hot.  All MOCHI products just cooked retain heat for a long period. 
Variation of mine here is adding 2 Tbsp of YOMOGI powder - Mugwart powder. Also I have tried with adding some of mashed cooked KABOCHA (Japanese Pumpkin).   Delicious!   Thanks Dad for this family recipe.
Kabocho Mochi Pancake

 Roast KABOCHA till tender
Add 8 oz of mashed KABOCHA into Sweet glutinous rice and sugar mixture.  Add vanilla extra, if you would like to.
 "Coat" the pan with cooking oil; spread the batter; and cook through.  Don't forget to Cover the pan with a Lid to help STEAM cook the MOCHI.

Serve with sugar or eat as is.  Kabocha has a natural sweetness to it.


Cooking with Mom - SHIER BIEN - Pan Fried Large Bao

Sunday's best highlights was cooking with my mother.   My mother's favorites are 'noodle' food or the 'bread' food.  She was busy studying some recipes by Carol.   We picked a couple of recipes - Shi'er Bien and Green Onion Pancake.  It was a fun day.

Makes 8
Ingredients for Filling:
400 g ground pork
400 g chopped NAPA Vegetable, squeezed to strain excess water
5 - 6 Chopped Green Onions
1/4+ C Chopped Ginger
Soy sauce 1 TBsp
Sesame oil 2 TBsp
Salt 1 tsp
White pepper
Stock 50 cc
Dough:
300 g Flour
100 cc hot water
90 cc cold water
Salt 1/8 tsp
Mix flour and salt, then add Hot Water.  Mix well, then add cold water and knead to form into a smooth ball.  Divide the dough into three parts. And form into a long rope 1-1/2 in to 2 inches in diameter.
Cover the dough and rest for 30 min.
Take one rope and slice into 2 to 2-1/ 2 inches each.  
Roll out the dough.  Thinner on outer edge then the center. 
Divide the meat mixture into equal portion.   Place it in center of the rolled dough.
Pinch close the dough - very well to keep the gravy from escaping.  
Place pinched side down on a floured surface and press down gently with your palm to flatten a bit.  
Heat a large skillet with 3 TBsp of cooking oil. 
Place the Shi'er Bien with pinched side down in the skillet when the oil started to shimmer.
Turn to high heat. 
Put 1 cup of water and cover with lid.  
Cook until almost all liquid is evaporated. Turn heat to medium low.
Remove the lid and cook for 2 minutes.   Rotating the skillet's position over the burner to assure even browning of all Shi'er Bien. Turn them over to brown the smooth side.  
Ready to serve when they are beautifully browned. 
Serve with ginger dipping sauce:  finely thread cut gingers; add soy sauce 1:1 seasoned rice vinegar or to your taste.

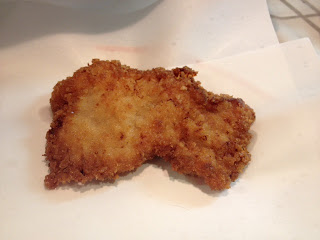
Making TONKATSU - Japanese style PanFried Pork Cutlet

While cutting a rump of pork for making stew, I sliced off some for ground pork and cutlets.   Didn't know what I want to do, but I remember how tasty the TONKATSU was that I had at one of the party.  Since I gave my own PANKO, I set to work.  
Serves 3
Ingredients:
3 large sliced pork pounded with the back side of the knife blade into thin slice
Or 6 small slices
1-1/2 C homemade PANKO ( bread crumbs crumbled finely in food processor)
1 C milk
1/2 tsp Nanami Togarashi - Japanese 7 flavor chili peppers usually used for eating UDON or SOBA, etc.
1/2 tsp Kosher Salt
1/2 C flour + 1/4 tsp salt and white peppers 
Skillet with 4 to 5 TBsp of cooking oil ( depending on the size of your skillet.)   Oil should cover only half deep of the food.
1.   Cover pork slices with flour.  Mix milk with peppers and salt. 
2.   Dip floured pork slices in milk mixture.
3.  Transfer to a bowl with PANKO.  Coat both sides by pressing down on the surface.  
4.  Slide them gently into the skillet.  Fry until brown on both side over medium low heat.   Serve with rice and coleslaw, for example, and with Tonkatsu Sauce.
Place on top of Tempura sheet to catch/ subtract excess oil before cutting into strips to serve.

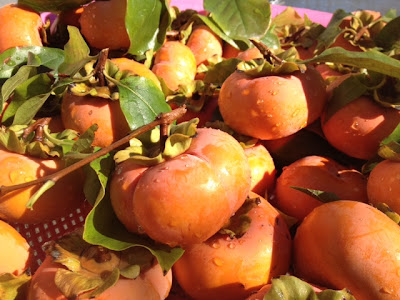
Fall Jewel 2014 - KAKI

This year I followed my friend's recommendation and wait to crop KAKI, Japanese persimmons until November.  I kept them covered with a crop net since late September.  
It was a great suggestion.   While my mom's Giant FUYU KAKI ripened at extreme fast rate along with the Figs (in Campbell) I noticed my KAKI are in good shape waiting for the cold front to freeze it over, even.   It will become sweeter.
Some of them have grown larger than any other year's.  I left half more on the tree those that are facing south and southwest.  They seem to have slower ripening rate than the ones that were facing north and northwest.

Monday, October 27, 2014

KABOCHA TEUCHI UDON (Homemade UDON with Japanese Pumpkin)

KABOCHA TEUCHI UDON was a highlight of this weekend.  Since fresh raw RAMEN did not reappear at the grocery store for over two months now, in disappointment, it's time to make my own.   I searched for some recipe for noodle, but after kneading the basic dough for TEUCHI UDON, I decided to add mashed KABOCHA.   KABOCHA is Japanese pumpkin that was previously roasted, mashed.  I was going to freeze some of it for future use, but this is a great opportunity to find out how it will be if mixed into the UDON dough.
A night before serving, prepare the dough.
Basic TEUCHI UDON recipe is 240 mL of warm water, 15 g Kosher salt, 400 g flour.
Knead for 8 minutes. 
I added 3/4 C of mashed KABOCHA and added additional 125 g of flour during mixing.  Knead for another 8 minutes.
Refrigerate overnight.
If you do not have a powerful commercial size mixer, after initial mixing by hand over the work surface,  place the formed dough ball in a heavy duty 1 gallon size freezer zip lock bag.  Rest for 30 minutes in refrigerator.  Roll it flat in the bag as you release air out of the bag and zip lock it.  Then, place on a clean floor surface and with a clean foot, of course, gently knead the dough with your foot.  Every minute, turn the dough in the bag over to fold and press down with your foot.  Knead for 8 minutes.  Then place in refrigerator for overnight or minimum of 3 hours of rest period.  This method is mentioned in many other bloggers' site.   And I think it is a very innovative method when a heavy duty mixer is not available and in place of strong arms.
Take a portion of the dough out of the bag onto a well floured work surface.
Chop a bunch of well washed green onions and set aside.
Set aside your favorite vege pickles and accompaniment for the noodles.  Hard boiled eggs, Exxo sauce, shrimp cakes, fish cakes, etc.
Start boiling a large pot of water.  Prepare your favorite soup base - DASHI base - 600 mL boiling water, 20 g shaved BONITA - KATSUOBUSHI (sold at Asian market in Japanese section), 20 g KONBU (dry, cut, kelp or sheet kelp for DASHI making).   5 to 6 pieces of SHIITAKE.  Simmer for 30 minutes.   Add 1/8 C Soy sauce when ready.
 Roll the dough out into a manageable rectangle.  5 x 12 inches, for example, and use Pizza cutter to slice.  ** Make sure the dough before you cut is well floured or they will stick to each other.
Pull a strand away and tap the noodle on the work surface by pulling both ends in a jump rope motion to stretch the noodle.   Otherwise, roll out the dough to a thinner length and slice into noodle strips.

Add into boiling water.
After the noodle afloat to the surface, cook 1 minute longer.  Strain and transfer into a noodle bowl.

Place all the topping goodies on top of the noodle.  Ladle hot soup over them.

And serve with hot chili oil or 7-flavor chili peppers - NANAMI TOGARASHI.


Sunday, October 26, 2014

Banana Bread and Banana KAKI Muffins

There are so many different recipes to try baking with persimmons, and I decided to test with my favorite banana bread recipe.  It turned out pretty good.   KAKI  (Japanese FUYU Persimmon/Non-stringent) is crisp and peeled and chopped into cubes.  Basic banana recipe is used and half of the batter is used for a small loaf of banana bread and the other half for the Banana KAKI Muffins.    I did not use very much cinnamon.  That's the whole point of my test cooking and baking with KAKI.  To find it's best taste without drowning it with spices.   The muffins are prepared with cinnamon, ground cloves, and lemon peels.
Extra KAKI are sliced and placed in freeze bag for future use; soft KAKI are gently pressed with the side of the spoon to separate it a bit and placed in ice-cube tray for later use in my future concoction... actually, I did use in the earlier post I blogged in KAKI Mochi Cookies, for example.


My Grand-Son's Lego Minecraft Birthday Cake


I love my grand-children's birthday.  Hate to see them grow up so fast, but I love the challenges they give me.  This year, it's Lego Minecraft Birthday Cake.
The cake is basic Chiffon Cakes in layers with different flavors - vanilla, chocolate, and green tea.  The challenging part is in making the Lego Minecraft figurines.  And since there are two other birthdays on the same week, there is also the biker dad, and break-dancing nephew.
It was fun making it.  What will it be for next year, I wonder.


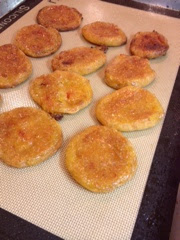
KAKI MOCHI Cookies


My mother's Giant FUYU KAKI ripened really quick this year.  We did not have the chance cropping the figs this year on time, and we lost it all, basically.
Here with soft KAKI, beside pulping them and freezing them, I tried it in a couple of different reicpe.  
Ingredients:
1/2 C soft KAKI/PERSIMMONS
1/2 C Sweet Rice Flour
3 Tbsp Water
1 Tbsp sugar
1 Tbsp Extra Virgin olive oil
1 cookie sheet with Oiled Silpat
Mix all ingredients together 
Bake at 375'F
Flip at 15 minutes
Bake 15 more minutes and flip again.  Chnage temperature to 400'F and
Bake 2-1/2 min longer.  
Remove from oven . 
Serve with sprinkles sugar on top.