Friday, September 17, 2010

Frozen Dragon-Fruits Mousse Cake


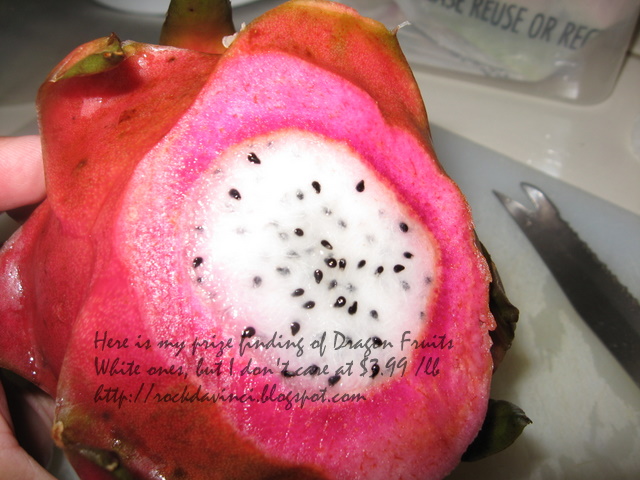
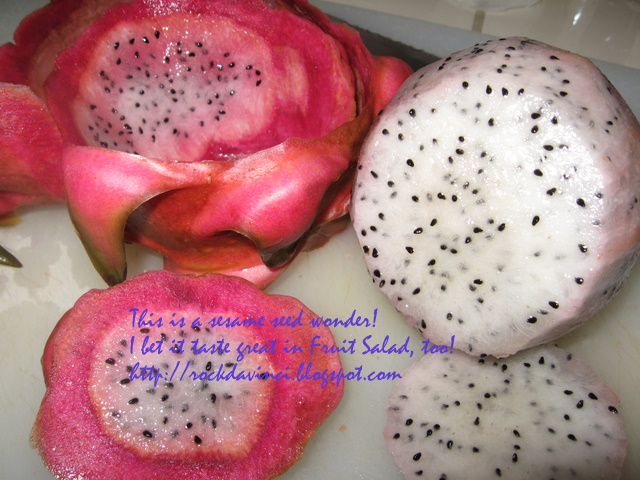
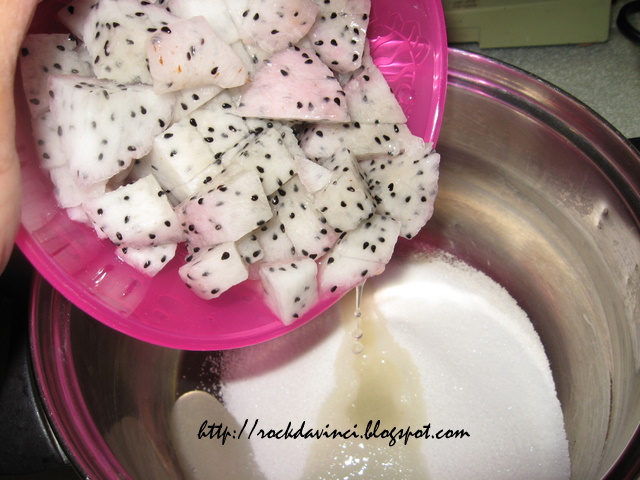
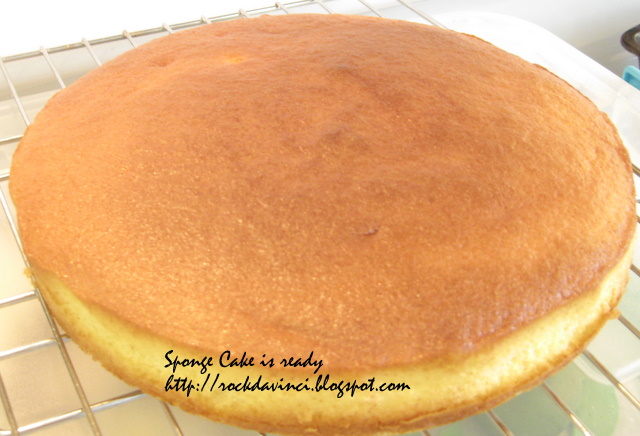
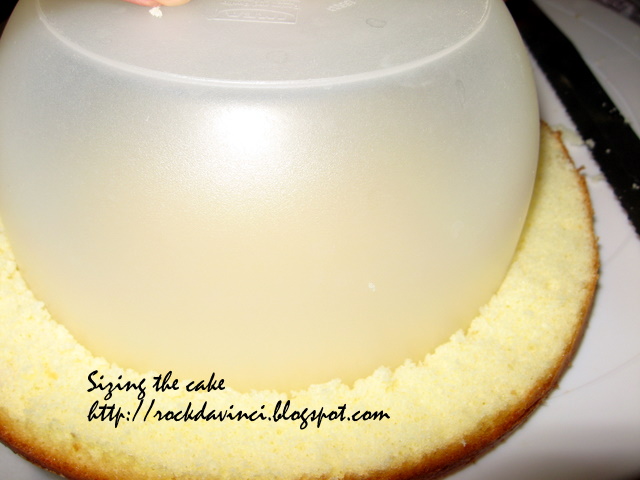
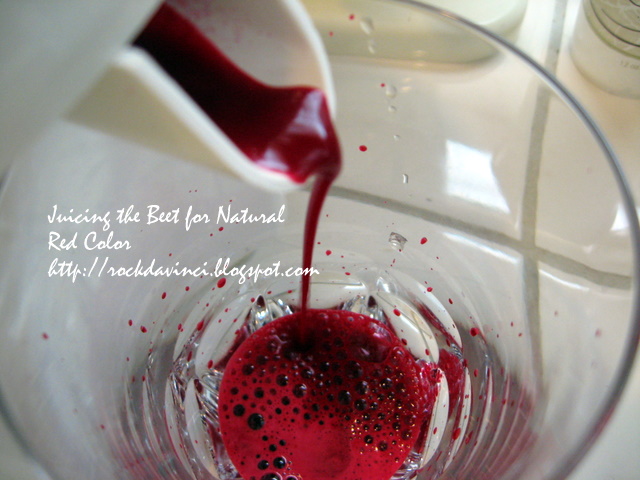
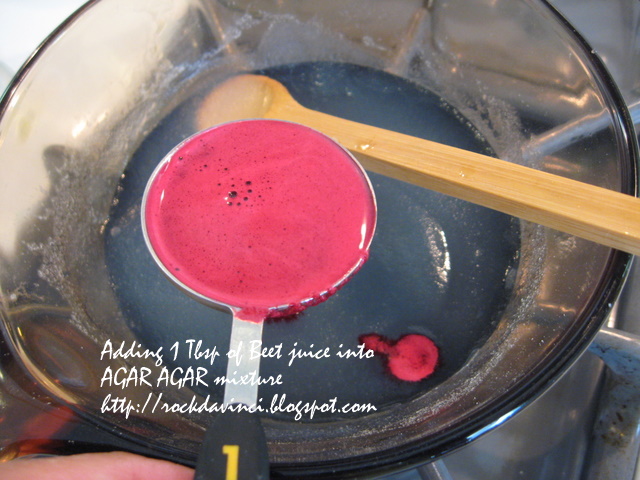
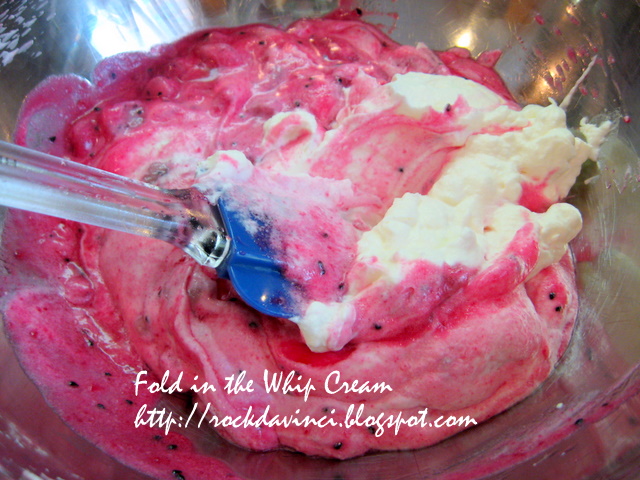
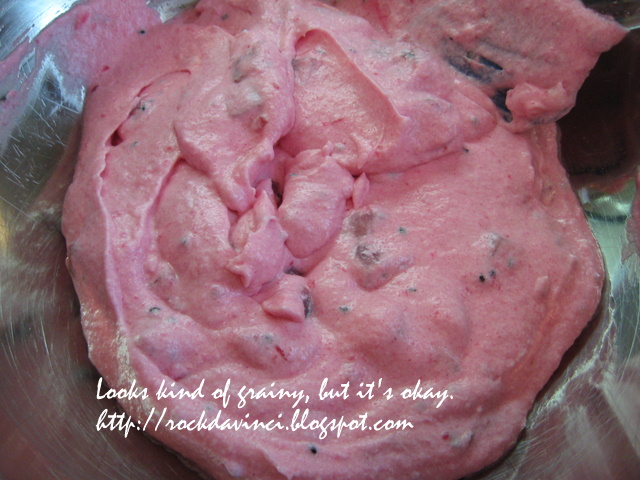
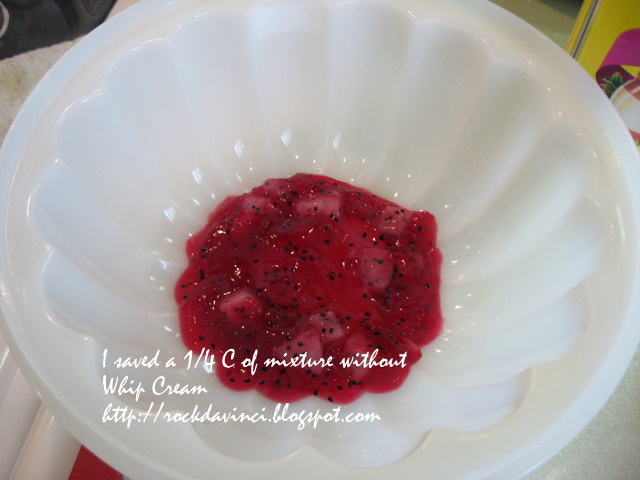
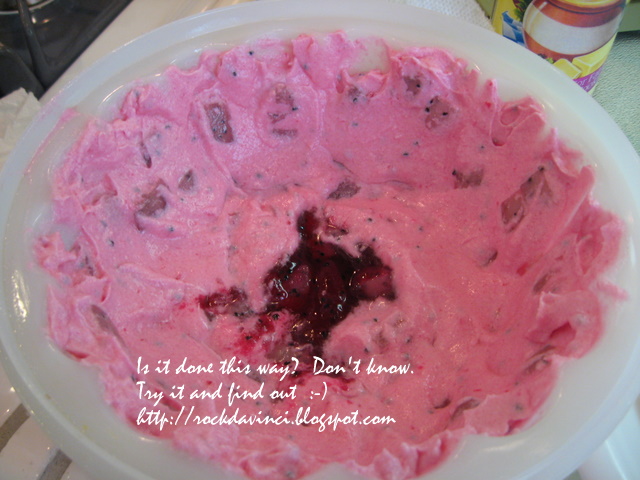
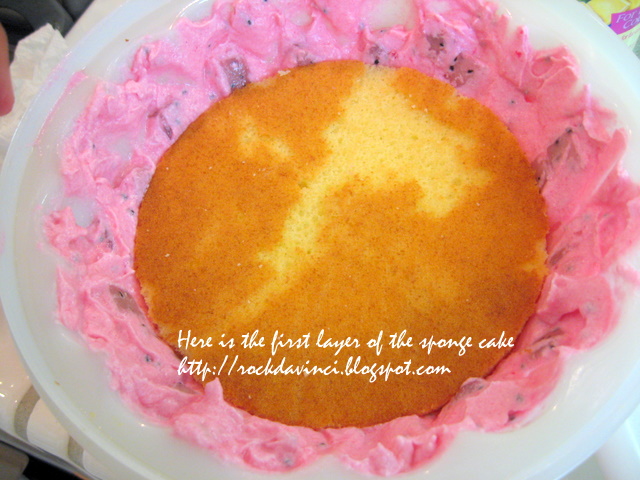
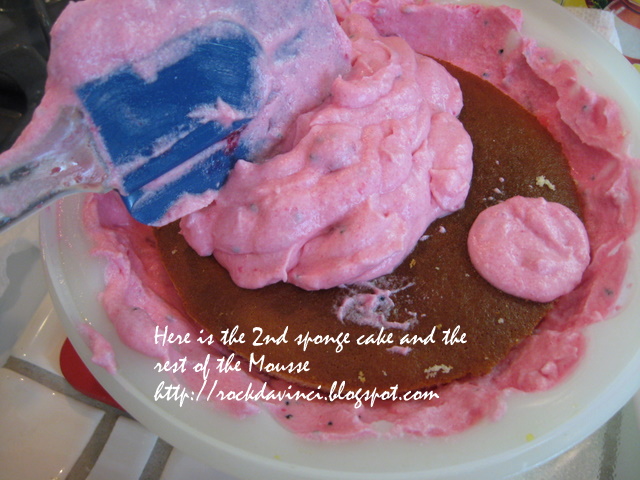
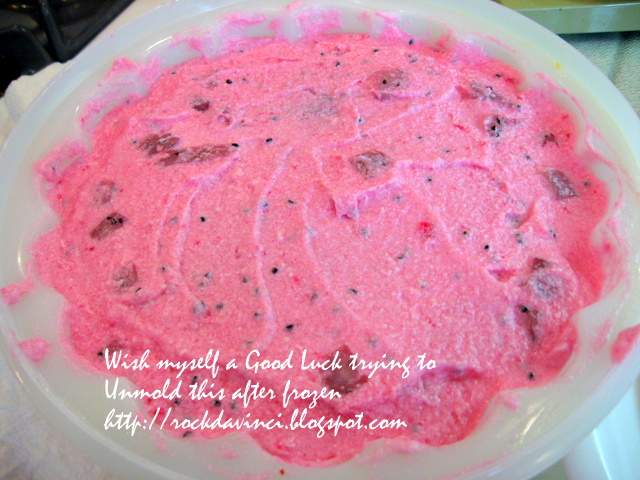
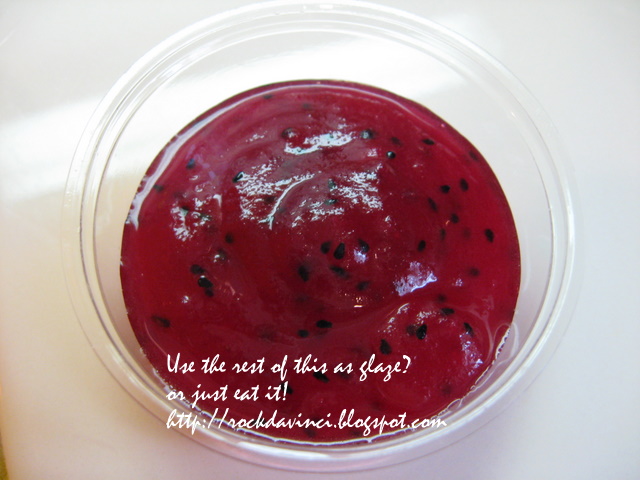
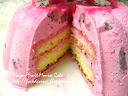
This is a beautiful frozen dessert that I learned from Bakericious.  http://bakericious.blogspot.com/2010/08/red-pitaya-dragon-fruit-yogurt-mousse.html; It got my full attention when I saw it.  I just had to try it.  Finding the Dragon Fruits in Sacramento was a trip in itself.  We called it "sesame" fruits when we lived in S. Viet-Nam.  Like Bakericious pointed out there are red and white ones, but the lucky find of mine were white.  So, to add the dramatic color, I contemplated on using the food color, I opted not to and remembered the good ole' Beets.  I used my Juiceman machine again, and it turned out a-okay.  I am still waiting to unmold the frozen dessert this weekend at my Grandson's Birthday party.  I hope it will unmold okay.  Can't wait to taste it... well, while I was making it, I already had the taste of the Mousse with Dragon fruit in it.  It is delicious.

PERSIAN-LOVE-CAKE


I have been test baking cakes and bread three times a week for the past few weeks.  I noticed some of my images got mixed up with another recipes', so before I forget, this is how my Persian Love Cake recipe turned out. 

The cake is wonderful.  It is a Chiffon Cake, but the texture turned out with fine crumb and light.  Instead of iced rose petals, I used Fondant.  (Double click on images to see other comments.) 

Ingredients from http://www.epicurious.com/recipes/food/views/Perisan-Love-Cake-232273#ixzz0hxSYAgmP 
Yield:  8 servings 
"This chiffon cake filled with rose-scented whipped cream is inspired by the aromatics found in Persian, Turkish, and Indian confections.  Cardamom..."
  For your convenience, the recipe is copied here.  A Couple of modification and per my preference, they are indicated by " *" or " ** "  (asterisks). 

 Candied Rose Petals
 2 large egg whites
1/2 C sugar
Petals from 2 organic roses


Cake
1 C cake flour
14 Tbsp baker's sugar or superfine sugar, divided  **Only used 11 Tbsp = 6 + 5
1-1/2 tsp baking powder
1/4 tsp coarse kosher salt
3 large eggs, separated
6 Tbsp water
1/4 C Canola oil  **or vegetable oil Preferred
1 tsp grated lemon peel *(zest)
1/4 tsp whole cardamom seeds (removed from about 5 green cardamom pods)

Frosting
2-1/2 C chilled heavy whipping cream, divided
Pinch of saffron threads
2/3 C powdered sugar
1 tsp Rose Water
2 Tbsp Natural Unsalted Pistachios
*Art paint brush dedicated for food preparation


Preparation:
Whisk egg whites in small bowl until foamy.  **Using the paint brush, brush just enough egg whites on rose petals on both sides with egg whites "lightly" - just slightly enough for sugar to stick.  Otherwise, the petal would look bulky.  You want a delicate looking sugar coated petals.  
Dry on nonstick rack at least 6 hours or overnight.

* for my cake, I used Fondant to make the flowers.  

For Cake:
Preheat oven to 325'F 
  1. Butter two 8" diam cake pans with 1-1/2 high sides
  2. Line pan bottoms with parchment paper; butter parchment.  * I use Jack Peppin's techinique - Butter the cut parchment paper first.  Then, press the butter side down onto the pan, then, flip butter side up.
  3. Using Whisk, whisk dry mixtures together -- **6 TBsp baker's sugar, baking powder, and salt onto a parchment paper or bowl.  Set aside.  **I did not want the cake to be too sweet, so I have 1 TBsp less sugar.
  4. * Beat egg yolks first till well beaten, then water, lemon zest and cardamom *(Powder - as I did not have the whole cardamoms).  Beat all together until pale and foamy. Cover with plastic to keep from drying.  Set aside.
  5. **Beat Egg whites with hand whisk, if you can, in medium bowl over a towel to keep the bowl from moving or use the cake pad (just any rubber pad.)  
  6. **When the egg whites starts to foam, start adding 5 TBsp of sugar - 1 tsp at a time in streams.  Keep whisking until whites resemble thick marshmallow fluff - "Thick", but still with glossy look
  7. Once egg whites are done, back to egg yolks mixture:
  8. *Take a large spoonful of egg yolk mixture into the bowl of Canola oil and mix it up a bit; then add into the egg mixture.
  9. Using a sifter, sift flour mixture into yolk mixture; do, fold, sift, fold, sift, fold, sift, gently till smooth. 
  10. Fold whites into batter in 3 additions.
  11. *Mix whites into egg mixtures with hand.
  12. Divid batter between prepared pans.
  13. Bake until cakes are golden and tester inserted into center comes out clean, about 25 min
  14. Cool in pans on racks for 15 minutes.
  15. Turn out onto racks, peel off parchment, and cool completely.
  16. (Can be prepared 1 day ahead.  Wrap and store at room temperature.)
For Frosting:
  • Combine 1/2 C cream and saffron in small saucepan
  • Bring to simmer
  • Remove from heat; let steep 20 minutes
  • Chill until cold
  • Beat remaining 2 C cream, powdered sugar, and Rose Water in large bowl until soft peaks form; Strain in Saffron Cream.
  • Beat until peaks form.
  • Place 1 cake layer, flat side up, on platter.
  • Spread 1 C frosting over.
  • Top with second  cake layer, flat side down.
  • Spread remaining frosting over top and sides of cake.
  • Chill at least 1 hour and up to 6 hours.
  • Garnish cake with rose petals and pistachios 
or Fondant flowers sprinkled with edible Pearl powder-- ** be aware to decorate with fondant flowers right before serving.  As fondant exposed to moist surface would change its form - "flat" as in "melted" like.

Sunday, September 05, 2010

Hokkaido Milky Loaf by Bread Machine

So, it is already 2 am, Friday morning.  Just finished baking Pandan Chiffon Cake and mini-Pandan Chiffon Cake (recipe that came from this 6" paper baking tube pan, manufactured in Japan, $1.50); and MOCHI MOONCAKE with Taro Filling; I might as well wake up to the aroma of fresh baked bread, I thought.  It has been a couple of years since I last baked with my bread machine.  I needed bread, and I resisted buying the ready made ones from the grocery store, so, here I go.  I chose HOKKAIDO MILKY LOAF.  The challenge is to get my bread machine to "knead" long enough to form the needed gluten.  I decided to let it run through the 'Start' cycle's kneading process twice.  After the first kneading cycle, I knew I had to scrape the bowl well.  And, I am glad I did.  I turned it off.  Then, I reset to start the new cycle again.  And set the timer on to bake in 3 hours.  I woke up to the beautiful fragrance of baked bread.
Texture?  I think, if I had let it go through the cycle 4 times, then, it would have reached the lovely beautiful stranded texture known to Asian style bread.  But this suffice my need for now.  The next time, what I will do is pre-knead it by hand and then set in the bread machine to bake with the timer on.  Why pre-knead by hand?  I noticed my 300 kw Kitchen Aid mixer is not powerful enough and taking too long to knead the 4-5 cups flour dough to the desired consistency without the motor becoming too hot to the touch.