To Share, To Enjoy Life Together. Why not make the "Cooking Adventures" as part of family activities to share, explore, and appreciate the differences... Let's Rock together in the Home Kitchen Lab!
Sunday, March 13, 2016
Monday, January 18, 2016
Making Meat Bao Adventure 1
She wanted to try this formula in one of very old Pei Mei's cookbook:
Ingredients:
Flour - 3-1/2 C
Sugar - 1Tbsp
Yeast - 2 tsp
1-1/2 C Warm water
Ingredients:
Flour - 3-1/2 C
Sugar - 1Tbsp
Yeast - 2 tsp
1-1/2 C Warm water
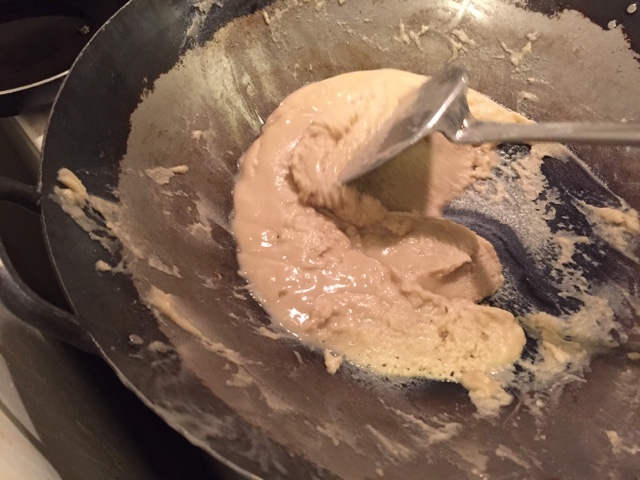
Mix all together and knead 7-8 minutes. Cover and rise for 3--4 hours.
Next, add to risen dough:
Baking Powder - 2 tsp dissolved in Cold water 1/2 Tbsp.
Add into risen dough and knead again.
Next, add to risen dough:
Baking Powder - 2 tsp dissolved in Cold water 1/2 Tbsp.
Add into risen dough and knead again.
Meat Filling:
Ground Pork - 1 lb
Shredded Cabbage - 1 lb - shredded and liquid squeezed out
Green Onions chopped - 1/2 bunch
Fresh Ginger minced - 2 Tbsp
Salt - 1 tsp
Cooking Wine - 1 Tbsp
Sugar - 1 Tbsp
White or Black Pepper 1/2 tsp
Soy Sauce - 1Tbsp
Mix all ingredients together, cover, and set aside.
Vegetable Filling:
Shred 1lb green cabbage
Black Mushroom chopped - 3 Tbsp
Scallion chopped - 1 T
Salt - 2 tsp
1 tsp Sesame oil
1 T Soy sauce
Mix all ingredients together, cover, and set aside.
When dough is doubled in size, remove from the bowl and knead 10 times. Depending on the size of your work surface, divide the dough into halves. Keep the other halves covered while working with the other. Roll the cut halves into a long rope enough to slice and form 9 rounds. (Total of 18.)Shred 1lb green cabbage
Black Mushroom chopped - 3 Tbsp
Scallion chopped - 1 T
Salt - 2 tsp
1 tsp Sesame oil
1 T Soy sauce
Mix all ingredients together, cover, and set aside.
Leave some flour on a corner of the work surface. You will dip the bottom of the round dough with flour that you are holding on with fingers of one hand each time you roll out its edge with the other hand.
Coat the sliced side of the dough with some flour to prevent sticking onto work surface.
Press down the cut side of the dough round facing up with the palm of your hand.
Start rolling the dough rounds with straight 1 or 1-1/2 inch rolling pin that you can buy at the Asian market as follows:
Coat the bottom of the round dough with flour as you roll the edge of the dough 'inward' then back to the edge, then turn the dough 1/8 of an inch at the same time its bottom is coated with flour and brought back to where you would roll with the other hand that is holding the rolling pin. Continue with this motion - coat, roll, turn, coat, roll.. until a full circle is complete.
Fill the center of rolled dough with meat mixtures.
Enclose the dough by pulling the edge and folding them in Fan style and pinch close each fan seam to the previous.
Place on slightly floured surface that you can cover with floured plastic wrap and towel to complete the final rise before steaming. Or place individual bao on top of a cut parchment paper square for each bao.
Rest for 20 minutes in hot air-conditioned kitchen or cover and rest for minimum 30 to 40 minutes.
Start boiling water in steamer at low temp first while waiting for the bao to complete the final rise.
Turn to high to bring to full boil.
Line the bottom of steam basket with moistened cheesecloth. Transfer first 9 baos that you filled first to the lined steamer basket.
Cover and steam at high but one notch down for 15 minutes.
NEVER open the lid.
At 15th minutes, without opening the lid, place a wooden spoon or an object under one side of the lid to allow cooking with released steam. Steam 5 more minutes.
Without opening the lid or removing the wooden spoon, turn off the heat. Do not remove from the stove or from the bottom steamer pot. Cool for 5 minutes.
Without opening the lid or removing the wooden spoon, remove just the basket with cracked open lid to a heat safe work surface. Cool for 5 minutes.
At the end of 5 minutes, remove the lid quickly and away from baos to prevent steam droplets to rain on steamed baos.
Serve on bamboo lined placemat to prevent moisture condensation at the bottom to cause soggy bottom. Or prop steamed bao sideways to cool in the steamer basket.
Check the steamer's hot boiling water level. Refill with hot water and bring to full boil. Steam the next round the same methods.
Friday, January 15, 2016
Making Yo-u Shu SAOBIEN with my Mom
This is another fun adventure in making our favorite Chinese breakfast food. Normally, some of the food are so much easier to enjoy if you could just buy from the street vendors. But getting to the nitty gritty of the details to produce this Saobien is quite satisfying when you can't get hold of it in your neighborhood Asian grocery stores - the way you like it. Saobien is baked flaky flat bread usually topped with sesame. Our first experience was during our vacation in Taiwan. My parents were delighted to come across it as they missed it since they left mainland China. One early morning our family friend took us to go buy breakfast. They took us down into an alley filled with vendors selling soybean milk, "Yo-u Tiao" - Chinese fried bread stick, Saobien with braised beef with cilantro, Zou - porridge, etc. The flaky flat breads are baked in a large drum can style charcoal oven. They are quickly wrapped and we took them home to enjoy with everyone.
My mother studied the formula and was contemplating to make it or not. But at her age, the long time standing in the kitchen cooking is not her favorite pass time anymore. But her curiosity lingers on to wonder how it would turn out. It gave her the motivation to test it. Hopefully it will be less painful then our previous Dim Sum adventure we had in making the 'Ho Fan' filled with shrimps.
First part of the process is to make the browned Roux. This is the key ingredients to produce layers in the Saobien.
Making YO-u Shu - fried/browned Roux:
Method 1: 2/3 cup oil, 1 cup flour. Bring oil to high heat. Add flour. Stir fry 5 minutes. Transfer to oven proof dish. Bake in 300'F for 30 minutes till brown.
Let cool before use.
Method 2: 1-1/2 cup oil, 3 cup flour. Bring oil to high heat. Add flour gradually and stir fry till brown over low heat for 10 minutes.
Let cool before use.
DOUGH:
6 cup flour, add 1-1/2 cup boiling water. Mix; then add 1/2 cup tap water. Knead for 7-8 minutes till smooth. Earlobe softness. Cover and rest for an hour. Rub some cooking oil on work surface. Divide the dough into halves or Roll out into 40x45 inch wide.
Cover the other while you work with the other.
Roll one of the divided dough out to 20x20.25 inches wide or 1/6 in thick. Sprinkle with some salt, spread Yo-u Shu, sprinkle 1 Tbsp of flour. Roll into long cigar. Cut equally into 10 pieces. Press the dough down a bit with fingers to elongate the cut dough. (Repeat all these steps for the other halves also.)
Roll up with sliced end on top and bottom.
Place rolling pin 2/3 from the top and roll upward. Press the bottom unrolled end of the dough to flatten a bit with fingers and fold the dough 2/3 way up and gold the top down.
Press the dough to elongate slightly with fingers. Repeat the 2/3 roll with rolling pin.
Roll it the second time with ends of fold at top and bottom.
Fold into thirds and dip smooth side in sesame seeds. Place in baking sheet with sesame seeded side down. Rest at least 30 min - uncovered is okay.
Preheat oven to 400'F.
(Start rolling the rested dough out to 5x3 inch. Place sesame down on baking she
Bake in Center oven rack. Bake for 5 min or till it puffs up, then turn them over and bake till slight hint of tan color - about 5 minutes but no longer. Unless it is still "white" like raw dough. I preferred mine bit more browning, but my mother said that will cause it to be tough when it cools down.
Serve hot with braised beef Chinese style; luncheon meat or any spicy deli meat, fried eggs, etc, etc, will work as well. Toast in toaster the next day to enjoy.
Subscribe to:
Comments (Atom)


