Monday, December 15, 2014

Testing Fluffy YOMOGI (Mugwort) MOCHI Pancake

I thought I would test to see how it would be by adding eggs to the MOCHI pancake; additionaly, add a tablespoon of YOMOGI powder (Mugwort) to make it healthier breakfast.   The pancake turned out fluffy like a marshmallow, but I didn't care for ithe mouthfeel.  I like the taste of the YOMOGI, but it did not go well with egg flavor.   The basic recipe is the winner, unless you are making the MOCHI Cake.
http://rockdavinci.blogspot.com/2009/06/japanese-mochi-cake.html

Updates on Drying FUYU KAKI

After two weeks, FUYU KAKI have shrunk considerably.    After giving away over 70 FUYU KAKI, I had more.  The tree produced a good amount this year.  Birds had some to enjoy and I still had plenty to enjoy and share.  While it is tasty to eat them fresh, when you have too much of them, you need to be creative to store them away.  These groups of FUYU KAKI are drying up much faster than the stringent HACHIYA persimmons, and of course, FUYU KAKI is much smaller and has less water content.  My mother mentioned something about eating them with other groups of herbs for health medicinal use.   These have been massaged a bit per my friend's suggestion to distribute the sugar or something like that.  And pretty soon, I will take them down and press down with something heavy to make them flat.  I hope they will turn out all right.        
 Gently massage the KAKI with fingers without breaking the hardened outer layer.


Saturday, November 22, 2014

Banana Mochi Pancake

I tried this Mochi pancake with banana.   It turned out really good.

Ingredients:  
3/4 C sweet glutinous rice flour
2 TBsp sugar
Pinch of salt
1/4 tsp baking powder
1/4 piece of banana sliced thinly
Some Extra Virgin LIGHT Olive Oil for frying and 1 TBsp of butter
About 1/4 C warm water
Mix everything together in a bowl. 
Heat a skillet w/lid with 1 TBsp of EVOO and butter.  
Spread the Mochi batter, top with thinly sliced banana on top.   Cover the skillet with lid.  Cook over low heat with lid on.  Move the skillet around to assure even browning of the bottom.  After 5 to 7 minutes put butter slices on top.   Flip it over and cook until banana is browned.  
Serve while warm.  Becareful though not to place hot Mochi pancake slice into mouth.  

Polly's Lazy Saturday Ponchik

 
This is a small batch Ponchik recipe I came up with as I don't have much time in the morning before going to work.  So I came up with this slow rise batch.  I want to use it when I am ready.   
Since the temperature of the kitchen is much lower now tha it is Fall, instead of rising in the refrigerator, I left it out on the kitchen counter.  
Two days before, mix the following in mixer for 20 minutes.  
Ingredients:
1-1/4 C pre-shifted flour:  preshift flour with1-1/8 tsp baking powder, 1/8 tsp salt.   Some extra flour.
Add 1/4 tsp active dry yeast
2 TBsp Sour cream
1 TBsp Sugar
2 TBsp Evaporated milk
1 Egg, large
A bag filled with powder sugar, about 1 cup.
Two days before on Thursday evening, for Saturday frying, Beat mixture with paddle for 8 minutes. 
Change to dough hook.  Scrape the side of the mixing bowl. in between 12 more minutes or so of kneading, add some more flour - 2 TBsp to 1/4 C of flour.  Mix for 12 minutes more.   
Grease a bowl with a lid.  Transfer dough into the bowl after forming it into a ball with floured hands. Cover with lid and let it rise slowly.   Open the lid a night after if the lid is shut closed.  If your kitchen is above 65'F, leave the bowl in the refrigerator.
When ready divide the dough into four.  
Round it and roll it out. Trim the edge  of rolled out dough.   Place on a floured tray and covered to rise.   
When the dough puffed up a bit, they ready for frying.  
 Over medium low heat, heat oil for frying.  Slide the dough into heated oil and start bobbing the dough with spoon to help rising.   Brown both sides.  
Transfer to the bag with powder sugar and coat the Ponchiks as much as you like or  fill the center with cream or custard , Bavarian cream, jams, preserves, and sprinkle with powder sugar.
I really like this one. The crumbs are really tender. 

Thursday, November 20, 2014

Hooked on KABOCHA / Japanese Pumpkin

I never thought I get hooked on a pumpkin.   Not just any pumpkin, but this KABOCHA.

Very luckily they come up every year in my brother's garden.  It is firm, sweet, and addicting... I think.  Some of the buffet serves them as Tempura.  And tonight I just fried it along with my spiral cut potatoes.   Just toss the fried potatoes in Hungarian Hot Paprika and Kosher salt.  It's delicious!

Monday, November 17, 2014

Early Thanksgiving Day Dinner

We had an early Thanksgiving Day dinner on Saturday due to some conflicting schedule.  We kept the basic menu of Turkey, cranberry sauce, sweet potatoes baked in brown sugar and marshmallows, stuffing, mashed potatoes, gravy, green bean casserole; purchased pumpkin pie and homemade KABOCHA KAKI Pie, Pumpkin Apple Bread; KABOCHA / Japanese Pumpkin Chiffon Cake served with Cool Whip.  
And best of all we are going to have one next week on the official Thanksgiving Day.  What are you going to serve for your family?  I recommend KABOCHA Chiffon Cake for one.  How about Turkey Seafood Ravioli?   
Young turkey brined in kosher salt, Lime and lemon, black pepper for 6 hours in ice water. Then, stuffed with fruits - pear, green apple, lime.   Placed on rack then in a roaster.  Roasted for 5 hrs for internal temp reached 180 F degree.   Well, as you can see from the picture it is cooked rather too long.  When the breast meat starts to separate from breast bone you know it's been cooked too long.   But the gravy turned out great.  All the flavor of the stuffing and brine and turkey were in the gravy.   The next time, I am going to turn the turkey breast side down and turn it over the last hour and half to brown.  I think that would work out great.
Kabocha Chiffon Cake
Pumpkin Apple Bread


Sunday, November 16, 2014

Sunday Test Cooking - Chinese Steamed Meat Bao and Shu-Mai


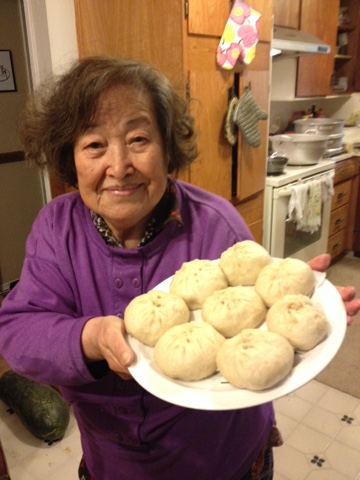
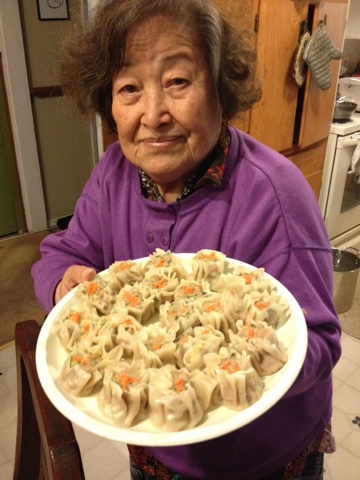
Another fun day test cooking our favorite Dim Sums at home.  They turned out quite good.
To Prepare STEAMED MEAT BAO DOUGH: 
600 g flour
1 tsp Rapid Rise Yeast
1/8 tsp salt
350 ml warm water
To make dough mix everything and knead for good 8  to 10 minutes or until a smooth ball forms.  Set aside in a bowl, covered and let rise until double.  You can use bread machine to make the dough also.   
Prepare the meat filling just like Shier' Bien in my previous post.  

To make SHU- MAI / SAO MAI:   
chop 4 green onions, 1/4 C fresh gingers; 1/8 tsp salt. 2 tsp cooking wine; 2 tsp Sesame oil; 1/2 lb shelled and deveined shrimps.  Process in a food processor, pulse mode till shrimps are chopped finely.   20 round ready made Gyoza skin. 
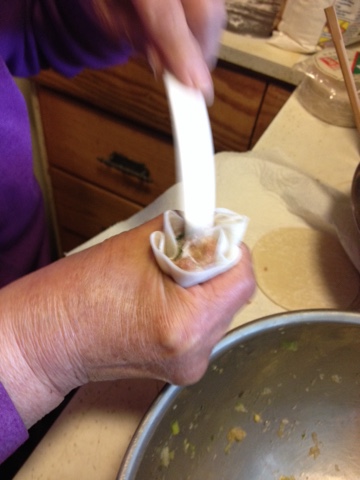
Place some meat filling on half of Gyoza skin and shrimp filling in the other half.   Gsther the skin using first four fingers of your hand.  Then set on work surface to form better.   Place on a plate that will be going into a steamer.  
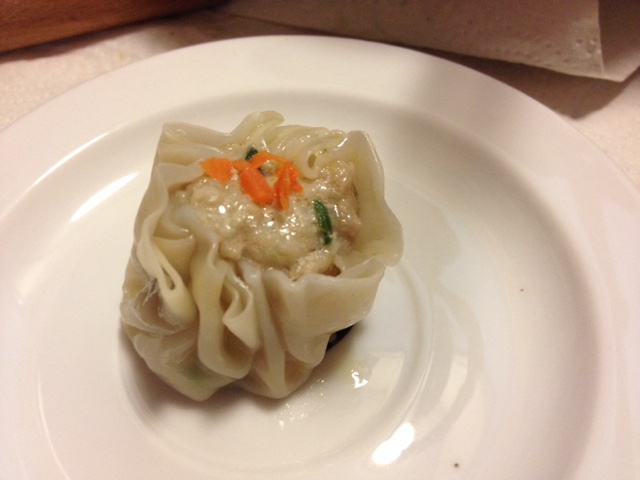
Heat steamer pot.   Continue making SHU-MAI.  Decorate each filled segment with tiny bit of your favorite sprinkles of carrot, peas, etc, to add 'color'.
Steamer's lid should have 'sack' cloth/ towel spreaded across to catch steam condensation from making the BAO SOGGY.  
Steam over medium heat for 15 minutes.  
Remove and serve.

To prepare Meat Bao:  
Divide the risen dough into halves.  Cover one half and work with the other half.  
Cut the half into another half then form into a rope.   Keep the other half covered while working with the other. 
Divide and cut the rope into 5 pieces. 
Cut 20 pieces of 3x3 inch parchment paper squares. This is for the Bao to sit on during steaming.
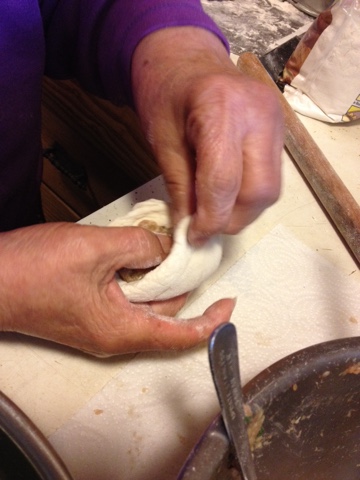
Roll out the dough into disc.  Thin at the edge just like rolling out potsticker skin.  Fill with meat filling.  Gather the edges together to enclose the filling.  

Place a piece of 3x3 cut parchment paper on the bottom and place in the steamer basket. Keep the basket covered while preparing the rest.   Steam over medium heat for 15 - 20 minutes.  Turn off the heat.
DO NOT OPEN THE LID TO PEEK.  
Let the steamer sit for 15 minutes. 
Open the lid quickly and away without letting the condensed steam water drops from dripping over the BAO.  
Serve with favorite dipping sauce.   Ours is - bit of soy sauce, seasoned sushi rice vinegar, finely thread cut fresh gingers.

Friday, November 14, 2014

YOMOGI / KABOCHA Mochi Pancake

Mochi pancake is one of my father's favorite breakfast.   Ingredients are very very simple:  glutinous sweet rice flour, water, sugar, oil for cooking.
Let's say 1 cup of sweet rice flour, add enough water to mix till it is thick lava that when scooped and dropped from a tablespoon, the batter would swim down continuously and slowly to the bowl.
 Heat up a skillet over medium low heat.  Give a good 'coating' of cooking oil.  Wait for it to shimmer.  Add the batter and spread into pancake. Turn heat low high. Cover with a lid.   
Cook until bottom is beautifully browned. Move the skillet every couples of minutes to create even browning.  Turn it over and cook till beautifully browned.  Serve with sprinkles of sugar.  **!! Warning: Cut it open and cool before biting in.   Teach children to do 'Heat test' with their lips before biting into anything served hot.  All MOCHI products just cooked retain heat for a long period. 
Variation of mine here is adding 2 Tbsp of YOMOGI powder - Mugwart powder. Also I have tried with adding some of mashed cooked KABOCHA (Japanese Pumpkin).   Delicious!   Thanks Dad for this family recipe.
Kabocho Mochi Pancake

 Roast KABOCHA till tender
Add 8 oz of mashed KABOCHA into Sweet glutinous rice and sugar mixture.  Add vanilla extra, if you would like to.
 "Coat" the pan with cooking oil; spread the batter; and cook through.  Don't forget to Cover the pan with a Lid to help STEAM cook the MOCHI.

Serve with sugar or eat as is.  Kabocha has a natural sweetness to it.